Dragonflight Season 4: Algeth’ar Academy Mythic Plus Guide
Welcome to your Algeth’ar Academy Mythic Plus guide! Here, you will find all you need to know about this ancient institute and beyond.
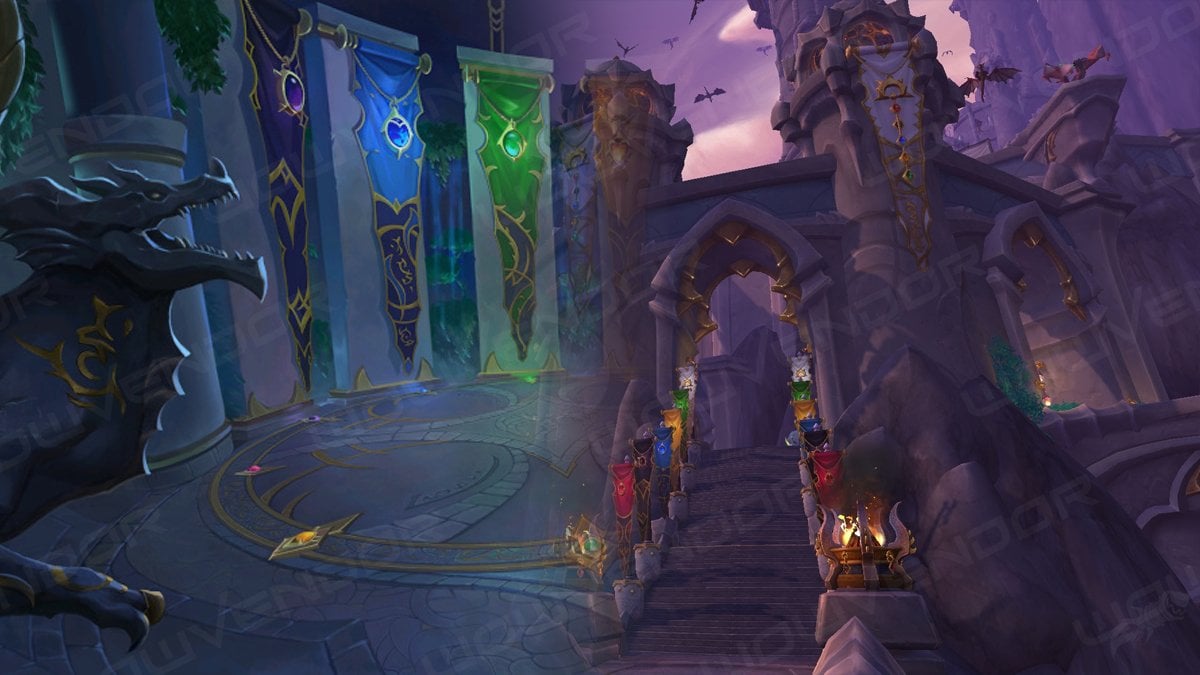
Table of Contents
As Season 4 is the last one before the next expansion, The War Within, the list of M+ rotation contains all the Dragonflight dungeons. If you’re new to WoW and want to know more about M+, be sure to check out our Mythic+ Guide for Newbies.
The topic of today’s guide is Algeth’ar Academy Mythic Plus. The academy is an ancient place of learning for dragons and many others to learn and share their history and knowledge. However, before it can return to its full glory, it needs some help from Azeroth’s brave adventurers to make sure these halls are safe and ready for the new students.
Where is Algeth’ar Academy Entrance
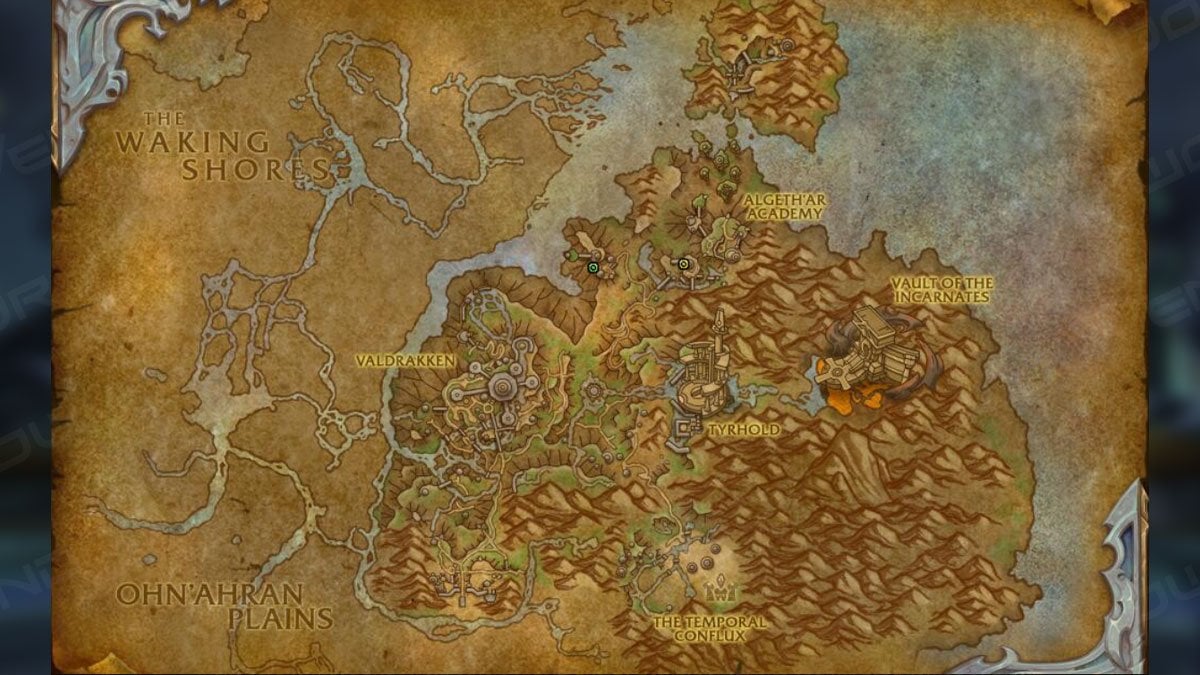
The entrance to Alge’thar Academy is located in the heart of Dragon Isles in Thaldraszus (58.28; 42.35).
Full Algeth’ar Academy Walkthrough
One of Algeth’ar Academy’s features is that it allows you to pick an order in which you fight bosses. But to access the final encounter, you need to defeat all of them.
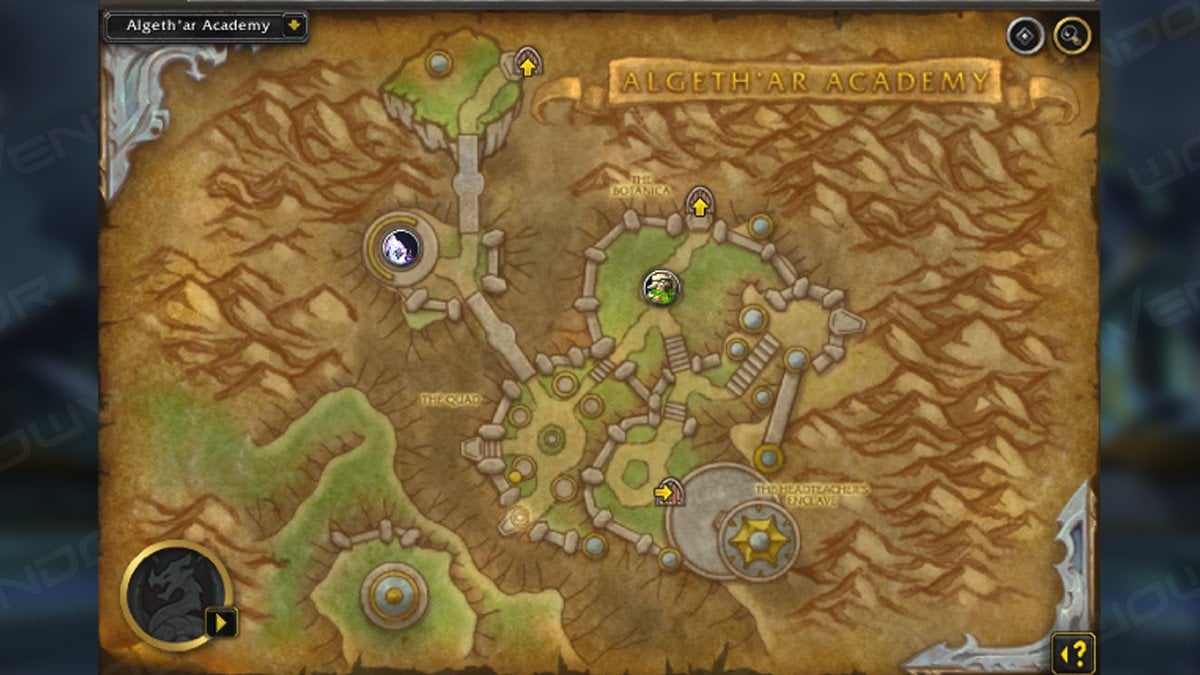
Algeth’ar Academy Layout
The academy has different wings connected to a central square area. Although we suggest an order for the best experience, you can tackle bosses in any sequence, so feel free to choose your own route.
Choose Your Buff
At the Quad, you’ll see recruiters from different Flights. Choose one for a permanent dungeon buff. Be careful with your choice, as you can only have one buff at a time.
- Red — +5% Versatility.
- Blue — A fixed Mastery increase.
- Bronze — +5% Haste.
- Green — +10% healing received.
- Black — +5% Critical Strike.
Get the buff that suits your spec. If you’re not sure which one to pick, Versatility is always a safe choice. Tanks may also benefit from the Green Dragonflight buff to support their healer.
Overgrown Ancient
Overgrown Ancient Trash Guide
Overgrown Ancient is considered the most difficult boss of the three, so getting rid of him first will mean the worst of this dungeon is behind.
Before facing the boss, clear out the enemy packs in the Botanica area. Either split them into two pulls or confront them all together if your group feels capable.
Aggravated Skitterfly — the primary threat in these packs. They deal a lot of damage without any cast indicator. Aside from that, they constantly use an Enrage-type ability, increasing their damage output. Crowd-control these and soothe the enrage effect to avoid getting killed by them.
When the arena is cleared and your cooldowns are up, you can pull the boss itself.
Overgrown Ancient Boss Guide
Burst Forth — The main mechanic is the boss’s Energy bar. When filled, it triggers a heavy, unavoidable party-wide damage ability. This also awakens any Hungry Lashers adds. Employ defensive mitigation to ease the strain on your healer.
Germinate — a dodgeable AoEs that spawn under every player for a short duration. As AoE explodes, it deals damage and leaves a dormant Hungry Lasher in its place. Your party should stack together, and sidestep in the same direction out of the AoE to efficiently deal with the adds through cleave damage.
Hungry Lashers — these spawn dormant after Germinate, but wake up with Burst Forth. Most of these should be taken care of with cleaving abilities and AoEs. Any woken Lashers need to be quickly taken by the tank, while others should use their offensive cooldowns and big damage buttons to dispose of them. The reason for that is that they apply on-hit, stacking poison DoT to its target, so Healers must be ready to Cure Poison.
Branch Out — a stronger version of Germinate, strikes only one and spawns a single add, Ancient Branch. It will also apply a Splinterbark DoT effect to all players, even if they dodged the AoE.
Ancient Branch — an add spawned by Branch Out. Prioritize taking it down quickly, even if other adds are present. It casts Healing Touch as soon as it spawns and every 10 seconds after until it dies. Either use a long stun or be ready to Kick the cast (make sure to establish kick order). As add is about to die, make sure to be close by so you can enter the green Abundance AoE left by its corpse. This will remove the Splinterbark DoT, but be careful, as Abundance can align with Germinate.
Barkbreaker — a tank buster that also leaves a physical vulnerability debuff. Make sure to use a defensive cooldown to live through this.
Crawth
Crawth Trash Guide
After beating Overgrown Ancient, cross the invisible bridge to reach an intersection platform with Guardian Sentry, an elite foe with some tricks up his sleeves.
Deadly Winds —spawn tornadoes at player locations, dealing heavy damage. Avoid touching them until they disappear.
Expel Intruders — a huge AoE that damages and pushes everyone back. Hide behind pillars to avoid it by breaking the line of sight.
Storm Slash — a tank buster that needs to be mitigated if your tank’s health is not high enough.
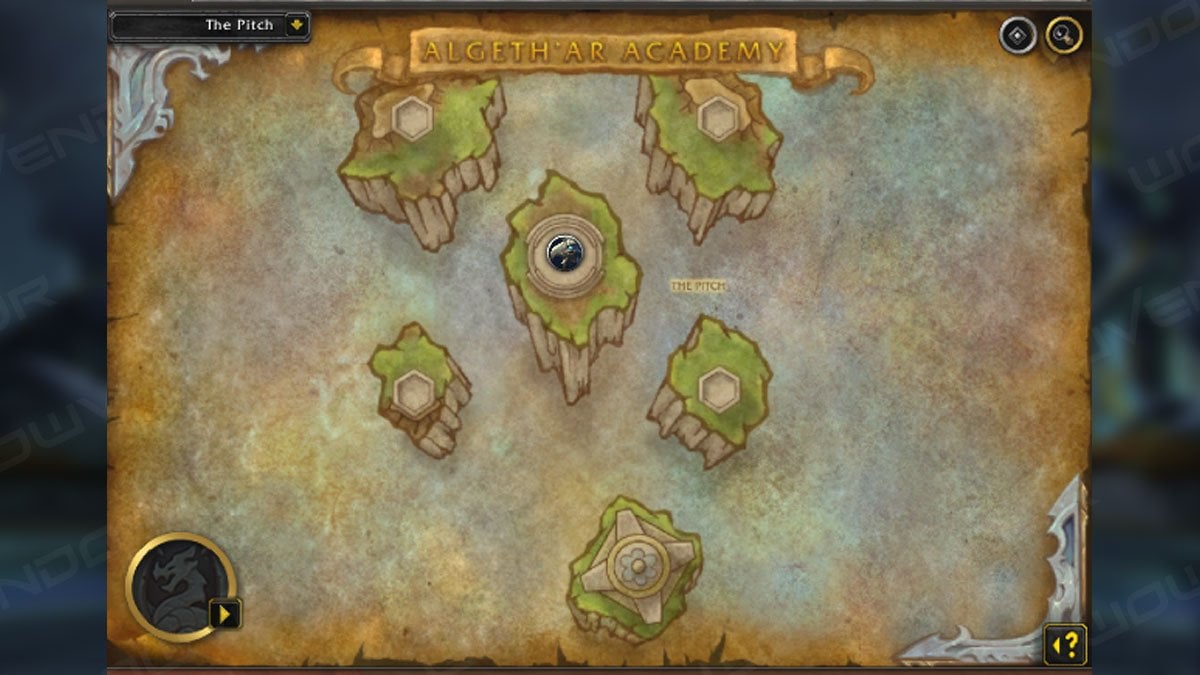
After you are done with this obstacle, move forward to the Pitch. Here, you have to fight 3 waves of Territorial and Alpha Eagles. The first ones apply a stackable bleeding DoT. Alpha Eagles cast a frontal pushback AoE (dodge it) and Call of the Flock (interrupt at all costs).
Crawth Boss Guide
To summon the boss, throw 3 Play Ball! into a fiery gate. To get the ball, run over it and use special action to throw the ball.
Play Ball! — the main mechanic of this fight. At 75% and 45% of boss Health, the Goals rings will be activated. Players need to throw 3 balls at any of these to trigger a special effect depending on the gate.
Goal of the Searing Blaze — throwing 3 balls at this gate will trigger Firestorm, stunning the boss for 12 seconds and increasing 75% damage taken. Perfect time to burst. This also triggers fire AoEs that will rain on the ground until the end of the fight. Avoid them, as they can one-shot players at high keys.
Goal of the Rushing Winds — scoring this gate triggers Gale Force. After a strong pushback, AoE will start appearing on the battlefield, leaving moving cyclones behind. The initial cast will also spawn wind motes. Picking those grants 45% Haste and 50% movement speed increase buff for 20 seconds.
Deafening Screech — party-wide damage that also interrupts casts and applies silence. Also leaves a stackable Sonic Vulnerability debuff on all players. The debuff is removed from all players when the effect of any of the Goals is triggered. Remove it at 3 stacks. If you want to push your stacks further, remember to use defensive cooldowns.
Overpowering Gust — a frontal cone AoE, dodge it.
Savage Peck — a mandatory tank buster move. Use active mitigation, as it leaves a nasty DoT after the initial hit.
The overall key is to trigger the Goals as late as possible while also ensuring that the healer can outheal increasing damage. Using personal mitigations may help delay the activation of Gates.
Vexamus
Return to the crossroad where you fought the Guardian, and head toward the Quad to reach the next zone. Your next encounter awaits after dealing with three groups of trash.
Vexamus Trash Guide
Spellbound Scepter — interrupt its party-wide cast, Mystic Blast, as it is usually enough to wipe the group.
Spellbound Battleaxe — applies a bleeding DoT to a tank with its Severing Slash. Some light mitigation is advised.
Unruly Textbook — Monotonous Lectures can put a target to 8 seconds of sleep. Be ready to interrupt the cast or cleanse the sleep.
Corrupted Manafiend — possess Mana Void high-priority cast you need to interrupt. Surge is another cast to take care of, but only if you have spare interrupts.
Arcane Ravager — a tanky mob. Deals damage to the furthest player from it with Vicious Ambush. This can be avoided by breaking the line of sight. Riftbreath is a high-damage channel, avoid it.
Arcane Forager — the lowest priority target, attacks random players with Vicious Lunge, dealing mild damage to them.
Vexamus Boss Guide
As 3 groups of enemies are defeated, Recall History will be cast and the boss will emerge.
Arcane Fissure — ability used by Vexamus when his Energy meter reaches 100. Deals heavy party-wide damage and pushes back the players. For several seconds after, AoEs will spawn at players’ locations. Use personal mitigation tools, especially if you’re under the effect of Mana Bombs.
Arcane Orbs — passively spawn on the battlefield and fly towards Vexamus, damaging all players and granting him 20 Energy upon reaching him. Soak the orbs, but be careful — taking an orb grants Oversurge debuff (dispellable). Usually a job for tanks, or someone with magic immunity.
Mana Bombs — infuses 3 random players with a DoT. As DoT expires, the player will explode with damage, leaving the Corrupted Pool. Avoid standing in the pool, or being pushed back into it. Hitting the boss with the explosion part will also grant him extra Energy, so avoid doing that.
Arcane Expulsion — a cleave tank buster, aim it away from the group.
Echo of Doragosa
When all 3 bosses are defeated, you can move to the Headteacher’s Enclave for the final encounter.
Echo of Doragosa Trash Guide
Algeth’ar Echoknight — casts Astral Whirlwind around themselves, dealing damage to everyone in melee range. Avoid it or crowd control the enemy.
Spectral Invoker — their Arcane Missiles can be interrupted, while Astral Bomb will help you deal with enemies. As the timer expires, the player with the bomb will deal damage to anyone around them, enemies included. So, position strategically to maximize damage output.
Algeth’ar Nurse — casts Celestial Shield when on low Health, but there is no use in stunning the cast, as it will be recast right afterward. The easiest way is just to Purge the effect.
Echo of Doragosa Boss Guide
Astral Breath — the cone AoE that is used when the boss gets to 100 Energy. Avoid getting hit, failing to do so is lethal.
Overwhelming Power — A stackable effect from Doragosa’s abilities. Each stack boosts player damage by 5%, but reaching 3 stacks triggers Arcane Rift, clearing all stacks. Having some stacks may hasten the battle, but too many of them risk overwhelming the group with Arcane Rifts. Some instances of this effect are unavoidable, so consider that as well.
Arcane Rift — a DoT zone that remains on the battlefield and periodically spawns orbs of Uncontrolled Energy. These orbs explode on contact, dealing heavy damage and applying Overwhelming Power to all players caught by the explosion.
Unleash Energy — a party-wide AoE, that also opens several Arcane Rifts near the players.
Power Vacuum — pulls all players to the boss before unleashing a powerful AoE attack. If you survive this, it’s probably not for long, as you will be pushed back right after and get an Overwhelming Power stack. Run away from this attack ASAP to avoid getting hit.
Energy Bomb — targets a player with a timed bomb that explodes after 8 seconds, applying an Overwhelming Power stack. Use personal mitigation tools.
Arcane Missiles — a salvo of magical projectiles aimed at a random player. Should be interrupted.
The main goal is to open as few Arcane Rifts as possible. Tank the boss in a corner and position carefully when spawning a Rift. Avoid letting the arena be filled with Rifts and orbs, especially during enemy pulls.
Algeth’ar Academy Loot Table
Overgrown Ancient
| Name | Type |
| Mystakria’s Harvester | One-Hand |
| Algeth’ar Hedgecleaver | Two-Hand |
| Freenzyroot Cuffs | Leather Wrist |
| Experimental Safety Gloves | Cloth Hands |
| Potion-Stained Cloak | Back |
| Boots of Explosive Growth | Mail Feet |
Crawth
| Name | Type |
| Obsidian Goaltending Spire | Two-Hand |
| Bronze Challenger’s Robe | Cloth Chest |
| Azure Belt of Competition | Leather Waist |
| Ruby Contestant’s Gloves | Leather Hands |
| Emerald Coach’s Whistle | Trinket |
| Dragon Games Equipment | Trinket |
Vexamus
| Name | Type |
| Spellbane Cutlass | One-Hand |
| Spellboon Saber | One-Hand |
| Vexamus’ Expulsion Rod | One-Hand |
| Platinum Star Band | Ring |
Echo of Doragosa
| Name | Type |
| Final Grade | Two-Hand |
| Organized Pontificator’s Mask | Cloth Head |
| Scaled Commencement Spaulders | Mail Shoulders |
| Breastplate of Proven Knowledge | Plate Chest |
| Venerated Professor’s Greaves | Plate Legs |
| Algeth’ar Puzzle Box | Trinket |
Algeth’ar Academy Achievements
- Heroic/ Mythic/ Mythic Guild: Algeth’ar Academy — defeat Echo of Doragosa in Algeth’ar Academy on Normal/ Heroic/ Mythic/ Mythic with members of the same Guild.
- Keystone Hero: Algeth’ar Academy — Complete the dungeon on Keystone level 20 or higher.
- Duck, Duck, Spruce! — Defeat the Overgrown Ancient while all party members have a Well-Fed Duckling on their head in Algeth’ar Academy on Mythic difficulty.
- See Me After Class — Defeat Vexamus without players absorbing any Arcane Orbs Icon Arcane Orbs in Algeth’ar Academy on Mythic difficulty.
- Squad Goals — Defeat Crawth after simultaneously activating both Goals in Algeth’ar Academy on Mythic difficulty.
Algeth’ar Academy Mythic Plus Guide: Conclusion
And this is it for our Algeth’ar Academy mythic guide. We hope this information is useful to you and will be able to help you complete the challenges ahead!


Comments