Operation: Mechagon Workshop M+ guide — The War Within Patch 11.1.7
This Mechagon Workshop M+ guide shows you how to find the dungeon, its layout, boss mechanics, the best strategies against them, and all the loot you can get in The War Within 11.1.7!
Table of Contents
- What is Mechagon Workshop
- Mechagon Workshop entrance
- Mechagon Workshop walkthrough
- Mechagon Workshop loot table and achievement
- Conclusion
- FAQ
Key takeaways
- Mechagon Workshop, returning from Battle for Azeroth, is part of The War Within Season 2 Mythic+ rotation. It has undergone many changes, requiring updated tactics.
- Liberation of Undermine in Patch 11.1.7 consists of three main sections: The Robodrome, The Under Junk, and Mechagon City.
- Mechagon Workshop has four bosses: Tussle Tonks, K.U.-J.0., Machinist’s Garden, and King Mechagon.
- Various dungeon areas and bosses’ abilities require proper positioning, balancing damage output, defensive cooldowns, and teamwork.
- For a detailed guide and tactics, please refer to the full guide.
Among all the latest contents in The War Within Season 2, there is a new Mythic+ dungeon rotation for players to conquer. Last time, we’ve discussed the Operation: Floodgate M+ walkthrough. And today, we’ve created a Mechagon Workshop mythic plus guide to help you with all the changes, tactics, tips, and tricks needed to complete this dungeon easily.


What is Mechagon Workshop
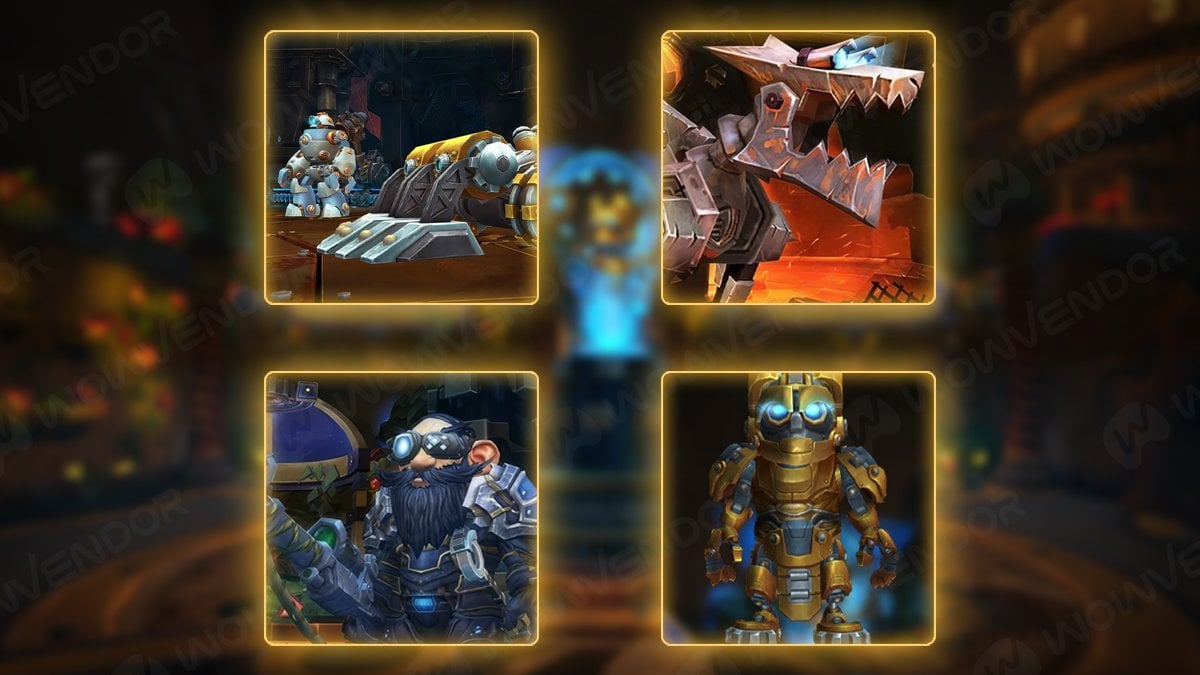
Mechagon Workshop is a reintroduced BFA dungeon from Battle for Azeroth that returns in patch 11.1.7 of The War Within. It consists of four bosses:
- Tussle Tonks
- K.U-J.0.
- Machinist’s Garden
- King Mechagon
And although Mechagon Workshop was part of this system before, it has undergone some changes in TWW Patch 11.1.7, which we’ll be covering in this guide.
Mechagon Workshop entrance
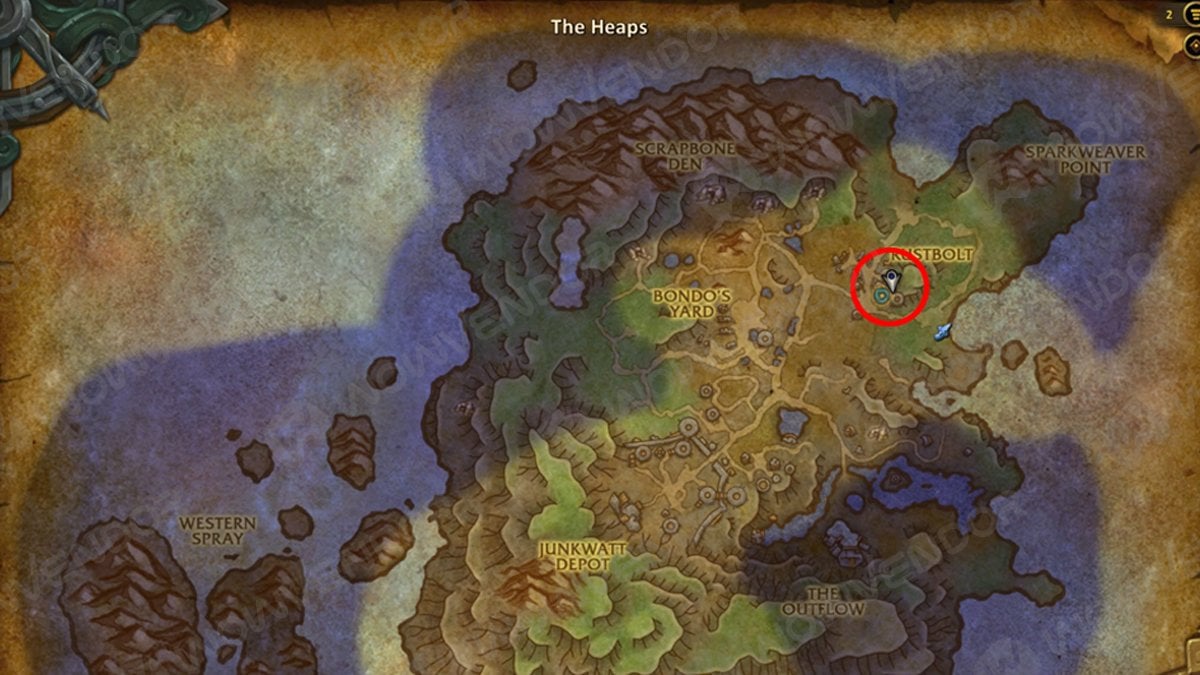
The Mechagon Workshop entrance is located on the Mechagon isle, at coordinates [73.6, 36.0]. You can also use a portal in Dornogal [53.7, 38.7] to teleport to the island directly. From there you can reach WoW Mechagon Workshop location.
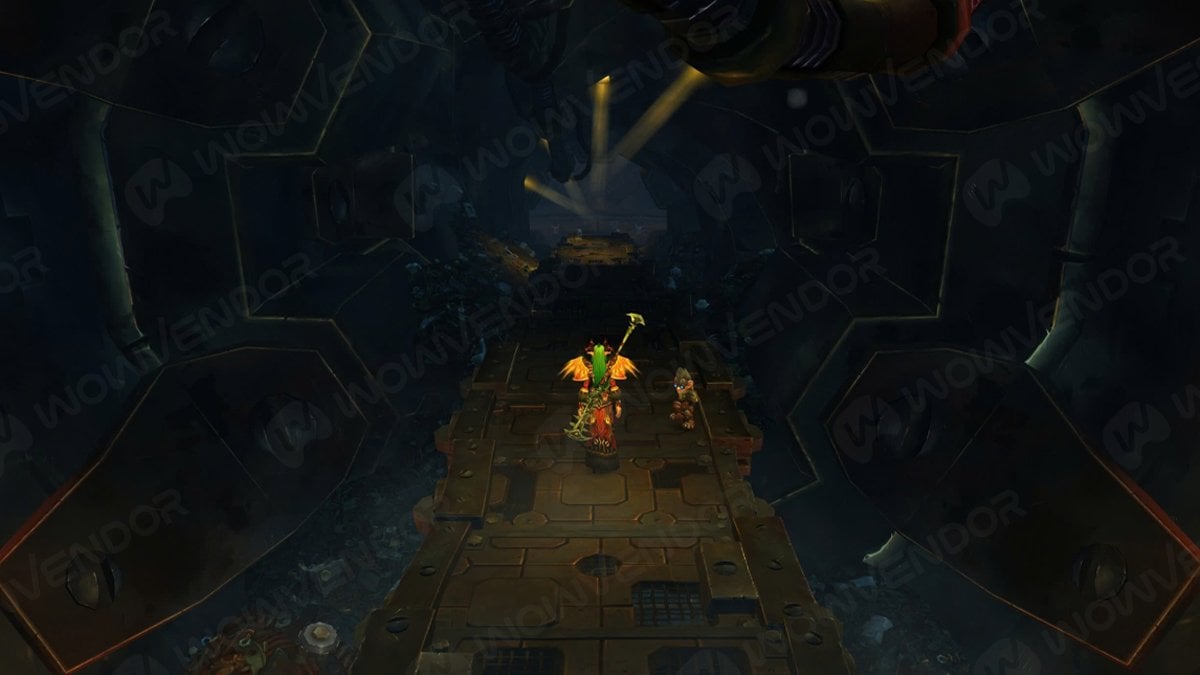
Mechagon Workshop walkthrough
In this section, we’ll cover The Robodrome, The Under Junk, and Mechagon City, including how to navigate the dungeon, reach each boss, counter their abilities, and the best strategies to take all four bosses down.
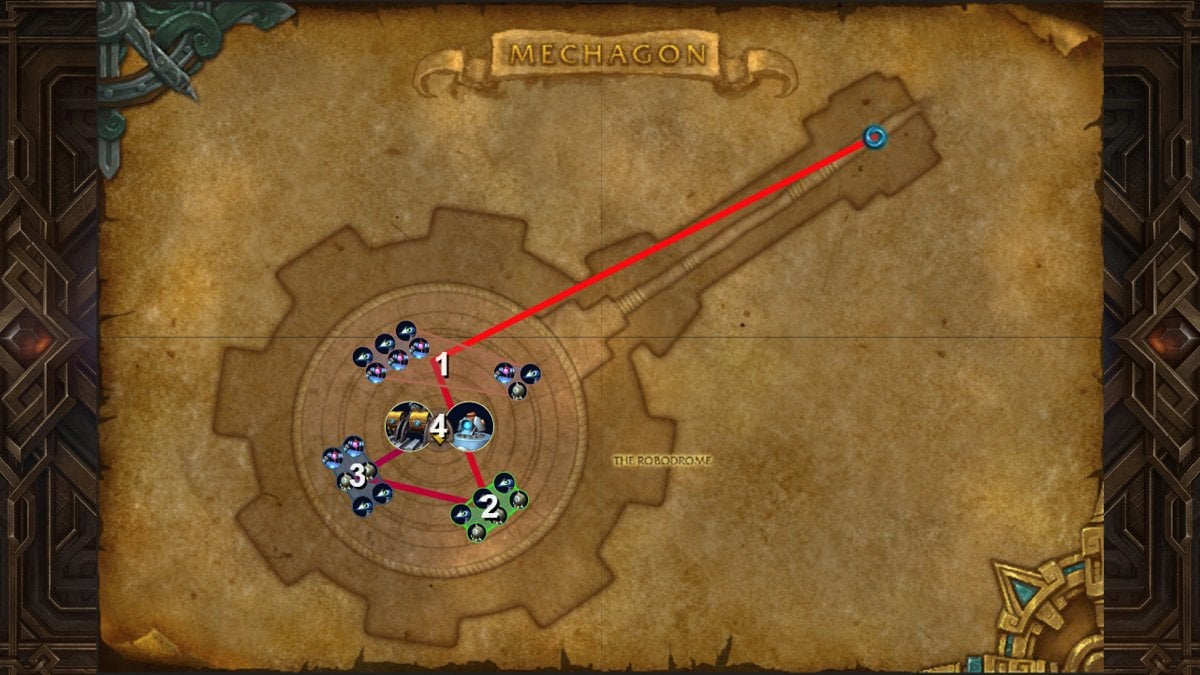
Mechagon Workshop dungeon layout
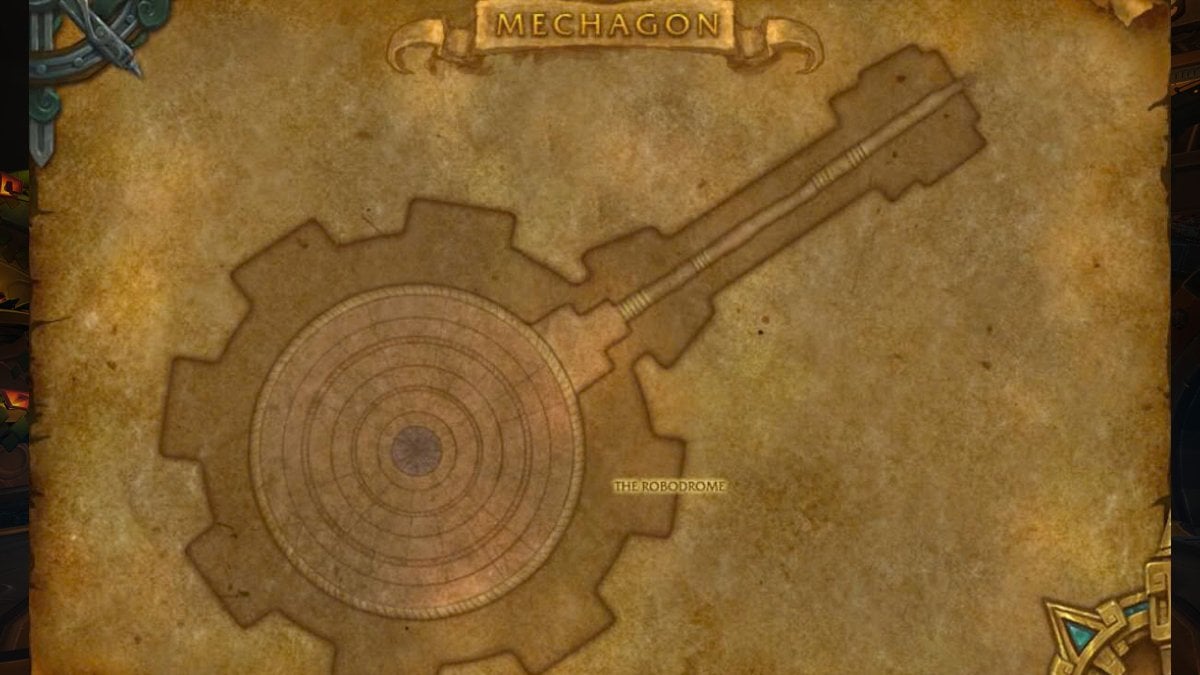
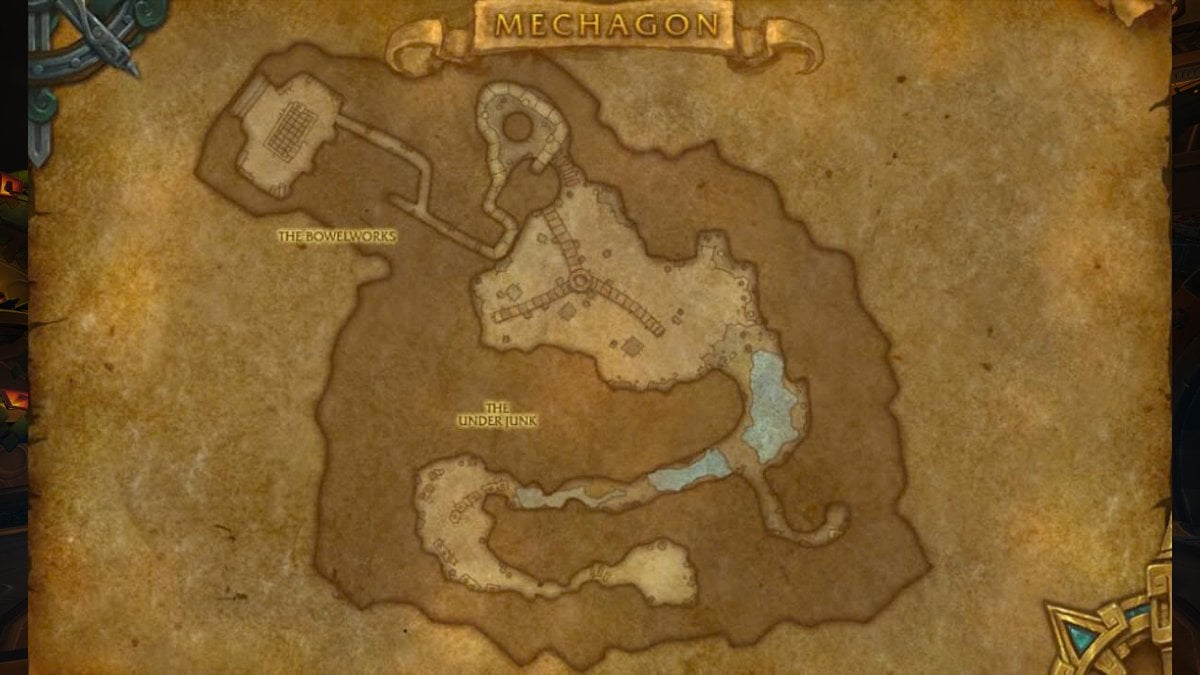
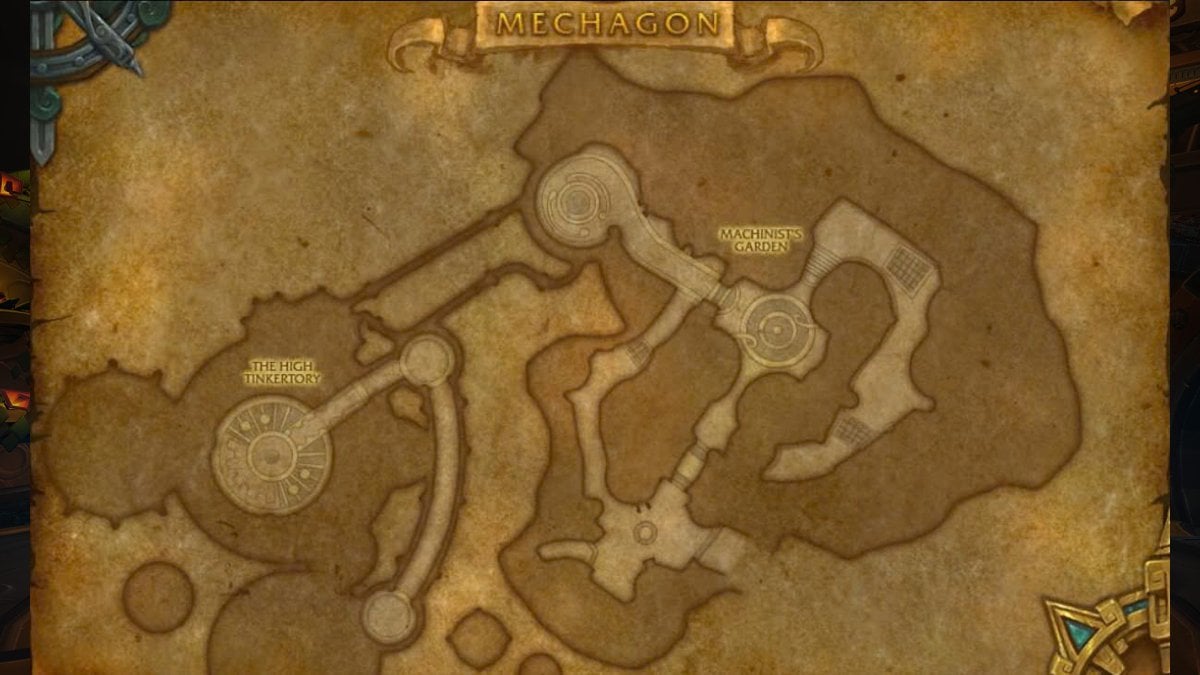
In the Mechagon Workshop map above, you can see that the dungeon consists of three areas:
- Initially, you arrive at The Robodrome for the first boss encounter.
- Right after you’re sent tumbling down to The Under Junk.
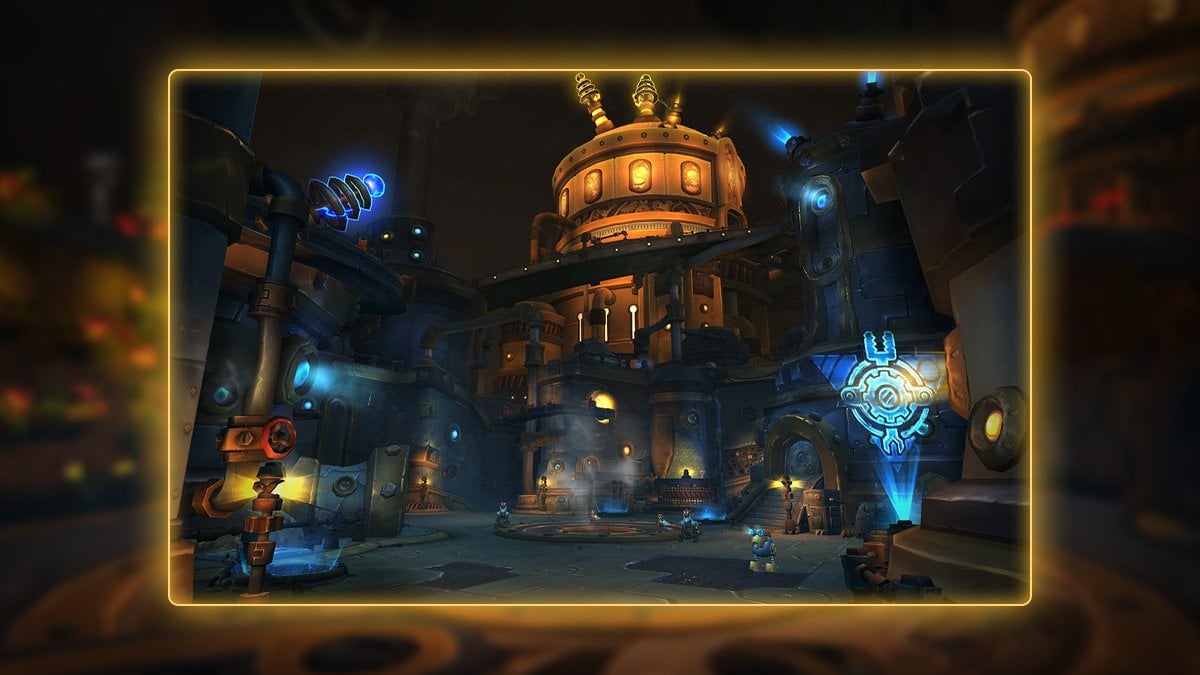
- The last area is the Mechagon City itself.
Mechagon Workshop recommended routes
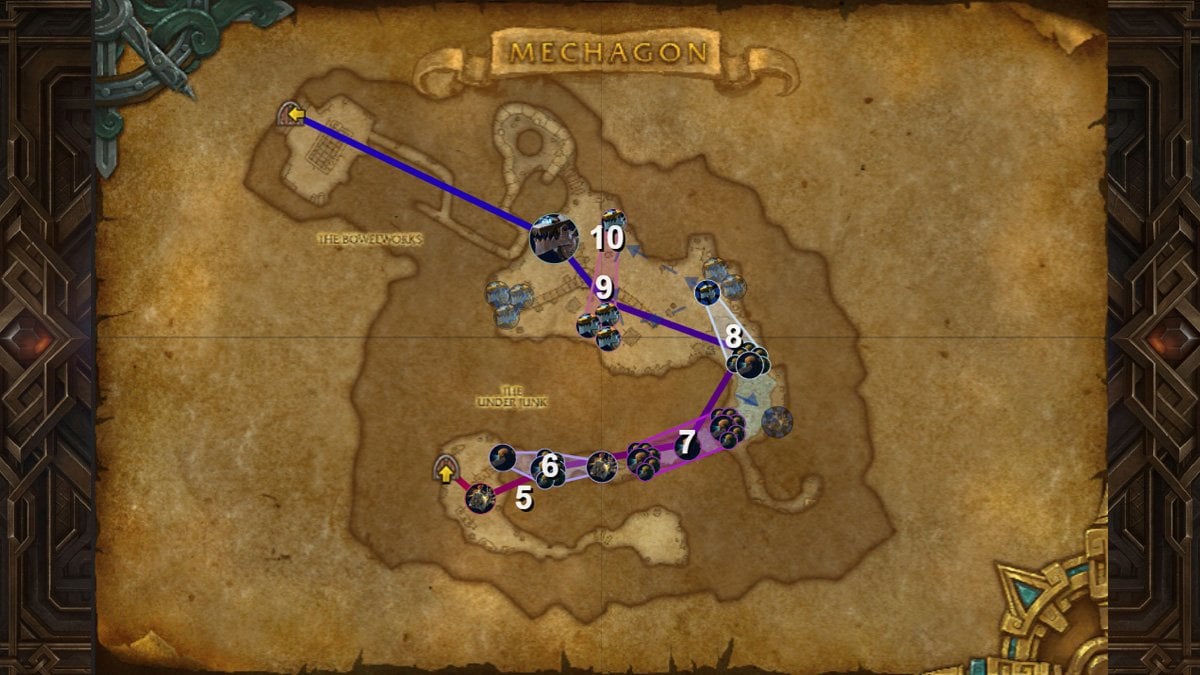
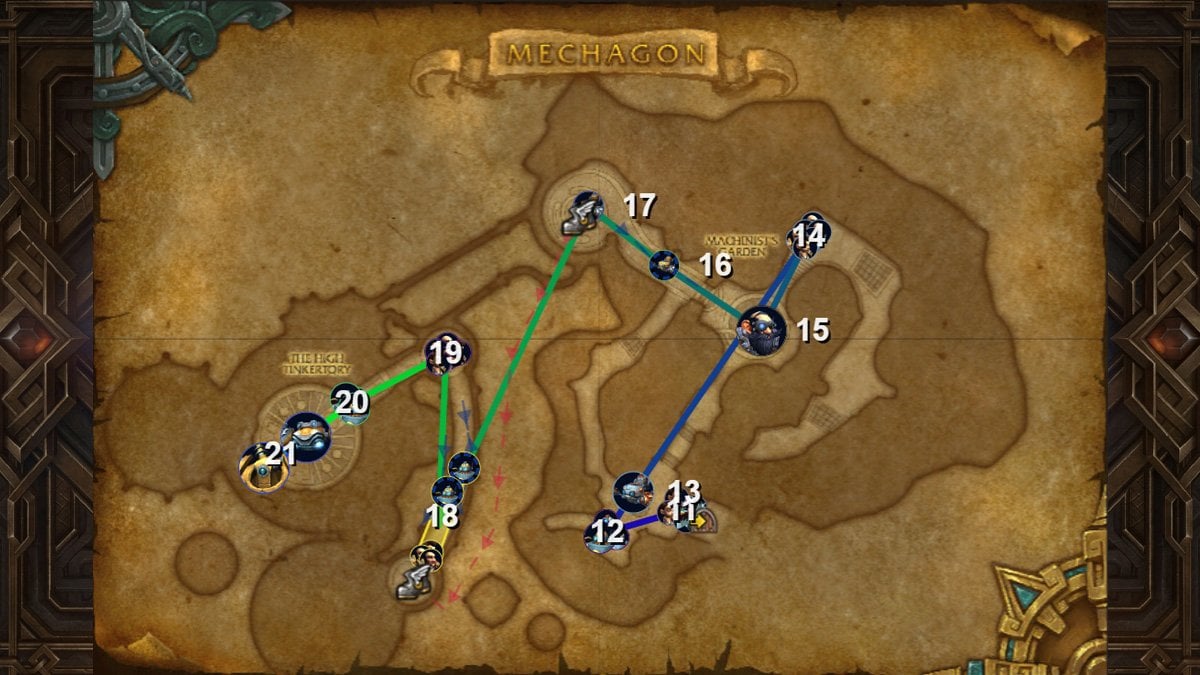
Here are the best routes for the Operation: Mechagon Workshop dungeon.
Note
You can also skip the conveyor belt to reach Machinist’s Garden faster. We’ll cover how to do that in the Machinist’s Garden boss guide.
Tussle Tonks: Boss strategies and notable trash
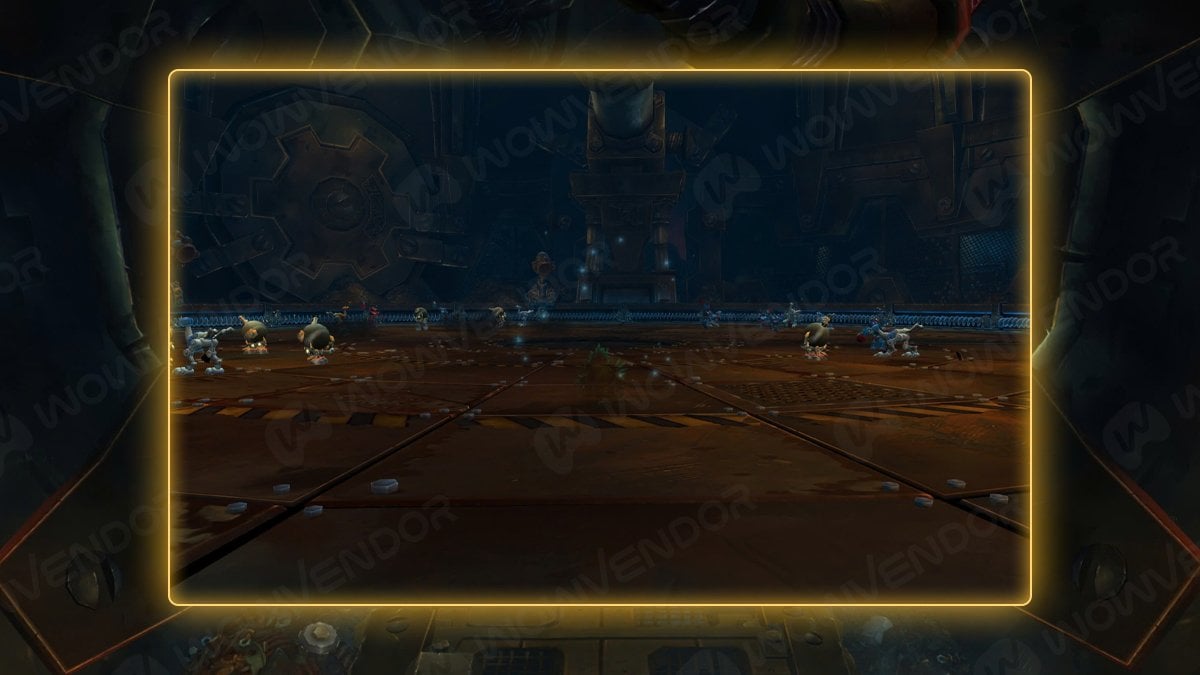
Your first objective is to clear the Robodrome of all enemies. If you’re feeling bold, you can pull the entire room—but be careful. New enemies have been added to make this area more challenging.
Notable trash before Tussle Tonks
Rocket Tonks and Strider Tonks are your standard enemies, with nothing too dangerous aside from the Rocket Tonks’ AoE attacks—just avoid them. The real threat comes from Bomb Tonks. Their Detonate cast deals heavy group-wide damage, and if left uninterrupted, even a single explosion can wipe your team. So make sure to interrupt it at all costs.
If you’re unsure about your group’s ability to handle everything at once, it’s safer to split the mobs into two pulls. However, if your team can coordinate defensive cooldowns and crowd control properly, an all-in-one pull is possible.
As you deal with all the tonks you should also pay attention to your surroundings. The arena itself fights against you. All the saw blades that slide in different directions deal damage on contact. The same goes for big hammers at the arena edge. Make sure to avoid these while dealing with mobs.
Tussle Tonks M+ boss guide

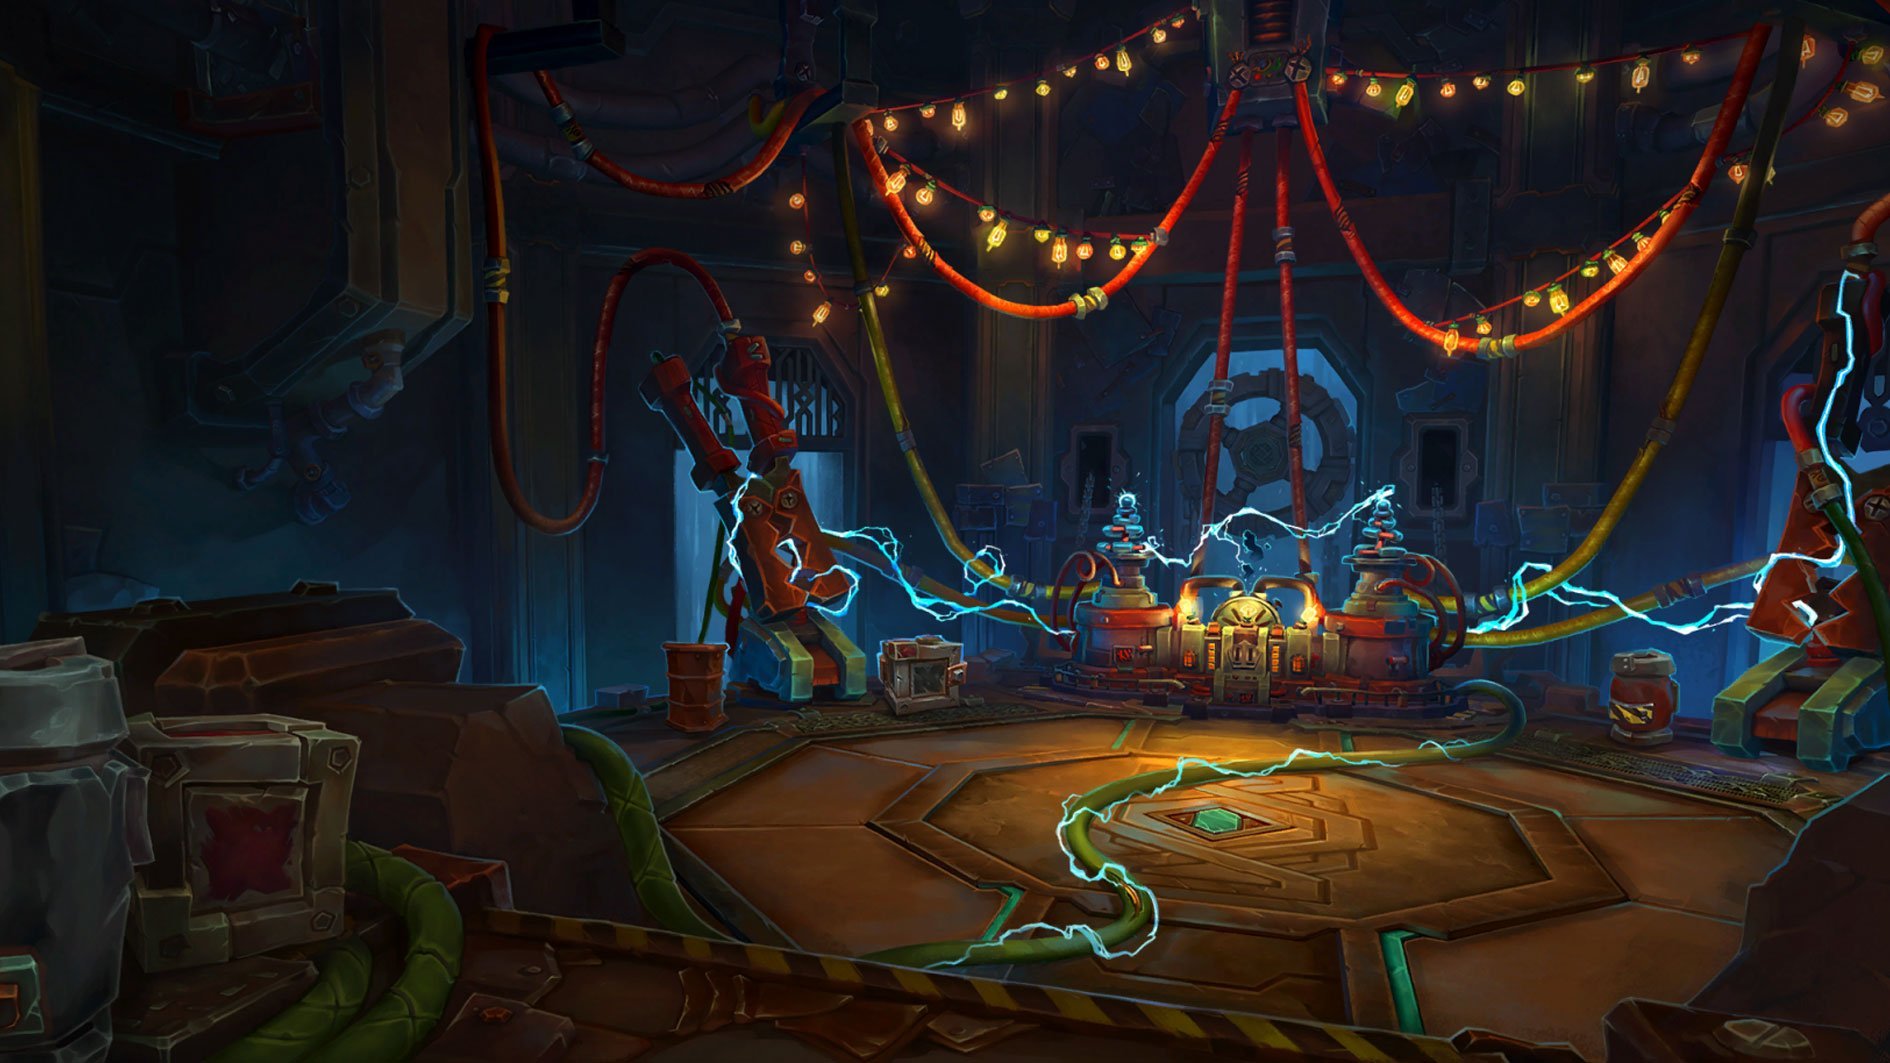
The first boss encounter in our Workshop Mechagon boss guide is a duo fight against a tank, Gnomercy 4.U., and a robot, The Platinum Pummeler. Several changes have been made to this encounter, making some old strategies outdated.
Warning
In Patch 11.1.7, you can’t just burst down one boss anymore. When either one dies, its mech enters a soft enrage, spamming Electrical Storm that wipes the group out. To prevent Electrical Storm, manage the bosses’ health bars carefully and kill them both at the same time.
The arena itself can work to your advantage, as both bosses can be hit by the sawblades and hammers scattered around.
Here are Gnomercy 4.U abilities and how to counter:
| Ability | Description | How to counter |
|---|---|---|
| B.4.T.T.L.3. Mine | Deals damage in the zone and leaves a mine in there. The mine explodes on contact with players. | Avoid touching them. |
| Foe Flipper | Charges at a random player that deals unavoidable damage and sends the player flying backward. | Do not fly into mines, as the combo can be lethal. |
| Maximum Thrust | Executed when it reaches 100 Energy. Starts a charge in the tank’s direction, as shown by the line on the ground. If the boss hits a saw on the wall, it will be stunned, but also throw B.4.T.T.L.3. Mine around the impact area. | Side-step the Maximum Thrust and watch out for the mines. Stay out of their range. |
Here are The Platinum Pummeler abilities and how to counter:
| Ability | Description | How to counter |
|---|---|---|
| Platinum Plating | Cast when Pummeler reaches 100 Energy. A stackable buff that reduces incoming damage per stack. | Tanks need to bring the boss under the hammer and trigger its attack, Piston Smasher. Don’t forget to avoid getting hit yourself. A hammer breaks after impact, so you must use another for the next plating. |
| Platinum Pummel | A powerful tank-buster attack that cleaves. | Use defensive cooldowns. Since the attack cleaves, the rest of the group should stay behind the boss. |
| Ground Pound | A series of group-wide AoEs. | Healers should be ready to top the team’s Health. DPS players should use their defensive cooldowns to help the healer out. |
The fight can feel chaotic, but it all comes down to positioning. The Tank should rotate bosses along the wall to bait one enemy into the wall and another into a hammer. The rest of the group is advised to stay together to spawn mines close to each other. This will help avoid cluttering the arena with them.
K.U.-J.0.: Boss strategies and notable trash

When the battle with Tussle Tonks is over, a hole will open, leading you to the Junk Down area. There await some new enemies as well.
Notable trash before K.U.-J.0.
The biggest threat in this segment is Waste Processing Units:
- They use Puncture, a tank-buster move with Bleed DoT. Bleed is powerful, so use mitigation cooldowns.
- Another move is Mega Drill, which deals unavoidable group-wide damage. The damage from both abilities is heavy, so it is recommended to avoid taking too many of these.
Metal Gunk is another annoying enemy that synergizes well with Waste Processing Units:
- Their ability, Corrosive Gunk, damages random players and applies healing absorption debuff. Pair that with Mega Drill, and you have a tough case for healers to get through. Pay attention to your own HP and help the Healer out with well-timed mitigation.
- Corrosive Gunk cannot be interrupted, but the enemy can be stunned. However, when the stun ends, the mob will start casting Corrosive Gunk again.
- The good news is that Living Waste lost its nasty on-death explosion so you can defeat them safely.
At the boss arena, you can meet Junkyard D.O.G. Although it’s not necessary to defeat them all to trigger the boss encounter, we advise clearing them out. Or risk accidentally pulling during the boss fight.
D.O.G. has a DoT attack, Fiery Jaws. Dispel as soon as possible. DoT can stack faster than it can be removed by the healer, so don’t hesitate to use personal defensive cooldowns to survive.
K.U.-J.0. M+ boss guide
Overall, the encounter with K.U-J.0 is another fight that relies on positioning. The falling cubes play an important role in this battle, dropping from above throughout the fight. They provide protection against the boss’s powerful AoE attack, but turning into Junk Bombs and explode if hit twice by the boss’s abilities. To stay safe, avoid cleaving normal cubes with boss attacks and steer clear of any that start glowing.
Below are K.U-J.0 abilities and how to counter them:
| Ability | Description | How to counter |
|---|---|---|
| Blazing Chomp | A tank-buster move that leaves a powerful DoT. When the DoT is dispelled it explodes, dealing significant group damage. | The tank needs to press their defensive buttons, while the Healer needs to top everyone’s Health before dispelling the DoT. |
| Explosive Leap | The boss will mark three random players and then leap at them in any order, dealing damage to anyone and anything nearby, including cubes. | Spread out to avoid overlapping AoE with your allies or cubes. If you have abilities like Feign Death, you can use them to interrupt the attack when the boss jumps at you. That way, the boss will not follow up with leaps on other targets. |
| Venting Flames | A deadly group-wide AoE. | Hide behind normal cubes to avoid certain death. Tanks should aim to position the boss close enough to the cube, so everyone has enough time to hide. |
Machinist’s Garden: Boss strategies and notable trash
When the guardian dog is defeated, you can start climbing the conveyor belt up. This way you will be able to reach the Mechagon City. The belt always moves backward, slowing you down. There are also flame vents on the wall that periodically shoot streams of fire.
The good news is that if someone reaches the end of the belt, they can press the small button on the wall to stop it altogether, flame traps included.
Some classes, like Demon Hunters, can use their increased mobility to skip most traps and quickly disarm the contraption. The same goes for Warriors with their Heroic Leap or Warlocks with their portals. Meanwhile, Death Knight’s Death’s Advance can help them move easier on the conveyer belt. Hunter’s Disengage, Shaman’s Gust of Wind, and Druid’s Wild Charge can also help close the gap in this part of the Mechagon dungeon.
Tip
Content creator Vesp shares a tip to help you save about 30 seconds by skipping most of the conveyor belt. Instead of running through it, go around the lava forge and face the grate. Jump, and your character will stand on an invisible ledge. Keep moving forward and jump until you reach solid ground.
Turn left, and you’ll see a large screw. Jump onto it, then jump again to reach the end of the conveyor belt, where you can easily press the red button.
If you find it too confusing, here’s his video to help you out:
Notable trash before Machinist’s Garden
When you reach the city, you will have to deal with several waves of defensive measures before you proceed further:
| First wave | Mechagon Tinkerers and G.U.A.R.D.s | Tinkerers are the ones to keep an eye out for, as they spam a powerful single-target attack, Giga-Wallop. They also create Anti-personnel Squirrels that walk toward random players and cast a big lethal AoE. Squirrels cannot be mind-controlled this time, but you can still stun them with hard crowd control. |
| Second wave | Defense Bots MKIII and MKI | Both types of bots apply dispellable DoTs, Arcing Zap, at random targets. MKIII also occasionally casts a group-wide AoE, Short Out. Incoming damage can be high when both abilities overlap, so be ready to pop defensives to help your healer. When they are low on HP, they apply a shield with Defensive Countermeasure. It can be dispelled with Purge, or burn through it with enough damage. |
| Third wave | A single mini-boss called Blastatron X-80 | It is an unmovable mech that constantly pulses with damage. Occasionally, it will also cast line AoE, Sonic Pulse. It deals high damage and applies Silence. Sidestep it at all costs. Another dangerous move is Capacitor Discharge. It is a series of room-wide circle AoEs with only one quadrant being a safe zone. The whole group should move along the safe area to dodge all hits. |
When the last enemy is down you can proceed to the next section. This time it’s a little stealth segment. Use smoke to avoid detection while waiting for the opportunities to pass between the bots. The ones that patrol back and forth create necessary walkways between detection zones. If a bot detects you, it will send you back to the start of this segment.
When your little spy adventure is finished, you can expect packs with new enemies:
- Mechagon Mechanics are healers, who interrupt their Tune Up cast and Purge Overclock buff from their allies.
- Workshop Defenders drop Shield Generators, which create yellow domes that reduce incoming damage for anyone inside. Tanks should move enemies out of these shields. If you’re confident in your positioning, you can stand in the dome by yourself, just make sure no mobs are inside with you.
Machinist’s Garden M+ boss guide
Eventually, you will arrive in the area of the next encounter, a mechanical garden full of devious contraptions. Your target is Head Machinist Sparkflux. The boss himself is rather harmless. It’s the garden you need to worry about. Being aware of your positioning and always being ready to move is the key to winning this fight.
Here are the Machinist’s Garden movesets and how to counter them:
| Ability | Description | How to counter |
|---|---|---|
| Discom-BOMB-ulator | The only attack that comes from Sparkflux. A telegraphed AoE aimed at random play. | Avoid getting hit as it deals high damage and disorients players. |
| Self-Trimming Hedge | A saw blade flies around the arena, ricocheting from walls. | Avoid standing in its way. |
| Inconspicuous Plant | An add that spawns periodically through the fight. It has ranged attacks and is unmovable, constantly shooting at the closest target to it. On death, it starts to spill oil. | Deal with it quickly, while the Tank moves closer to it. Other group members should use hard stuns to avoid damage and give the tank more time to move closer. |
| Roaring Flame | A series of raining fire AoEs. This happens when the Oil Fountain left by the Inconspicuous Plant contacts fire. | Stay out of the affected area. |
| “Hidden” Flame Cannon | Cast when Energy reaches 100. Activates three cannons at the center of the arena that start spewing flame beams. The center also rotates clockwise. Flame beam ignites any Oil Fountain on its path. | The group needs to move alongside the beams to avoid getting hit by them, while also avoiding other AoEs. |
This may sound overwhelming, but it is clearly all about positioning. As long as you move alongside the beams and avoid getting hit by AoEs, you should be fine, as there are no sources of unavoidable damage. Aside from plant add, that is.
King Mechagon: Boss strategies and notable trash
The final stretch is the way to King Mechagon himself. It is a straightforward section.
Notable trash before King Mechagon
The only new enemy here is the weaker version of Blastatron X-80 you fought before. You can take both but be ready to heal through double pulsing damage. These also have a Sonic Pulse line attack, but this is it. Defeating mechas will spawn a transport to take you further.
All the other mobs on your way will be the same, just in various combinations. You have already met them in the Mechagon City part. Don’t forget, you can use Shield Generators to protect yourself from many attacks, like Defense Bot MKIII’s Short Out.
King Mechagon M+ boss guide

The final encounter of the dungeon is King Mechagon himself. The fight consists of two Phases, each with its quirks. In the first Phase, the boss acts like a typical boss encounter, while in the second Phase, he turns into a wall boss. So tanks need to be ready to adjust accordingly. But like through the whole dungeon, this fight is also all about positioning.
Phase 1
Here are all King Mechagon’s abilities and how to counter them:
| Ability | Description | How to counter |
|---|---|---|
| Pulse Blast | The primary fire of King Mechagon. It is a magical ranged attack. Meaning physical mitigation is useless against it. | Try to dodge it. |
| Plasma Orb | Several orbs persist on the battlefield through all Phases. Deal damage on touch and cause knockback. | Avoid touching those. |
| Recalibrate. | The boss makes all the Plasma Orb fly in a direction indicated by arrows and explode upon reaching it. | Avoid standing in the orbs’ way. |
| Mega-Zap | A line AoE aimed at a random target. Deals high damage, pierces through, applies a DoT, and a vulnerability debuff to being hit by another Mega-Zap. It’s unavoidable. | Use personal mitigations and spread out. Avoid standing in a line or too close to others. |
| Take Off! | King Mechagons flies up, creates a high-damage zone, Cutting Beam, underneath himself, and starts chasing a random target. While doing so, he also pulses group-wide damage. | Chosen players should move away from the boss, while others avoid getting hit by Cutting Beam. Meanwhile, the Healer needs to keep up with pulsing damage. |
Phase 2
Phase 2 starts when you completely defeat King Mechagon’s Aerial Unit. The whole group will be stunned, while the King will assume control of the giant mech, Omega Buster. This is an unmovable wall boss that enrages if the tank is not in his melee range. So the tank should always be near the Omega Buster, preferably at his side.
Here are King Mechagon’s abilities in phase 2 and how to counter them:
| Ability | Description | How to counter |
|---|---|---|
| Plasma Orb | Several orbs persist on the battlefield through all Phases. Deal damage on touch and cause knockback. | Avoid touching those. |
| Recalibrate | The boss makes all the Plasma Orb fly in a direction indicated by arrows and explode upon reaching it. | Avoid standing in the orbs’ way. |
| Mega-Zap | It now targets three random players with wider beams. Everything else remains the same, but with the increased width and multiple beams, positioning is even more important. | Position to avoid overlapping. Melees can stand at the boss side opposite the tank, leaving bigger room for ranged and the Healer to spread their beams. |
| Magneto-Arm | Deploys an arm that constantly draws in players and Plasma Orbs, while pulsing with group-wide damage. The further you are from the arm, the weaker the pull and the less damage you get. | Run away from it as far as possible, while avoiding Plasma Orbs. Use of movement speed-increasing abilities is advised. |
| Protocol: Ninety-Nine | An enrage-type group-wide AoE. Used only if the boss is not engaged in melee combat. If it’s triggered, this means the tank is out of the boss’s melee range. | Tank should always stand close to the boss. |
When Omega Buster is defeated, the King will be defenseless. Quickly finish him. And there you have it. You’ve successfully completed Mechagon Workshop!
Mechagon Workshop loot table and achievement
Here’s a complete list of all the loot you can get from the Mechagon Workshop dungeon, organized by boss:
Tussle Tonks loot table
| Slot | Type | Item |
|---|---|---|
| Wrist | Gold-Coated Superconductors | |
| Waist | Leather | Mekgineer’s Championship Belt |
| Waist | Cloth | Ringmaster’s Cummerbund |
| Legs | Plate | Heavy Alloy Legplates |
| Boots | Cloth | Hyperthread Boots |
| Trinket | Agility / Strength | Modular Platinum Plating |
| One-handed weapon | Dagger | Apex Perforator |
| One-handed weapon | Mace | Electrifying Cognitive Amplifier |
K.U-J.0 loot table
| Slot | Type | Item |
|---|---|---|
| Back | Agility / Strength / Intellect | Trashmaster’s Mantle |
| Hands | Cloth | Operator’s Mitts |
| Hands | Swift Pneumatic Grips | |
| Legs | Leather | Flame-Seared Leggings |
| Boots | Plate | Pyroclastic Greatboots |
| Trinket | Agility / Strength | K.U.-J.0.’s Flame Vents |
Machinist’s Garden loot table
| Slot | Type | Item |
|---|---|---|
| Waist | Plate | Automatic Waist Tightener |
| Legs | Self-Repairing Cuisses | |
| Boots | Leather | Machinist’s Treasured Treads |
| Trinket | Healer | Ingenious Mana Battery |
| One-handed | Sword | Tearing Sawtooth Blade |
| Two-handed | Staff | Neural Synapse Enhancer |
King Mechagon loot table
| Slot | Type | Item |
|---|---|---|
| Head | Plate | Apogee Inventor’s Goggles |
| Head | Cloth | Inventor’s Ingenious Trifocals |
| Head | Leather | Mekgineer’s Mindbending Headgear |
| Head | Psychogenic Prognosticator’s Lenses | |
| Shoulder | Leather | Extravagant Epaulets |
| Shoulder | Cloth | Shoulderguards of Fraying Sanity |
| Chest | Circuit-Linked Chainmail | |
| Chest | Plate | Mechanized Plate Chasse |
| Wrist | Plate | Anodized Deflectors |
| Wrist | Cloth | Hyperthread Wristwraps |
| Hands | Plate | Gauntlets of Absolute Authority |
| Hands | Leather | Self-Sanitizing Handwraps |
| Waist | Leather | Mad King’s Sporran |
| Legs | Cloth | Royal Attendant’s Trousers |
| Boots | Regal Mekanospurs |
For a complete list of Mythic+ loot tables in The War Within Season 2, check out our full guide here:
Mechagon Workshop achievements

This dungeon has only one related achievement – the Keystone Hero: Operation: Mechagon – Workshop, which requires you to complete Operation: Mechagon – Workshop at Mythic Level 10 or higher, within the time limit. Completing this achievement will grant you a teleport to the entrance.
Conclusion
And this wraps up our Workshop Mechagon dungeon guide. We hope it helps you to get the easy clear of Workshop Mechagon dungeon on Mythic+ difficulty in Patch 11.1.7: Undermine. Happy dungeoning Season 2! And if you ever need assistance, our Mythic Plus boost is here to help!
FAQ
What is the recommended item level for Mechagon Workshop in Mythic+?
For Operation: Mechagon Workshop Mythic+ difficulty, a recommended item level of 629+ is advised for lower keys, while 645+ is preferable for higher keys.
If you have a lower item level but still want to run Operation: Mechagon Workshop M+, you can start your own group and invite higher item-level players to compensate. You can also ask your friends or guildmates with high item levels to join. That said, it’s best to be close to the recommended ilvl to handle mechanics better and keep the run smooth.
Where is the entrance to Mechagon Workshop?
The Mechagon Workshop entrance is on Mechagon Island at [73.6, 36.0]. You can also use a portal in Dornogal [53.7, 38.7] to teleport to the island directly.
Does Mechagon Workshop drop any unique mounts?
Yes. Mechagon Workshop has a chance to drop the Aerial Unit R-21/X mount from King Mechagon.
Who are the bosses in Mechagon Workshop?
Operation: Mechagon Workshop has four bosses, including Tussle Tonks, K.U-J.0, Machinist’s Garden, and the final boss, King Mechagon.
What is the timer for Mechagon Workshop in Mythic+?
The timer for Operation: Mechagon Workshop in M+ is 32 minutes.
How to skip the fire conveyor belts in Mechagon Workshop
To skip the fire conveyor belt in Operation: Mechagon Workshop, go around the lava forge and face the metal grate. Jump, and your character will land on an invisible ledge. Keep moving forward and jump until you reach solid ground. Turn left, and you’ll see a large screw. Jump onto it, then jump again to reach the end of the conveyor belt, where you can easily press the red button.
Classes like Death Knight, Demon Hunter, Druid, Evoker, Hunter, Warlock, and Warrior can use their abilities to easily skip across. For a clearer explanation and example video, check the “Machinist’s Garden: Boss strategies and notable trash” section.


Comments