Dragonflight Season 3: Darkheart Thicket Mythic Plus Guide
Welcome back to our Dragonflight Season 3 Mythic+ series! Today, we will discuss the Darkheart Thicket Mythic Plus Guide.

Table of Contents
Key Takeaways
- Darkheart Thicket is located in Val’sharah, eastern Broken Isles.
- Archdruid Glaidalis Encounter: Be cautious of Festerhide Grizzly’s cleaves and Spew Corruption. Handle Nightmare Abomination adds promptly to prevent damage. Manage debuffs like Maddening Roar and Nightmare Toxin strategically.
- Oakheart Encounter: Deal with Rotheart Dryad’s spears and Vile Blossom’s Root Burst. Handle Nightmare Dwellers before Ancient encounter to avoid Fear. Strategize for the Strangling Roots mechanic during the Oakheart boss fight.
- Dresaron Encounter: Avoid triggering dragon eggs to prevent Hatespawn Whelpling spawns. Be cautious of Bloodtainted Fury’s charge and Bloodtainted Buster’s cast. Position wisely during Down Draft to mitigate knockback effects.
- Shade of Xavius Encounter: Prioritize Tormented Bloodseekers and Dreadfire Imp for crowd control. Beware of Taintheart Summoners’ Curse of Isolation and Taintheart Stalkers’ Dark Hunt. Understand mechanics of Growing Paranoia and Nightmare Bolt during Shade of Xavius fight.
With every new season in World of Warcraft come various changes. Among them are new dungeons available for Mythic+. Previously, we have discussed WoW Black Rook Hold M+ Guide, and today’s topic is Darkheart Thicket. If you are new to WoW, or you’re just simply looking for other dungeons’ guides, be sure to check out our Mythic+ Guide for Newbies!
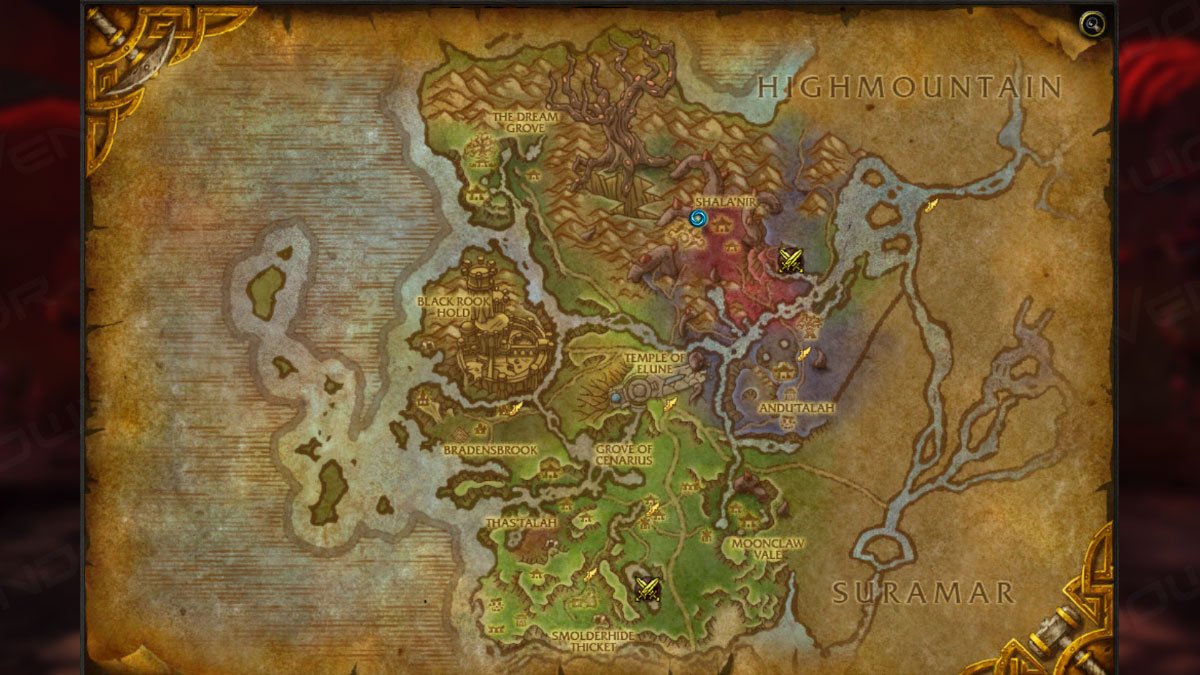
Where is Darkheart Thicket Entrance
The entrance is located in one of the Broken Isles’ zones, Val’sharah. To be more precise, it is located in the eastern part of the map, in Shala’nir at coordinates [59.2, 31.5].
Full Darkheart Thicket Walkthrough
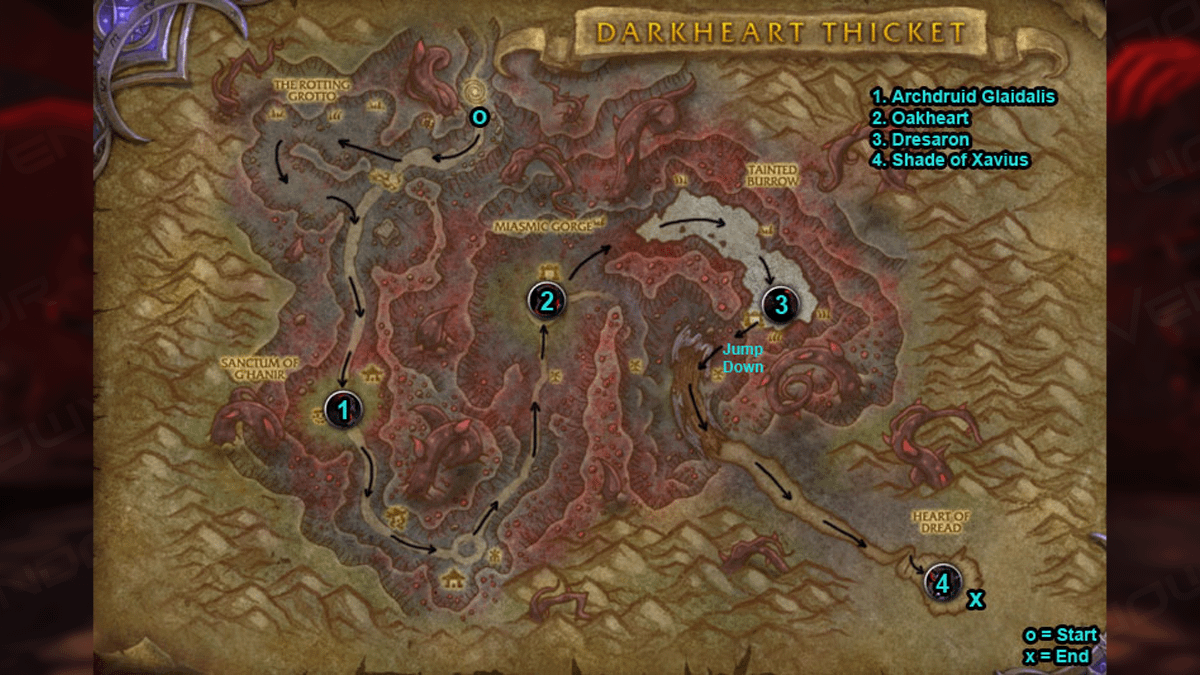
Darkheart Thicket Layout
Darkheart Thicket has a simple layout. As the map below shows, the path from the beginning to the end is straightforward. We only have to take a detour to beat the third boss.
Archdruid Glaidalis
Archdruid Glaidalis Trash Guide
Festerhide Grizzly deals a lot of damage to the Tank with their unavoidable cleaves, Spew Corruption creates DoT zones and extra adds. Meanwhile, Maddening Roar is a party-wide AoE with a stackable debuff empowering each subsequent Roar cast. Be careful with pulling more than one.
Nightmare Abomination. The adds created by Grizzly’s Spew Corruption will Fixate on members of your group, leaving DoT zones in their trail. Don’t let them reach their target, use Cleaves or AoE to defeat them.
Frenzied Nightclaw use Grievous Rip, prioritizing ranged players. The attack deals heavy damage and leaves a DoT effect. Cleanse it by healing the target to 90% Health. Players should use personal mitigation to ease the Healers’ workload.
Mindshattered Screecher. Interrupt their Unnerving Screech as it applies the Disoriented status effect in the area. This can lead to a wipe since Tanks with this status lose aggro.
Dreadsoul Poisoner applies Nightmare Toxin debuff. When the timer expires (or if dispelled), the target explodes, damaging nearby allies. Position carefully to avoid taking extra damage.
Crazed Razorbeak. Their only ability, Propelling Charge, is a dodgeable dash forward. Tank should bait the attack away from the group and sidestep it.
Dreadsoul Ruiners. Despair applies healing reduction debuff, but it can be cleansed (especially if applied to a Tank). Star Shower leaves a dodgeable AoE. If you have casters in your group, consider interrupting Star Shower to make their life easier.
Archdruid Glaidalis Boss Guide
The Archdruid’s move list consists of attacks used by trash mobs on the way to him.
Bear Form. Turn the boss away from the party, so the Primal Rampage doesn’t cleave unnecessary targets. The first hit is unavoidable cleave with knockback. The second one can be sidestepped as the bear just charges forward. It’s advised to tank the boss against the wall to prevent uptime loss.
Cat Form. The boss uses Grievous Leap, jumping at a distant target and then back at the tank, damaging and leaving DoT that can be removed by healing the affected target to 90% Health. The first jump targets the furthest player from the boss. Players with mitigation and self-healing can take turns baiting the first hit.
Caster Form. Uses Nightfall, an AoE that leaves a DoT zone. It also spawns adds that Fixate on players. Take care of them ASAP since they also create a DoT zone. Use crowd-control to stop their movement, or they will make it harder for you to position for other mechanics.
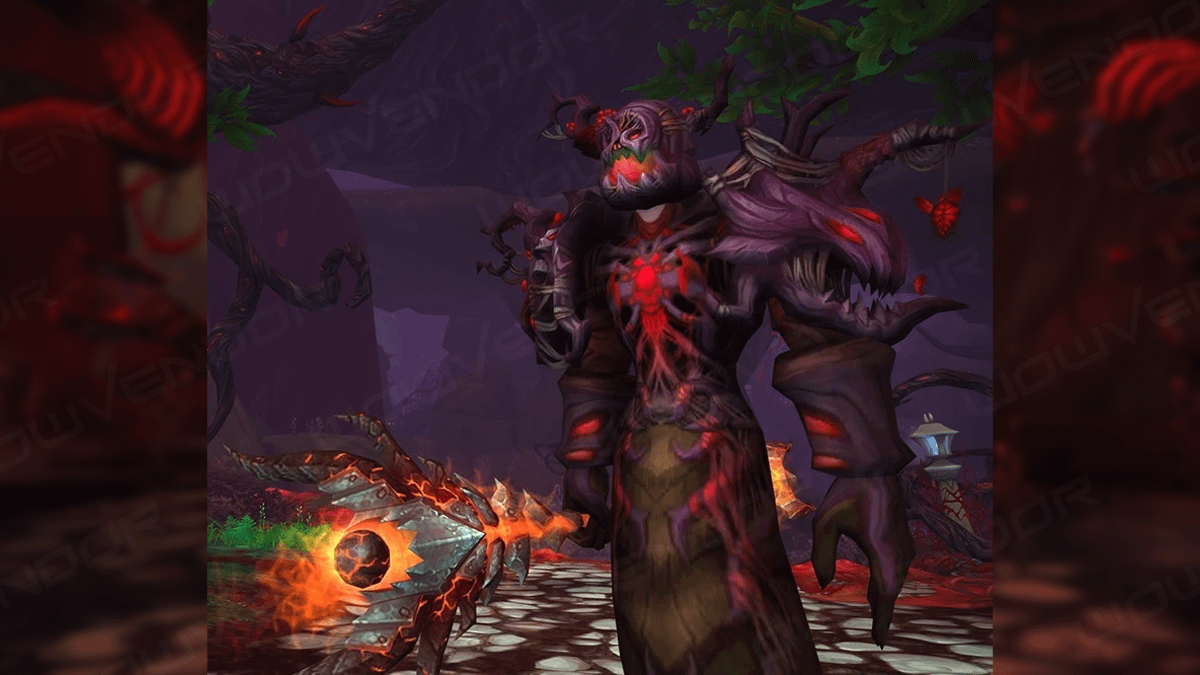
Oakheart
Oakheart Trash Guide
Rotheart Dryad leaps away from the party and throws spears at the Tank. They also poison random players. Be careful not to pull additional packs while dealing with them.
Rotheart Keeper creates exploding Vile Mushrooms that deal a lot of damage to nearby players and constantly heal nearby plants. Tanks need to constantly move mobs away from the mushrooms. The rest of the group should focus on taking these keepers down.
Vile Blossom uses Root Burst that causes the ground under players to explode after a few seconds, sending them flying. Pay attention to what happens under your feet to avoid extra damage.
Before fighting the Ancient, defeat five Nightmare Dwellers. If their Tormenting Eye channel is completed, the target will also be Feared for 4 seconds. Use interrupts and stuns to prevent the channel from finishing.
Oakheart Boss Guide
Key encounter mechanic: Strangling Roots. Approximately every 30 seconds, the boss creates 3 rooting traps under the players. If someone gets caught, destroy the trap to be free again.
The boss can also use Uproot, turning all untriggered traps into Vilethorn Saplings. These are melee adds, they don’t have any abilities. But if too many of them spawn at once, they can be a threat.
There are two ways to deal with this mechanic.
- Ignore traps, let them spawn into adds. Tank grabs them, and the party cleaves them along with the boss. Requires extra work from Tank and Healer.
- Destroy traps before the adds spawn. The Roots are Submerged, meaning they are immune to most AoE attacks, but they can still be damaged before they are triggered. If players have crowd-control immunities, pop those and run through traps to trigger them without getting rooted.
Shattered Earth. A party-wide AoE with knockback. Be aware of what’s behind your back so as not to be pushed into a trap.
Crushing Grip. A heavy-hitting tank-buster. Tanks are advised to use powerful mitigation, while healers keep extra attention. After the first part of the damage ends, the boss will throw the Tank into a random player, damaging both.
Nightmare Breath. A cone attack that deals fire damage. It cannot be side-stepped, so use weaker defensive cooldowns. Make sure to always keep the boss turned away from the party.
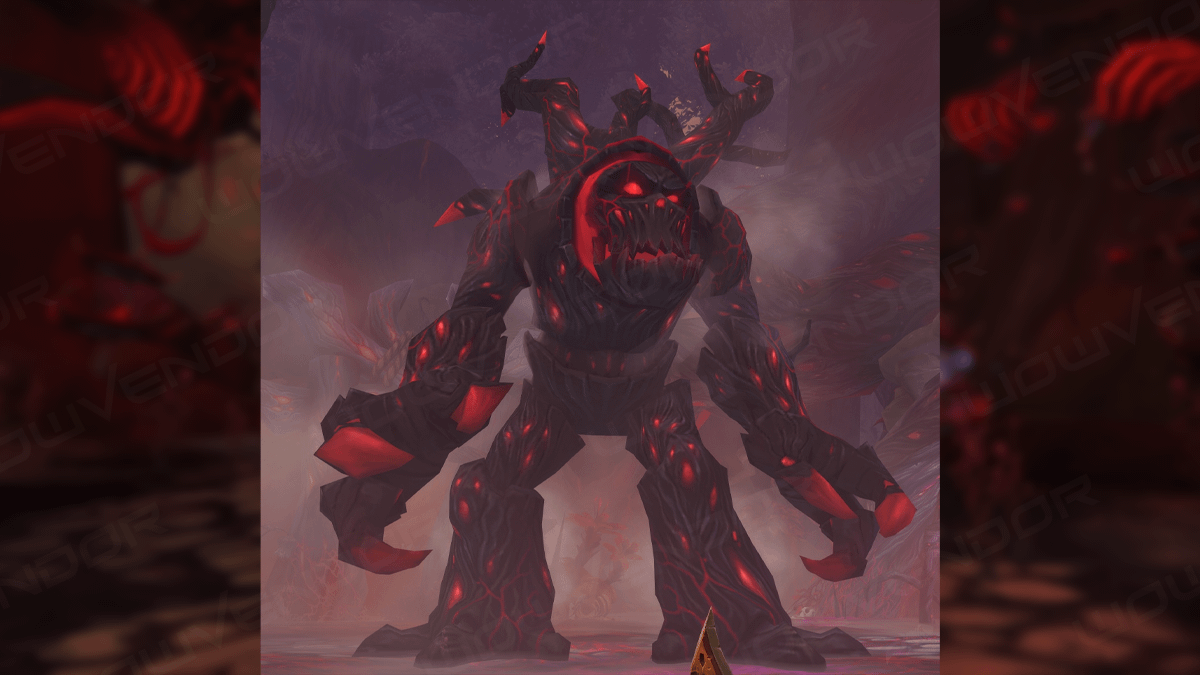
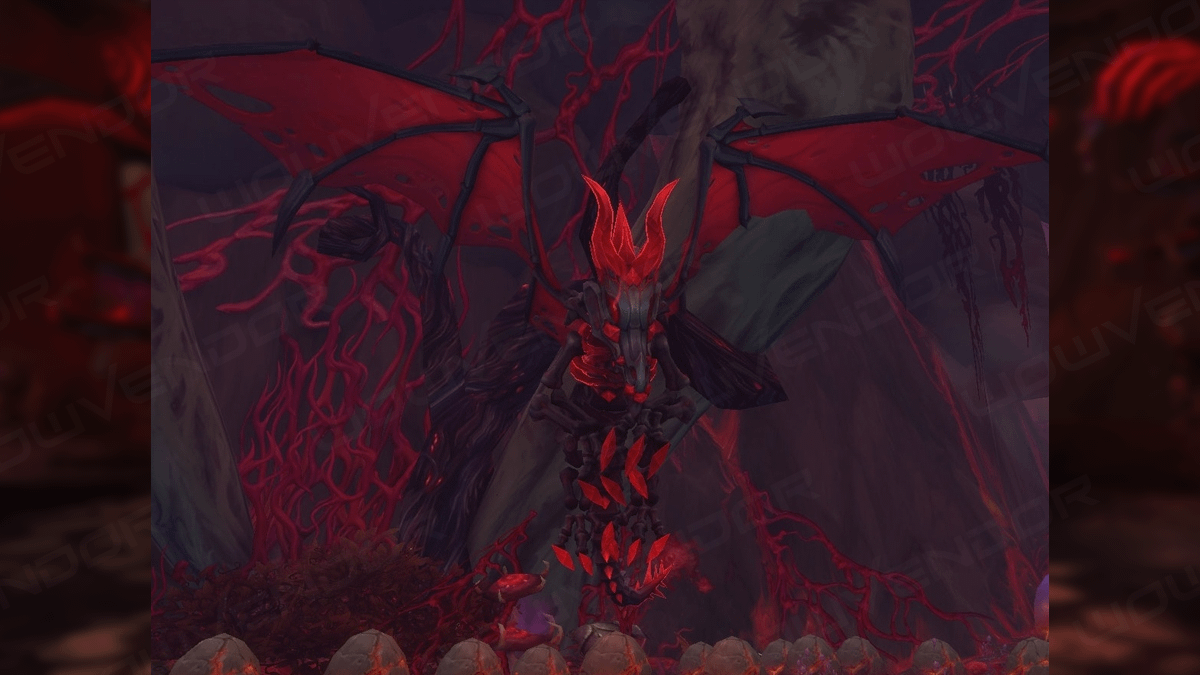
Dresaron
Dresaron Trash Guide
Don’t get near the dragon eggs or they will hatch into Hatespawn Whelpling. These can be dangerous in big numbers since they self-destruct upon death.
Hatespawn Slime. Similar to whelps, they explode on death. Keep an eye on them to not defeat them all at once.
Bloodtainted Fury will try to push you around with Blood Assault and Blood Bomb. The first attack is a charge aimed at the tank. Sidestep it. The second is an AoE that can be dodged. Avoid getting hit or you will be sent flying towards eggs. On death, they will Disperse into 4 Bloodtainted Busters.
Bloodtainted Buster. When they reach 50% Health they start Blood Metamorphosis cast. If it completes, the Buster will turn back into Fury. Crowd-control them when the cast starts.
Dresaron Boss Guide
The fight area is full of dragon eggs. Dresaron uses Down Draft, damaging all players and pushing them back for the whole duration. The further away the players are from Dresaron, the stronger the pushback.
To avoid getting knocked back into the eggs, stay as close to the boss as possible. When Down Draft starts, run towards Dresaron.
Earthshaking Roar. A party-wide attack that spawns cave-ins at a random player’s location. Be ready to move out after the initial hit to avoid unnecessary damage.
Breath of Corruption. The channeled cone of acid damages and reduces armor. Turn the boss away from the party beforehand and sidestep to avoid it, as the boss doesn’t turn while casting.
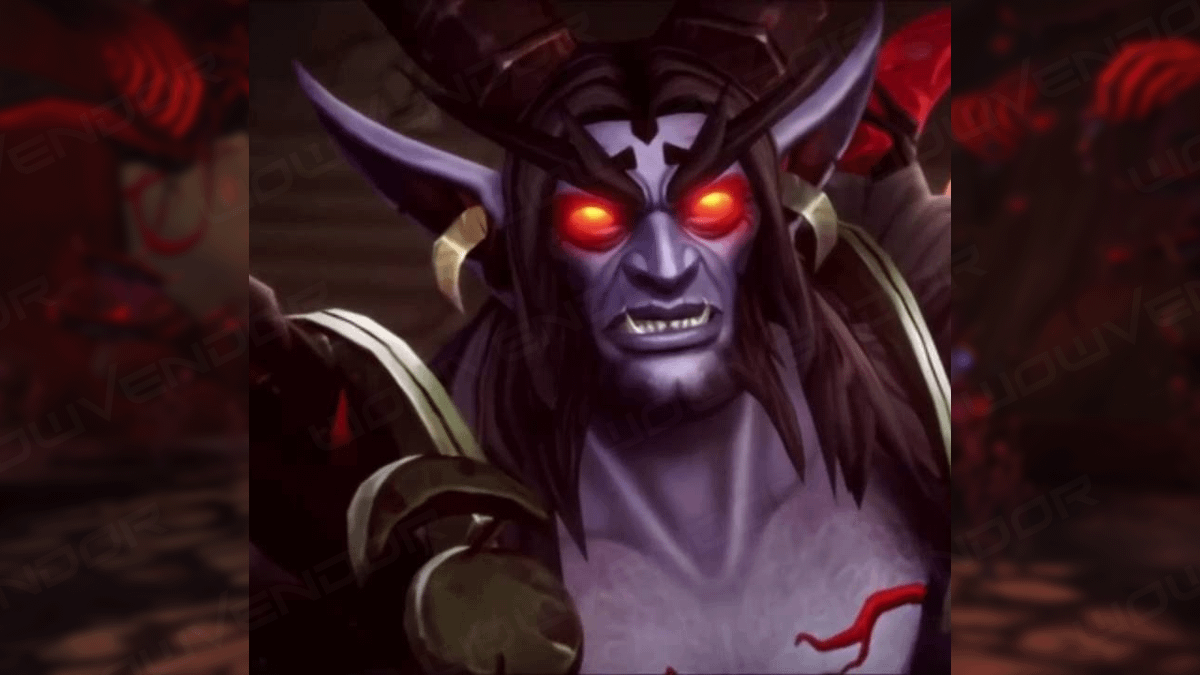
Shade of Xavius
Shade of Xavius Trash Guide
Tormented Bloodseekers are the priority targets. They apply Darksoul Bite, which can be deadly if there are several in a group. Use AoE crowd-control against them. Classes that can cure Diseases should remove the debuff.
Dreadfire Imp throws Firebolts at random targets as well as Dread Inferno. It sticks to players and explodes, dealing damage to all allies nearby, so position accordingly. Prioritize interrupting the cast.
Taintheart Summoners apply Curse of Isolation. The debuff slows down its target by 75% and erupts every 2 seconds with damage. Players need to position accordingly. Affected players should use movement speed buffs.
Taintheart Deadeye applies a cleanseable Scorching Shot DoT. It also creates Shadow Decoys and can swap places with them. Just cleave the Decoys.
Taintheart Stalkers use a two-hitter attack, Dark Hunt. It dashes between two players and deals moderate damage to both.
Shade of Xavius Boss Guide
Most of his attacks target random players, sometimes in succession. He has a lot of AoEs, so the fight can be chaotic.
Growing Paranoia. The boss places an AoE on a random player. If another player steps into the zone, the debuff will deal serious damage and apply Fear to the initial target. Position yourself so no one gets into the zone.
Nightmare Bolt. Moderately damages the target and applies the Waking Nightmare effect. The debuff keeps its victim Silenced and Pacified unless another player is inside their zone. Players with this debuff need to stand near another person, avoiding those with Growing Paranoia.
If the target with Growing Paranoia is hit with Nightmare Bolt, then Waking Nightmare will overwrite Paranoia debuff. This works in reverse, as well.
Festering Rip only targets those in the melee range. It leaves a nasty DoT and healing reduction debuff. Needs to be dispelled quickly.
Feed on the Weak. Deals a lot of damage to a random non-tank player throughout its channel. Affected players need to use personal mitigation. Healer should focus on sustaining the target.
Apocalyptic Nightmare. When Shade of Xavius reaches 50% Health, he will deal group-wide damage. The fire will constantly rain on the ground in the form of AoEs. Players should dodge them. Tank needs to make sure the boss is not getting hit by them as well. If Shade gets hit by one, he receives a stackable 5% damage increase.
Darkheart Thicket Loot Table
Below, you will find all of the rewards that are in the Darkheart Thicket loot table. You will receive 470 ilvl items at the end of the dungeon and up to 483 ilvl from the Great Vault.
Archdruid Glaidalis
| Thronscar Wristguards | Wrist — Plate |
| Gloves of Wretched Lesions | Hands — Mail |
| Poisonroot Belt | Waist — Cloth |
| Arch-Druid’s Tainted Seal | Ring — Haste+Mastery |
| Grove Darkener’s Treads | Feet — Leather |
| Corrupted Starlight | Trinket — Ranged |
Oakheart
| Corrupted Knot | One-handed Mace — Strength |
| Blighted Grasp Bracers | Wrist — Mail |
| Oakheart’s Trunkwarmers | Legs — Cloth |
| Band of Twisted Bark | Ring — Crit+Mastery |
| Oakheart’s Gnarled Root | Trinket — Ranged |
Dresaron
| Chain of the Green Flight | Neck — Crit+Mastery |
| Slipstream Shoulderpads | Shoulder — Cloth |
| Thermal Bindings | Wrist — Leather |
| Greatbelt of Disruption | Waist — Plate |
| Whelp Handler’s Lined Boots | Feet — Mail |
| Nightmare Egg Shell | Trinket — Agility or Strength |
Shade of Xavius
| Mantle of the Resolute Champion | Shoulder — Plate |
| Cloak of Fading Echoes | Back — Haste+Crit |
| Dream Bolstered Chestguard | Chest — Mail |
| Gloves of Vile Defiance | Hands — Leather |
| Paranoid Sprinters | Feet — Cloth |
| Writhing Heart of Darkness | Trinket — Tank |
Darkheart Thicket Achievements
Aside from general Darkheart Thicket achievements, there are also some special ones for its Mythic+ version.
Keystone Hero: Darkheart Thicket: completing the dungeon at Mythic Level 20 or higher opens up a teleport to the dungeon, accessible from Valdrakken.
Legion Keymaster: completing this dungeon using any keystone is one of the requirements to receive the achievement.
Conclusion
And this is it for our WoW Darkheart Thicket walkthrough. Have a nice journey, and see you later in our WoW Everbloom Mythic+ Guide!


Comments