How to get Honeyback Hivemother mount guide: I’m On Island Time
Greetings and welcome to our Honeyback Hivemother 11.0.7 mount guide! We’ve assembled all the information required for you to complete I’m On Island meta-achievement.
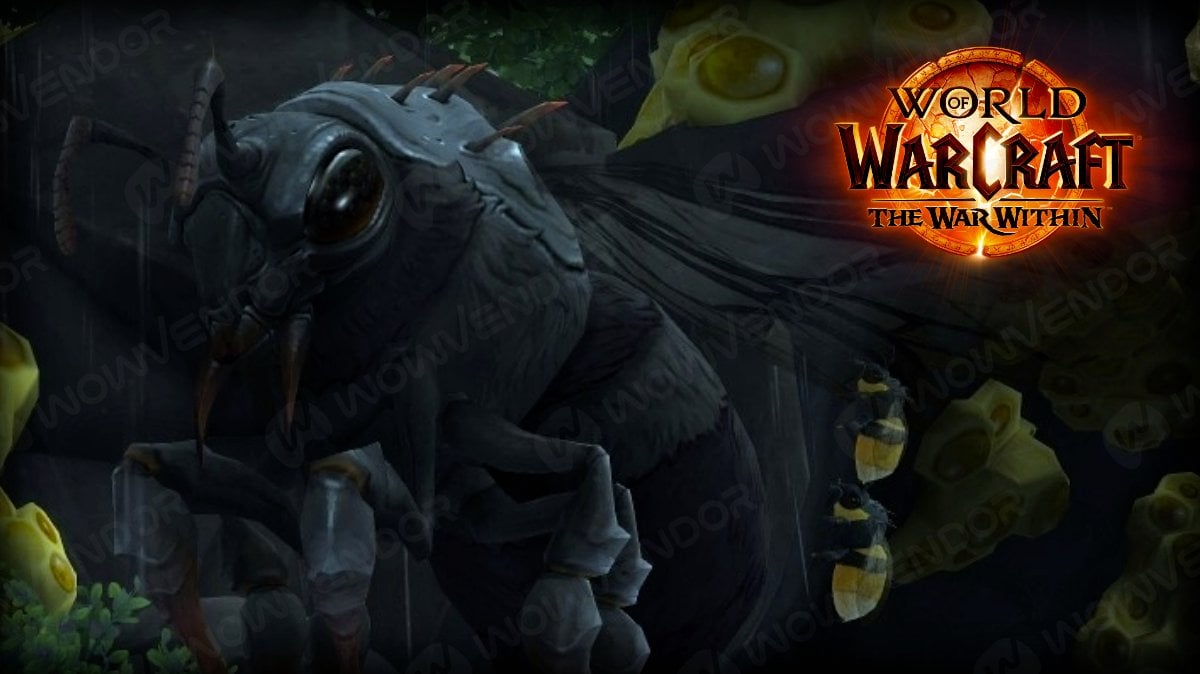
Table of Contents
- Honeyback Hivemother mount
- I’m On Island Time meta-achievement
- Hot Tropic in Zuldazar
- Sound Off in Tiragarde Sound
- Bwon Voyage in Nazmir
- Songs of Storms in Stormsong Valley
- Dune Squad in Vol’dun
- When the Drust Settles in Drustvar
- Loremaster achievements
- Conclusion
Honeyback Hivemother is newly added to patch 11.0.7 mount which is given for completing I’m On Island Time meta-achivement. This achievement involves doing activities of the BfA expansion specifically patch 8.0 content. Honeyback Hivemother requires lots of time even if you force yourself to complete all of the achievements, some of the weekly quests are timegated. For more information on Honeyback Hivemother and other mounts added with the Siren Isle update, check all 11.0.7 mounts guide.
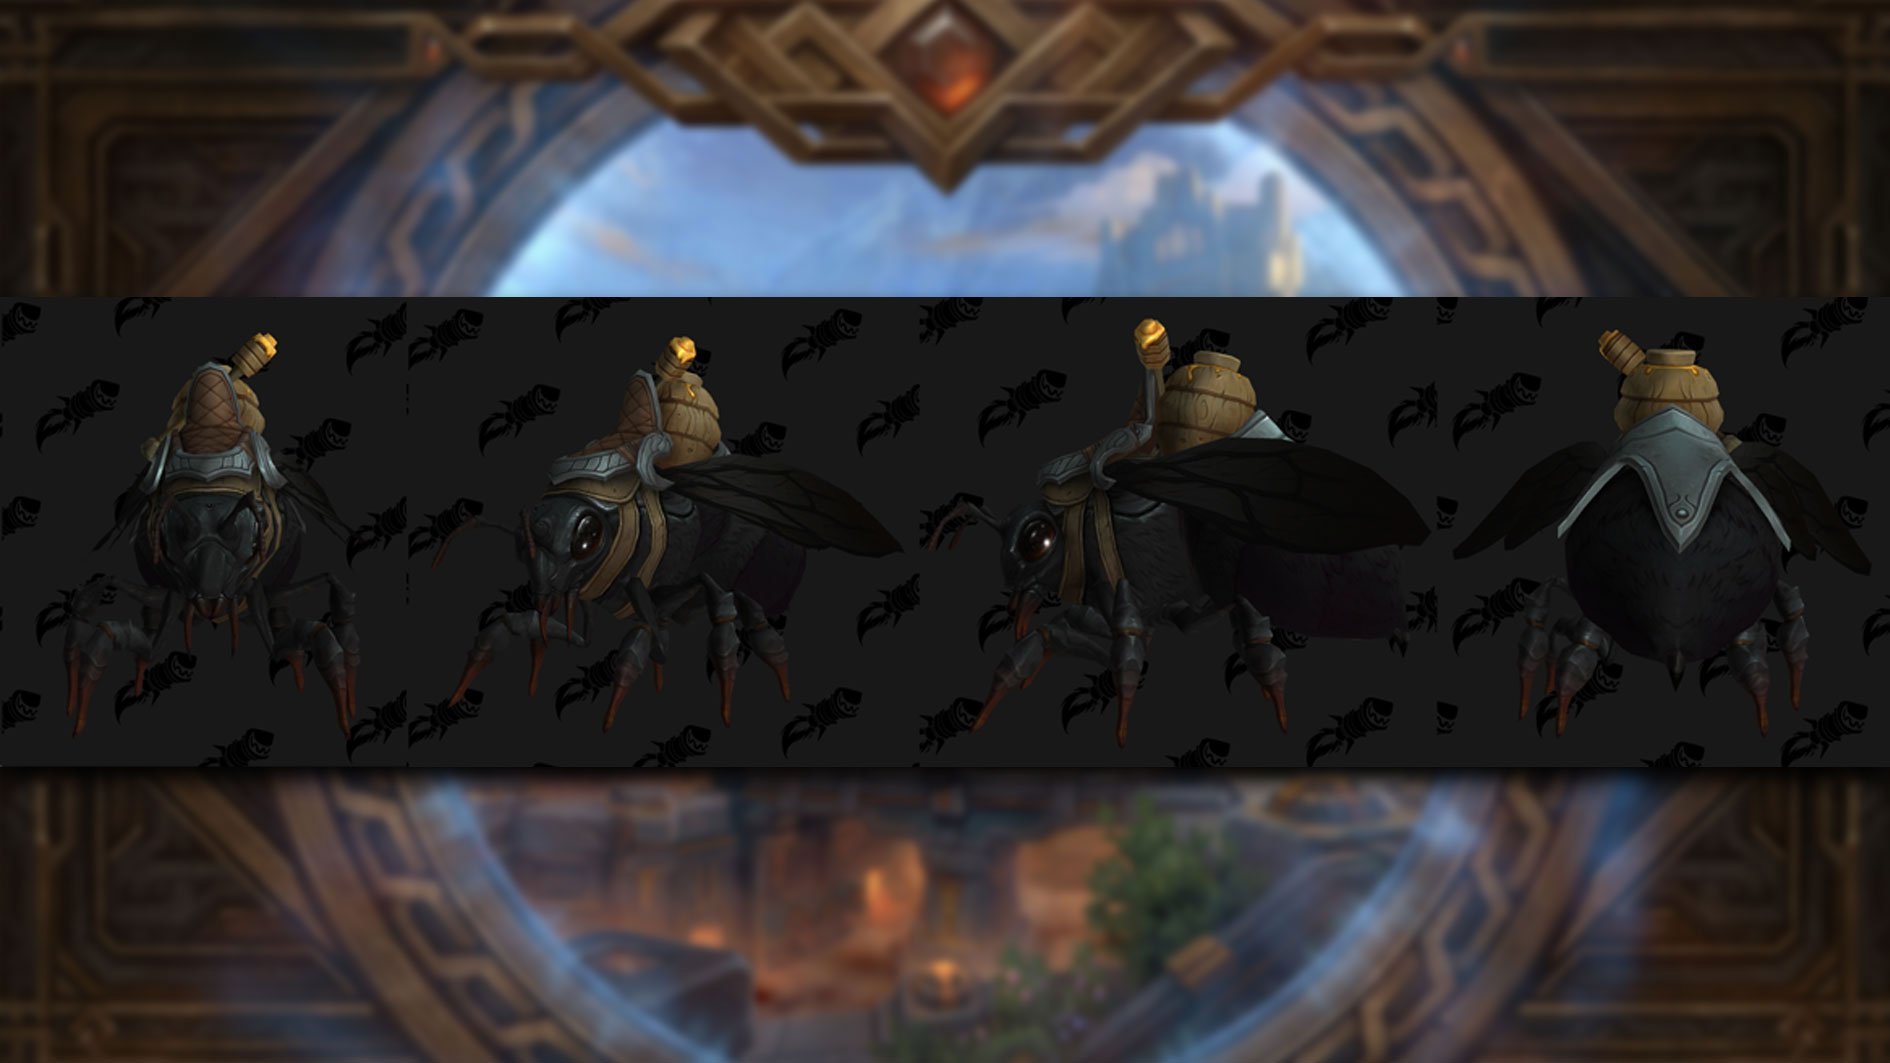
Honeyback Hivemother mount
Honeyback Hivemother is a new addition to patch 11.0.7 of War Within. It has the same model as Honeyback Harvester which was exclusive to Alliance players. But with Honeyback Hivemother Horde players would be able to ride this bee mount, starting from the 11.0.7 patch!
To get this mount you are required to complete the I’m On Island Time meta-achievement which involves doing various activities on 6 main locations of BfA expansion. This is by no means an easy and fast achievement to complete, so don’t be ashamed to look for Mount services to get Honeyback Hivemother as a part of Jani’s Trashpile.
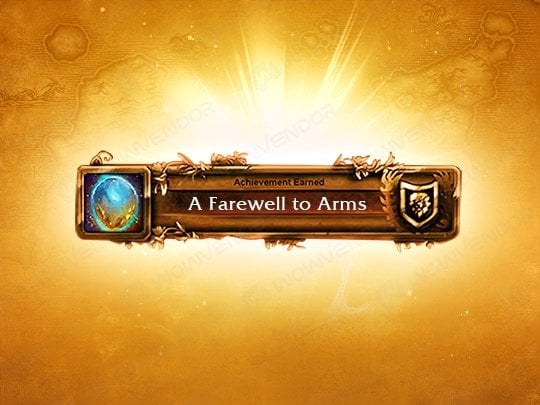
On the bright side, this meta-achievement counts towards another meta-achievement — A Farewell to Arms. Which awards you for your great feats — Jani’s Trashpile mount. It should be noted that getting Jani’s Trashpile mount is an even more time-consuming feat than getting Honeyback Hivemother.
I’m On Island Time meta-achievement
To complete the I’m On Island meta-achievement, players must finish several open-world and zone-specific achievements across all six Battle for Azeroth zones. These include completing various zone quests in both Zandalar and Kul Tiras. Some of the Achievements can only be completed by either the Horde or Alliance, and these are marked in the Achievement details.
Key Achievements include:
- Hot Tropic in Zuldazar
- Sound Off in Tiragarde Sound
- Bwon Voyage in Nazmir
- Songs of Storms in Stormsong Valley
- Dune Squad in Vol’dun
- When the Drust Settles in Drustvar
- Loremaster of Zandalar
- Loremaster of Kul Tiras
- Battle for Azeroth Explorer
- Wide World of Quests
Players must also complete Loremaster of Zandalar and Loremaster of Kul Tiras to finish the main storylines in each region. Other tasks, like Battle for Azeroth Explorer and Wide World of Quests, involve exploring all zones with Battle for Azeroth Explorer and completing 100 World Quests across Zandalar and Kul Tiras for Wide World of Quests.
Many of these achievements require you to find some obscure Rares and hidden items. To solve these problems we recommend downloading the RareScanner and TomTom addon for your convenience!
This will be a long ride, so be sure to prepare yourself as Honeyback Hivemother is not an easy feat!
Hot Tropic in Zuldazar
The Hot Tropic Achievement is a multi-part goal that requires completing various smaller achievements across Zuldazar, the capital city of the Zandalari trolls. Each part of the achievement requires you to explore the zone, find rare creatures, treasure chests, and Loa shrines, as well as completing a series of quests. Here’s a detailed guide to help you complete Hot Tropic and unlock all the rewards.
Adventurer of Zuldazar
To earn the Adventurer of Zuldazar achievement, you must defeat all rare creatures in Zuldazar. There are 23 rares scattered throughout the zone, and some of them require specific methods to summon. You can use the following coordinates to track them down and eliminate them. We especially recommend downloading the RareScanner addon for your convenience!
Rare Locations and Coordinates:
| Rare Creature | Coordinates |
| Atal’zul Gotaka | [80.88, 21.31] |
| Dark Chronicler | [43.23, 76.37] |
| Zayoos | [47.97, 54.25] |
| Avatar of Xolotal | [49.78, 57.33] |
| Torraske the Eternal | [46.69, 65.34] |
| Kul’krazahn | [59.64, 56.56] |
| Umbra’jin | [70.33, 33.02] |
| Hakbi the Risen | [42.11, 36.14] |
| Warcrawler Karkithiss | [44.25, 25.21] |
| Daggerjaw | [74.33, 38.96] |
| Kiboku | [75.62, 36.25] |
| Tambano | [77.70, 10.81] |
| Gahz’ralka | [64.28, 32.67] |
| Syrawon the Dominus | [53.80, 44.84] |
| Lei-zhi | [58.80, 74.21] |
| Bloodbulge | [59.68, 18.22] |
| Kandak | [68.77, 46.80] |
| Golrakahn | [74.12, 28.49] |
| Darkspeaker Jo’la | [65.36, 10.20] |
| Vukuba | [62.16, 46.20] |
| Murderbeak | [60.72, 66.11] |
| G’Naat | [80.02, 35.98] |
| Bramblewing | [66.63, 32.40] |
Treasures of Zuldazar
For the Treasures of Zuldazar achievement, you will need to find and loot 14 one-time treasures scattered around Zuldazar. Some treasures are hidden or require special conditions to be accessed. Below are the locations of all the treasures.
Treasure Locations and Coordinates:
| Treasure | Coordinates | Description |
| Offering of the Chosen | [54.09, 31.50] | To the right, second floor of the building. |
| Spoils of Pandaria | [51.71, 86.90] | The bottom floor of the ship. |
| Warlord’s Cache | [49.48, 65.26] | Top of the ship. |
| Da White Shark’s Bounty | [59.22, 88.83] | Event: Stay close to the NPC and kill them when they appear. |
| Cache of Secrets | [43.27, 27.46] | Hidden inside a cave behind the waterfall. |
| Witch Doctor’s Hoard | [64.73, 21.70] | The path starts from the east side of the hill. |
| Gift of the Brokenhearted | [51.43, 26.61] | Not visible on the map; look for a hidden location. |
| Dazar’s Forgotten Chest 1 | [49.61, 37.65] | Enter the Temple of the Prophet, then turn right to find the chest. |
| Dazar’s Forgotten Chest 2 | [49.34, 38.72] | Follow the road and take the stairs up to reach this chest. |
| Dazar’s Forgotten Chest 3 | [44.03, 37.97] | Take the Golden Road up near the dungeon entrance to find this chest. |
| Dazar’s Forgotten Chest 4 | [41.00, 33.19] | The path is located behind the waterfall. |
| Dazar’s Forgotten Chest 5 | [38.79, 34.43] | Follow the road to find the chest. |
| The Exile’s Lament | [71.16, 17.67] | Enter the cave near the coordinates to find the treasure. |
| Riches of Tor’nowa | [52.97, 47.22] | Jump down from the road to access this treasure. |
Additional Coordinates for Reference:
- Offering of the Chosen: [38.3, 7.3] (Another location in Zuldazar)
- Spoils of Pandaria: [21.4, 27.2]
- Cache of Secrets: [44.5, 26.9]
- Warlord’s Cache: [49.7, 26.3]
- The Exile’s Lament: [71.2, 17.6] (Cave entrance)
- Riches of Tor’nowa: [52.6, 47.4] (Spot to jump down from)
Fixed TomTom Coordinates:
These coordinates are ready for use with TomTom:
- Offering of the Chosen: /way Zuldazar 54.09 31.50 (To the right, second floor)
- Spoils of Pandaria: /way Zuldazar 51.71 86.90 (Bottom floor of the ship)
- Warlord’s Cache: /way Zuldazar 49.48 65.26 (Top of the ship)
- Witch Doctor’s Hoard: /way Zuldazar 64.73 21.70 (Path starts from the east side of the hill)
- Gift of the Brokenhearted: /way Zuldazar 51.43 26.61 (Not visible on the map)
- Dazar’s Forgotten Chest 1: /way Zuldazar 49.61 37.65 (Enter Temple of the Prophet and turn right)
- Dazar’s Forgotten Chest 2: /way Zuldazar 49.34 38.72 (Take the stairs up and follow the road)
- Dazar’s Forgotten Chest 3: /way Zuldazar 44.03 37.97 (Take the Golden Road up near dungeon entrance)
- Dazar’s Forgotten Chest 4: /way Zuldazar 41.00 33.19 (Path behind the waterfall)
- Dazar’s Forgotten Chest 5: /way Zuldazar 38.79 34.43 (Follow the road to find it)
- The Exile’s Lament: /way Zuldazar 71.16 17.67 (Cave)
- Riches of Tor’nowa: /way Zuldazar 52.97 47.22 (Jump down from the road)
Coordinates That Do Not Work With TomTom:
The following coordinates don’t work with TomTom and require manual navigation:
- Da White Shark’s Bounty: /way Dazar’alor 59.22 88.83 (Event, stay close and kill NPC)
- Cache of Secrets: /way Dazar’alor 43.27 27.46 (Cave behind the waterfall)
Loa Expectations
The Loa Expectations achievement involves obtaining all Loa buffs available in Zandalar (Like Boon of Bwonsamdi). You can unlock these buffs by completing various quests across Zandalar, and once you’ve gained access to them, you can visit the Zanchul Temple in Dazar’alor to interact with each shrine.
This achievement can only be completed by Horde characters. You can track the progress of all Loas by checking the status of another achievement Zandalar Forever!, if you complete this achievement you will have all Loas except Kimbul. To get access to Kimbul Shrine you need to complete They Came From The Sea questline which ends in Mark of the Loa quest. After that, you will have access to Kimbul Shrine.
Note: Many players report having bugs with this achievement. The bug seems to be connected to player characters changing factions from Alliance to Horde and vice-versa. We strongly recommend doing these achievements on Horde characters which had no history of changing factions.
Loa Shrine Locations and Coordinates
| Loa Shrine | Coordinates |
| Council Chambers | [40.9, 11.2] |
Bow to Your Masters
For the Bow to Your Masters achievement, you need to bow to all the Zandalari Loas. This includes major Loas like Pa’ku, Gonk, and Bwonsamdi, and also some special Loas that appear throughout Zandalar.
The easiest way to complete this achievement is by finishing the main Zandalar storyline, which will unlock most of the Loas. The remaining Loas, Kimbul, Jani, and Rezan, require additional steps like completing side quests or entering dungeons. We’ve talked about Kimbul in previous achievement. You can /bow to Jani by finding any of its trash piles, with an easy location at the coordinates below. To /bow to Rezan, enter the Atal’Dazar dungeon on any difficulty, run to him without aggroing, and /bow for achievement credit.
Note: Many players report having bugs with this achievement. The bug seems to be connected to player characters changing factions from Alliance to Horde and vice-versa. We strongly recommend doing these achievements on Horde characters which had no history of changing factions.
Loa Locations and Coordinates:
| Loa | Coordinates |
| Jani | [53.10, 31.64] |
| Pa’ku | [70.79, 49.91] |
| Gonk | [49.22, 44.42] |
| Krag’wa | [75.44, 56.22] |
| Bwonsamdi | [39.42, 24.74] |
| Akunda | [53.18, 91.56] |
| Sethraliss | [27.04, 52.58] |
| Kimbul | [57.00, 10.88] |
Get Hek’d
The Get Hek’d achievement involves completing a series of tasks for Jani herself, the trickster Loa. You must locate and interact with 12 Mysterious Trash piles found across Zandalar. Each pile gives you a task, such as looting items or killing mobs.
After finishing the introduction quests, you need to find 12 Mysterious Trash piles for Jani around Zandalar. At each pile, you’ll either complete a small quest or collect something from nearby mobs to give to Jani. Here’s a list of the tasks and locations:
Jani’s Trash Pile Locations and Objectives
| Task | Coordinates |
|---|---|
| The Great Hat Robbery | [61.96, 46.89] |
| Big Hunter Mon | [66.21, 16.62] |
| Golden Ravasaur Egg | [71.69, 41.28] |
| Feathered Serpent Scale | [62.73, 20.58] |
| Taking the Loa Road | [53.99, 74.09] |
| Naz’wathan Relic | [68.58, 32.78] |
| Snapjaw Tail | [34.00, 75.07] |
| Vilescale Pearl | [80.95, 46.82] |
| Saurid Surprise | [42.15, 72.03] |
| Polished Ringhorn Hoof | [56.24, 15.26] |
| Sturdy Redrock Jaw | [49.33, 84.35] |
| Charged Ranishu Antennae | [46.94, 46.57] |
A Loa of a Tale
The A Loa of a Tale achievement requires you to collect all the Tales of the Loa books in Zandalar. These books can be found in various locations throughout the zone, and some of them are hidden inside Dazar’alor, so be sure to check inside the city.
Tale Locations and Coordinates
| Tale | Coordinates |
| Tales of de Loa: Rezan | [43.74, 76.74] |
| Tales of de Loa: Shadra | [47.84, 28.84] |
| Tales of de Loa: Jani | [48.54, 54.60] |
| Tales of de Loa: Pa’ku | [49.00, 41.29] |
| Tales of de Loa: Gonk | [51.69, 28.25] | |
| Tales of de Loa: Torcali | [67.28, 17.62] |
| Tales of de Loa: Gral | [75.5, 67.6] |
| Tales of de Loa: Bwonsamdi | [39.12, 38.65] |
| Tales of de Loa: Hir’eek | [39.57, 54.67] |
| Tales of de Loa: Krag’wa | [58.92, 48.65] |
| Tales of de Loa: Torga | [72.85, 7.60] |
| Tales of de Loa: Kimbul | [27.70, 62.12] |
| Tales of de Loa: Akunda | [42.22, 62.11] |
Eating Out of the Palm of My Tiny Hand
The Eating Out of the Palm of My Tiny Hand achievement requires you to feed Brutosaurs their favorite food. You’ll need to buy specific items from vendors and then feed them to the Brutosaurs found in Zuldazar, Nazmir, and Vol’dun.
Vendor and Brutosaur Locations
| Vendor | Coordinates | Brutosaur | Coordinates | Location | Favourite Food |
| Golkada | [71.2, 29.5] | Irritable Maka’fon | [64.2, 39.3] | Zuldazar | Extra-dry Fruitcake |
| Blind Wunja | [35.4, 55.3] | Goramor | [32.4, 35.1] | Nazmir | Primitive Watermelon |
| Rikati | [40.4, 55.4] | Ol’ Stompy | [61.9, 9.5] | Vol’dun | Snake on a Stick |
Raptari Rider
The Raptari Rider achievement requires you to maintain the Speed of Gonk buff for 3 minutes. This buff comes from interacting with Totems of Gonk around Zuldazar. Simply run around and renew the buff to complete this achievement. No need to seek different totems for this achievement.
Totem Locations and Coordinates
| Totem | Coordinates |
| Gonk Totem | [49.92, 33.17] |
Sound Off in Tiragarde Sound
The Sound Off achievement in World of Warcraft requires completing several smaller achievements in Tiragarde Sound, a zone in Kul Tiras. Below are the details for each achievement you need to complete, including rare mob locations, treasure locations, quests, and more. Follow these steps to finish the Sound Off achievement and earn your rewards.
Adventurer of Tiragarde Sound
To earn the Adventurer of Tiragarde Sound achievement, you need to defeat all 33 rare mobs in the zone. Some of these rares are triggered by specific actions or require a special summoning method. Here’s a list of their locations:
| Rare Mob | Coordinates |
| Auditor Dolp | [75.14, 78.48] |
| Bashmu | [34.01, 30.29] |
| Blackthorne | [84.70, 73.85] |
| Captain Wintersail | [38.42, 20.66] |
| Fowlmouth | [89.78, 78.15] |
| Gulliver | [57.81, 57.05] |
| Lumbergrasp Sentinel | [68.35, 20.88] |
| Imperiled Merchants | [64.29, 19.31] |
| P4-N73R4 | [65.17, 64.60] |
| Raging Swell | [64.80, 59.25] |
| Saurolisk Tamer Mugg | [58.54, 15.13] |
| Shiverscale the Toxic | [55.70, 33.18] |
| Squirgle of the Depths | [49.35, 36.13] |
| Tempestria | [60.80, 17.27] |
| Teres | [63.83, 49.15] |
| Totes | [46.39, 19.97] |
| Barman Bill | [76.21, 83.05] |
| Black-Eyed Bart | [56.67, 69.94] |
| Broodmother Razora | [83.36, 44.13] |
| Carla Smirk | [72.83, 81.46] |
| Foxhollow Skyterror | [59.98, 22.75] |
| Kulett the Ornery | [48.07, 23.34] |
| Maison the Portable | [58.09, 48.70] |
| Merianae | [43.80, 17.71] |
| Pack Leader Asenya | [39.46, 15.17] |
| Ranja | [69.09, 62.73] |
| Sawtooth | [76.02, 28.87] |
| Squacks | [81.00, 81.66] |
| Sythian the Swift | [66.70, 14.27] |
| Tentulos the Drifter | [55.09, 50.56] |
| Tort Jaw | [70.03, 55.67] |
| Twin-hearted Construct | [70.27, 12.83] |
| Guardian of the Spring | [61.51, 52.33] |
Treasures of Tiragarde Sound
The Treasures of Tiragarde Sound achievement requires you to find and loot 15 unique treasures. Some treasures drop from pirates, while others are hidden in chests. Here’s where to find them:
| Treasure | Coordinates |
| Hay Covered Chest | [61.51, 52.33] |
| Precarious Noble Cache | [56.03, 33.19] |
| Scrimshaw Cache | [72.48, 21.69] |
| Soggy Treasure Map | [54.99, 46.08] |
| Yellowed Treasure Map | [90.50, 75.51] |
| Cutwater Treasure Chest | [72.49, 58.14] |
| Forgotten Smuggler’s Stash | [61.78, 62.75] |
| Faded Treasure Map | [29.22, 25.34] |
| Singed Treasure Map | [48.98, 37.59] |
| Secret of the Depths 1 | [55.97, 91.26] |
| Secret of the Depths 2 | [61.52, 77.72] |
| Secret of the Depths 3 | [70.32, 85.76] |
| Secret of the Depths 4 | [67.14, 79.82] |
| Secret of the Depths 5 | [63.07, 81.86] |
| Ominous Altar Cave | [61.51, 83.82] |
Bless the Rains Down in Freehold
To earn Bless the Rains Down in Freehold, you must hit four targets while riding a pirate bird during the World Quest Swab This! (Alliance version) Swab This! (Horde version). Alliance players can get this achievement by doing Rodrigo’s Revenge quest. This World
Quest is available for both Alliance and Horde players, though we recommend doing these achievements on Alliance characters. World Quest may not be in rotation for this day. You can ease the process by creating Raid Group with no players, by this you can postpone doing the World Quest on accident. Here are the target locations:
| Target | Coordinates |
| Banana Hoard | [76.15, 84.60] |
| Cart o’ Cutlasses | [75.05, 82.94] |
| Sweete’s Feast | [73.38, 83.92] |
| Blacktooth Brew | [76.69, 81.80] |
Sailed in Sea Minor
The Sailed in Sea Minor achievement requires you to loot 6 sea shanties scattered across Tiragarde Sound. Some are found by looting objects, while others drop from rare mobs.
| Sea Shanty | Coordinates | Source |
| Shanty of the Lively Men | [72.61, 68.53] | No |
| Shanty of Inebriation | [53.14, 17.67] | No |
| Shanty of the Black Sphere | [56.67, 69.94] | Yes, drops from Black-Eyed Bart |
| Shanty of Fruit Counting | [43.38, 25.85] | No |
| Shanty of Josephus | [76.21, 83.05] | Yes, drops from Barman Bill |
| Shanty of the Horse | [73.21, 84.14] | No |
Three Sheets to the Wind
For the Three Sheets to the Wind achievement, you need to sample a variety of Kul Tiran drinks. Most of these drinks are sold by Alliance vendors, but Horde players can either buy them through an Alliance character or find them on the Auction House. Below are the drink locations:
| Vendor | Coordinates |
|---|---|
| Vendorong Forgotten Rum Cave (Stormsong) | [49.07, 57.22] |
| Nicolas Moal (Boralus) | [58.17, 70.24] |
| Harold Atkey (Boralus) | [75.33, 14.42] |
| Joseph Stephens (Boralus) | [47.74, 47.34] |
| Ruddy the Rat (Boralus) | [69.26, 29.86] |
| Sarella Griffin (Tiragarde) | [49.79, 25.29] |
| Barkeep Cotner (Drustvar) | [21.14, 66.15] |
| Linda Deepwater (Drustvar) | [21.47, 43.60] |
| Emma Haribull (Stormsong) | [44.45, 54.19] |
Kul Tiran Up the Dance Floor
To complete the Kul Tiran Up the Dance Floor achievement, you just need to /dance with another player at the Norwington Estate Dance Floor. It’s a simple achievement that is most easily done with dedicated players. You can search for such groups in LFG, or ask for them in Discord or other forums. You can also invite your friends to the Dance Floor. The dance floor is located at:
- Norwington Estate Dance Floor: [50.53, 24.33]
The Long Con
The The Long Con achievement can only be completed by Alliance players. To unlock it, you need to finish the Freehold section of the main storyline and complete the Aged to Perfection quest from Roko, located in Freehold. After finishing the quest The Long Con, you’ll earn the achievement.
By following these steps and visiting the locations provided, you’ll complete the Sound Off achievement and get a great sense of accomplishment in Tiragarde Sound!
Bwon Voyage in Nazmir
The Bwon Voyage achievement in World of Warcraft requires completing several smaller achievements in the Nazmir zone. To finish this achievement, you need to tackle rare mobs, collect treasures, complete world quests, and more. Below are the steps for each part of the achievement, including rare mob locations, treasure spots, quests, and important in-game tasks.
Adventurer of Nazmir
To complete the Adventurer of Nazmir achievement, you must defeat all 32 rare mobs scattered across the zone. Some of these rares require special conditions or summoning methods. Use the coordinates below to track down each rare mob. We especially recommend downloading the RareScanner addon for your convenience!
Here is the list of all Nazmir rares:
| Rare Mob | Coordinates |
| Ancient Jawbreaker | [67.81, 29.72] |
| Azerite Infused Slag | [32.80, 26.90] |
| Uroku the Bound | [44.22, 48.73] |
| Chag’s Challenge | [68.10, 20.23] |
| Captain Mu’kala | [81.81, 30.57] |
| Glompmaw | [68.95, 57.47] |
| Queen Tzxi’kik | [56.66, 69.32] |
| Jax’teb the Reanimated | [45.37, 51.97] |
| Kal’draxa | [52.93, 13.40] |
| Enraged Water Elemental | [81.69, 61.05] |
| Scout Skrasniss | [58.96, 38.93] |
| Tainted Guardian | [31.44, 38.15] |
| Urn of Agussu | [38.09, 57.68] |
| Wardrummer Zurula | [48.98, 50.82] |
| Za’amar the Queen’s Blade | [38.77, 29.08] |
| Lo’kuno | [78.08, 44.51] |
| Azerite Infused Elemental | [54.13, 80.91] |
| Blood Priest Xak’lar | [43.17, 90.46] |
| King Kooba | [53.69, 42.87] |
| Corpse Bringer Yal’kar | [41.66, 53.44] |
| Gwugnug the Cursed | [33.53, 87.08] |
| Gutrip the Hungry | [32.34, 43.32] |
| Infected Direhorn | [25.44, 77.68] |
| Juba the Scarred | [28.00, 34.08] |
| Krubbs | [76.03, 36.54] |
| Bajiatha | [42.80, 59.49] |
| Scrounger Patriarch | [58.43, 10.14] |
| Totem Maker Jash’ga | [49.45, 37.14] |
| Venomjaw | [29.70, 51.07] |
| Xu’ba the Bone Collector | [36.55, 50.53] |
| Zanxib the Engorged | [38.88, 71.48] |
| Mala’kili and Rohnkor | [52.60, 54.89] |
Treasures of Nazmir
The Treasures of Nazmir achievement requires you to collect 10 different treasures scattered across the zone. These treasures are often hidden in chests or require certain actions to unlock. Here are the treasure locations with coordinates:
| Treasure | Coordinates |
| Lucky Horace’s Lucky Chest | [77.90, 36.34] |
| Cursed Nazmani Chest | [42.27, 50.56] |
| Lost Nazmani Treasure | [62.10, 34.87] |
| Shipwrecked Chest | [66.79, 17.35] |
| Swallowed Naga Chest | [76.82, 62.20] |
| Partially-Digested Treasure | [77.88, 46.35] |
| Cleverly Disguised Chest | [35.66, 85.60] |
| Offering to Bwonsamdi | [42.77, 26.20] |
| Venomous Seal | [46.23, 82.92] |
| Wunja’s Trove | [35.45, 54.98] |
Carved in Stone, Written in Blood
The Carved in Stone, Written in Blood achievement requires you to locate four Blood Troll Tablets around Nazmir. These are all found in the Heart of Darkness area in central Nazmir. Use the coordinates below to find each one.
| Tablet Name | Coordinates |
| Ancient Nazmani Tablet | [56.35, 57.27] |
| Cracked Tablet | [51.26, 85.11] |
| Weathered Nazmani Tablet | [43.36, 48.10] |
| Fractured Tablet | [42.56, 57.11] |
It’s Really Getting Out of Hand
To complete the It’s Really Getting Out of Hand achievement, you need to finish the World Quest Getting Out of Hand in Nazmir. This quest gives you a Scroll of Fate’s Hand that transforms you into the Hand of Fate. Your goal is to complete the task within 20 seconds.
Because this World Quest rotates, players have been completing it by unique methods. You can learn more about this achievement and further phenomena of it in this article.
Eat Your Greens
The Eat Your Greens achievement requires you to loot several plants scattered around Nazmir. These plants give you buffs when looted. Here are the locations of the plants you need to find:
| Plant Name | Coordinates |
| Saurolisk Tail Nibs | [30.28, 52.69] |
| Gnarl Root | [27.99, 35.32] |
| Krag’wa’s Ire | [52.58, 35.80] |
| Bwonsamdi’s Tears | [55.61, 74.68] |
| Sapphire Amaraina | [78.77, 35.13] |
| Stonebloom | [54.49, 56.07] |
Hoppin’ Sad
The Hoppin’ Sad achievement requires you to find and return 10 Lost Spawn of Krag’wa in Nazmir. These creatures are hidden in caves or small areas around the zone. Here are the locations of all 10:
| Lost Spawn of Krag’wa | Coordinates |
| Krag’wa #1 | [65.6, 50.9] |
| Krag’wa #2 | [69.1, 57.9] |
| Krag’wa #3 | [56.1, 64.9] |
| Krag’wa #4 | [45.6, 91.0] |
| Krag’wa #5 | [26.8, 80.4] |
| Krag’wa #6 | [24.2, 91.6] |
| Krag’wa #7 | [21.7, 69.3] |
| Krag’wa #8 | [33.5, 61.6] |
| Krag’wa #9 | [25.6, 40.6] |
| Krag’wa #10 | [52.8, 42.9] |
Revenge is Best Served Speedily
The Revenge is Best Served Speedily achievement is for Horde players. You need to complete the World Quest Revenge of Krag’wa in under 45 seconds. The easiest way to complete this achievement is by using Krag’wa’s abilities to quickly defeat enemies. The challenge is in waiting for the World Quest to appear, as it rotates too. Once it’s available, defeat the mobs as quickly as possible, this should not be hard with scaling.
A Most Efficient Apocalypse
This achievement is for Horde players as well. You need to complete the World Quest Cancel the Blood Troll Apocalypse in under 30 seconds. The key to completing this achievement is to avoid bombing the same location twice. Try to plan your route carefully to bomb different areas efficiently.
You can check this YouTube video to learn more about this World Quest
By following all of these steps and coordinates, you will complete the Bwon Voyage achievement in Nazmir and check-marking another location for the I’m On Island Time meta-achievement!
Songs of Storms in Stormsong Valley
The Songs of Storms achievement in World of Warcraft requires completing several achievements in Stormsong Valley. These include defeating rare mobs, collecting treasures, completing quests, and finding unique items in the zone. Here’s a step-by-step guide to help you complete the achievements for this zone.
Adventurer of Stormsong Valley
The Adventurer of Stormsong Valley achievement requires you to kill all rare mobs in the zone. Some rares require special summoning conditions, so be sure to check your map and coordinates. Here are the locations for the rare mobs in Stormsong Valley:
| Rare Mob | Coordinates |
| Song Mistress Dadalea | [70.70, 33.28] |
| Seabreaker Skoloth | [34.13, 38.44] |
| The Lichen King | [51.79, 78.92] |
| Slickspill | [41.53, 28.50] |
| Galestorm | [70.77, 54.64] |
| Kickers | [31.48, 60.99] |
| Poacher Zane | [34.75, 67.98] |
| Grimscowl the Harebrained | [62.21, 73.57] |
| Croaker | [62.67, 34.07] |
| Crushtacean | [51.44, 56.75] |
| Vinespeaker Ratha | [49.65, 70.05] |
| Haegol the Hammer | [35.33, 78.26] |
| Ice Sickle | [62.88, 83.99] |
| Whiplash | [47.31, 65.89] |
| Wagga Snarltusk | [42.41, 75.07] |
| Osca the Bloodied | [41.93, 62.39] |
| Taja the Tidehowler | [60.32, 46.44] |
| Severus the Outcast | [22.15, 72.83] |
| Sabertron | [34.30, 32.20] |
| Ragna | [41.11, 74.93] |
| Broodmother | [29.25, 69.45] |
| Whirlwing | [46.80, 41.98] |
| Foreman Scripps | [64.50, 65.80] |
| Pinku’shon | [38.48, 52.33] |
| Deepfang | [53.07, 50.63] |
| Corrupted Tideskipper | [66.48, 48.62] |
| Dagrus the Scorned | [68.30, 39.58] |
| Strange Mushroom Ring | [53.07, 69.09] |
| Squall | [57.55, 74.32] |
| Captain Razorspine | [47.27, 65.82] |
| Sister Absinthe | [62.24, 56.78] |
| Nestmother Acada | [43.35, 45.26] |
| Sandfang | [72.70, 60.54] |
| Jakala the Cruel | [53.35, 64.41] |
| Sandscour | [72.54, 50.52] |
| Reinforced Hullbreaker | [68.74, 51.47] |
| Pest Remover Mk. II | [40.14, 37.32] |
| Beehemoth | [67.21, 75.25] |
Treasures of Stormsong Valley
To unlock the Treasures of Stormsong Valley achievement, you need to loot all one-time treasures scattered throughout the zone. Each treasure may have different requirements, such as being hidden or needing a special item to open. Below are the locations of these treasures:
| Treasure | Coordinates |
| Weathered Treasure Chest | [66.92, 12.03] |
| Frosty Treasure Chest | [48.96, 84.07] |
| Hidden Scholar’s Chest | [59.91, 39.07] |
| Discarded Lunchbox | [58.21, 63.68] |
| Venture Co. Supply Chest | [36.69, 23.23] |
| Old Ironbound Chest | [42.85, 47.23] |
| Sunken Strongbox | [67.22, 43.21] |
| Smuggler’s Stash | [58.60, 83.88] |
| Carved Wooden Chest | [44.44, 73.53] |
| Forgotten Chest | [46.00, 30.69] |
Be sure to visit these locations and loot the chests to complete the achievement.
Clever Use of Mechanical Explosives
For the Clever Use of Mechanical Explosives achievement, you need to use a Sporonite Bomb on the rare The Lichen King. To get a Sporonite Bomb, you must first collect Truffles in Stormsong Valley using a Pig Nose. Here’s how to do it:
- Obtain a Pig Nose by looting the Carved Wooden Chest treasure. You can also purchase them from Hobbs in Brennadam or Sanya Wraithschilde in Warfang Hold.
- Once you have a Pig Nose, search for Truffles around the zone. When you find them, collect them and use them to get a Sporonite Bomb.
- Once you have the Sporonite Bomb, go to The Lichen King and use the bomb on him during combat.
| Location | Coordinates |
| The Lichen King | [51.8, 79.6] |
These Hills Sing
The These Hills Sing achievement requires you to enjoy an Unforgettable Luncheon in a special location. Here’s how to get it done:
- First, you need to obtain An Unforgettable Luncheon. You can find this by looting the Discarded Lunchbox treasure or purchasing it from “Nasty” Buck or Sanya Wraithschilde in Brennadam or Warfang Hold.
- Go to the special location, a mountain overlooking Briarback Haul, with at least 2 empty bag slots.
- Dismount and open your Unforgettable Luncheon to complete the achievement.
| Location | Coordinates |
| Discarded Lunchbox Treasure | [58.21, 63.68] |
| “Nasty” Buck | [58.63, 70.27] |
| Sanya Wraithschilde | [50.93, 33.71] |
| Special Place Location | [41.25, 69.53] |
Legends of the Tidesages
To complete the Legends of the Tidesages achievement, you need to find and read all the volumes of the Legends of the Tidesages books scattered around Stormsong Valley. Here are the locations of the books:
| Volume Number | Coordinates |
| Volume 1 | [49.51, 80.90] |
| Volume 2 | [59.02, 59.54] |
| Volume 3 | [31.95, 72.91] |
| Volume 4 | [33.81, 33.23] |
| Volume 5 | [56.02, 38.53] |
| Volume 6 | [44.18, 36.60] |
| Volume 7 | [62.08, 30.22] |
| Volume 8 | [75.07, 31.13] |
Every Day I’m Truffling
For the Every Day I’m Truffling achievement, you need to collect all four Stormsong Valley truffle buffs at the same time. Here’s how to do it:
- Use a Pig Nose to collect Truffles around Stormsong Valley. These truffles are small and hard to spot, so it’s recommended to reduce your Ground Clutter settings to 1 for better visibility.
- The four truffles are: Magic Truffle, Violet Truffle, Valley Truffle, and Turbo Truffle.
- The Turbo Truffle will give you a buff when you loot it. Once you have the Turbo Truffle buff, eat the other truffles in the following order:
- Violet Truffle → Valley Truffle → Magic Truffle.
Make sure you collect all the truffles before eating them to complete the achievement.
Let’s Bee Friends
This achievement is for Alliance players only. Let’s Bee Friends requires you to feed Bumbles the bee every day for 7 days. To start:
- Kill Flowing Honey near Mildenhall Meadery until the Annealed Honey Amulet drops.
- Take the Annealed Honey Amulet to Rosaline Mildenhall in Boralus, and she will give you Rosaline’s Letter.
- Bring the letter to Ancel Mildenhall at Mildenhall Meadery, and he will give you the quest Bumbles the Bee. Complete this quest to unlock the daily quests.
- Feed Bumbles for 7 days to earn the achievement. You do not need to do this in consecutive days.
Deadliest Cache
The Deadliest Cache achievement is also for Alliance players. To complete it:
- Go to Thresher’s Wharf in Stormsong Valley and start the questline with Deadliest Cache: Reel Big Fish.
- Complete the final quest, Deadliest Cache: Carpe Diem, to earn the achievement.
Dune Squad in Vol’dun
Tiragarde Sound is a beautiful but dangerous zone filled with rares, treasures, and other challenges that can lead you to valuable achievements. The achievements in this area include killing rares, collecting treasures, and completing various quests. Below is a breakdown of the different achievements you can earn in Tiragarde Sound, with detailed instructions on how to complete them.
Adventurer of Vol’dun
To earn the Adventurer of Tiragarde Sound achievement, you need to kill all of the rares scattered across the zone. Some rares can be found easily, while others may require specific methods to summon. The following is a list of rare locations with coordinates for your convenience.
Rare Locations:
| Rare Name | Coordinates |
| Ak’tar | [50.37, 81.60] |
| Azer’tor | [47.81, 87.94] |
| Bloated Krolusk | [49.06, 49.89] |
| Captain Stef “Marrow” Quin | [41.41, 23.92] |
| Enraged Krolusk | [61.43, 38.43] |
| Hivemother Kraxi | [53.81, 51.21] |
| Jungleweb Hunter | [60.56, 17.56] |
| King Clickyclack | [37.37, 40.50] |
| Relic Hunter Hazaak | [49.06, 71.87] |
| Scorpox | [32.71, 65.22] |
Keep in mind that these rares may not always be up, and some may require specific conditions to spawn. Use the map to help you navigate the zone more efficiently.
Treasures of Tiragarde Sound
The Treasures of Tiragarde Sound achievement requires you to find and loot several one-time treasures scattered across the zone. Some treasures can be found in hidden spots or require certain actions to reveal them.
Treasure Locations:
| Treasure Name | Coordinates |
| Ashvane Spoils | [46.59, 88.01] |
| Lost Explorer’s Bounty | [49.78, 79.40] |
| Stranded Cache | [44.51, 26.15] |
| Zem’lan’s Buried Treasure | [29.38, 87.47] |
| Deadwood Chest | [40.57, 85.74] |
| Grayal’s Last Offering | [48.20, 64.69] |
| Sandfury Reserve | [47.19, 58.46] |
| Excavator’s Greed | [56.69, 64.69] |
These treasures are one-time collectibles, so make sure to loot them when you see them.
Scavenger of the Sands
For the Scavenger of the Sands achievement, you need to find and loot various junk items scattered throughout Tiragarde Sound. These items are marked on the ground and can be picked up without any combat involved. Once you loot them, you can vendor them safely.
Junk Item Locations:
| Item Name | Coordinates |
| Jason’s Rusty Blade | [56.29, 70.11] |
| Julie’s Cracked Dish | [53.56, 89.81] |
| Ofer’s Bound Journal | [26.79, 52.91] |
| Julien’s Left Boot | [52.43, 14.39] |
| Zach’s Canteen | [47.06, 75.77] |
| Rachel’s Flute | [64.88, 36.32] |
| Portrait of Commander Martens | [45.22, 91.14] |
| Ian’s Empty Bottle | [36.21, 78.38] |
Loot all the items on the list to complete this achievement.
Dune Rider
The Dune Rider achievement requires you to ride all five of the rickety planks in Tiragarde Sound. These planks can be found on sand dunes, and you need to fly over them and click on each one to get credit.
Rickety Plank Locations:
| Plank Number | Coordinates |
| Rickety Plank #1 | [38.03, 70.97] |
| Rickety Plank #2 | [32.12, 69.08] |
| Rickety Plank #3 | [47.90, 62.49] |
| Rickety Plank #4 | [45.78, 63.58] |
| Rickety Plank #5 | [54.90, 21.36] |
Fly to these coordinates and click on the planks to complete the achievement.
Scourge of Zem’lan
To earn the Scourge of Zem’lan achievement, you must kill 20 pirates at the Port of Zem’lan while Ol’ Bonebite is by your side. To summon Ol’ Bonebite, you need to activate three buffs by interacting with objects in the area.
Buff Locations:
| Buff Name | Coordinates |
| Pirate Hat | [37.13, 78.11] |
| Zem’lan Blackeye Brew | [36.80, 79.90] |
| Treasure Map | [35.80, 76.65] |
Once you have all three buffs, Ol’ Bonebite will spawn and help you fight the pirates. Quickly kill 20 pirates to complete the achievement.
Adept Sandfisher
The Adept Sandfisher achievement requires you to fish Sandworm Scales in Tiragarde Sound. You can only do this while participating in the Sandfishing World Quest. Sandworm Scales drop from Ravenous Sandworms, which you will catch during the World Quest.
Tips:
- Make sure to avoid looting Sandworm Fangs, as they are required for a separate part of the World Quest.
- If you want to avoid completing the World Quest while working on this achievement, join a raid group to prevent credit from being given towards the World Quest.
Champion of the Vulpera
For the Champion of the Vulpera achievement, you need to rescue 10 Vulpera prisoners in Tiragarde Sound. The prisoners can be found during several quests, including Ready to Riot, The Master Key, and the World Quest Abandoned in the Burrows.
Tips:
- The most reliable way to complete this achievement is by waiting for the Abandoned in the Burrows World Quest to be available.
- Join a raid group to rescue prisoners without earning credit for the World Quest.
Scavenge like a Vulpera
The Scavenge like a Vulpera achievement requires you to complete a digsite in Tiragarde Sound while disguised as a Vulpera. To do this, you need to be in the Vulpera for a Day buff, which you can get by completing a World Quest in the zone.
Steps:
- Make sure you have Battle for Azeroth Archaeology learned.
- Wait for an Alliance Assault to be up in Tiragarde Sound.
- Look for a digsite to spawn in the zone and head there.
- Talk to Nisha to get the Vulpera for a Day buff.
- Complete the digsite while you have the buff.
Be careful not to leave Tiragarde Sound while the buff is active, or it will be lost. If you do, you can talk to Nisha again to get it back.
By following these steps and using the coordinates provided, you should be able to complete all the achievements in Tiragarde Sound. Happy adventuring!
When the Drust Settles in Drustvar
In World of Warcraft, the “When the Drust Settles” achievement requires you to complete several smaller achievements in Drustvar, part of the Kul Tiras zone. Below is a detailed guide to help you finish all the requirements.
Adventurer of Drustvar
This achievement requires you to defeat all the rare mobs scattered around Drustvar. Some rares can be found by summoning them, while others appear randomly. To help you find them, follow the coordinates listed below.
Rare Locations in Drustvar
| Rare Name | Coordinates |
| Betsy | [59.93, 34.66] |
| Barbthorn | [58.90, 17.90] |
| Bonesquall | [66.58, 50.68] |
| Longfang & Breakwater | [59.24, 55.26] |
| Beastly Ritual Skull | [52.07, 46.97] |
| Whargarble the Ill-Tempered | [65.00, 22.66] |
| Grozgore | [50.84, 20.40] |
| Beshol | [51.35, 29.57] |
| Emily Mayville | [63.41, 40.20] |
| Balethorn | [56.57, 29.24] |
| Executioner Blackwell | [31.01, 18.31] |
| Hyo’gi | [22.93, 47.96] |
| Arvon the Betrayed | [34.96, 69.21] |
| Avalanche | [43.80, 88.28] |
| Gorged Boar | [29.20, 24.88] |
| Fungi Trio | [24.24, 21.93] |
| Hexed Hunter | [30.47, 63.44] |
| Quillrat Matriarch | [66.57, 42.59] |
| Vicemaul | [72.78, 60.36] |
| Gluttonous Yeti | [62.95, 69.38] |
| Ancient Sarcophagus | [43.46, 36.11] |
| Rimestone | [59.55, 71.81] |
| Seething Cache | [67.93, 66.83] |
| Gorehorn | [57.42, 43.80] |
| Talon | [32.20, 40.36] |
| Nevermore | [59.87, 44.78] |
| Bilefang Mother | [35.48, 32.90] |
| Deathcap | [18.74, 60.57] |
| Captain Leadfist | [28.05, 14.25] |
| Arclight | [29.05, 68.63] |
| Haywire Golem | [23.42, 29.75] |
| Sister Martha | [33.24, 57.65] |
| Braedan Whitewall | [26.93, 59.62] |
Treasures of Drustvar
To complete this achievement, you need to collect all one-time treasures found throughout Drustvar. Many of these treasures require specific conditions to appear, such as unlocking areas or defeating certain enemies.
Treasure Locations in Drustvar
| Treasure Name | Coordinates |
| Web-Covered Chest | [33.71, 30.08] |
| Runebound Cache | [63.30, 65.85] |
| Runebound Coffer | [33.68, 71.73] |
| Bespelled Chest | [55.60, 51.81] |
| Enchanted Chest | [25.47, 24.16] |
| Merchant’s Chest | [25.75, 19.95] |
| Runebound Chest | [44.22, 27.70] |
| Hexed Chest | [18.51, 51.33] |
| Ensorcelled Chest | [67.76, 73.67] |
| Stolen Thornspeaker Cache | [24.34, 48.29] |
Sausage Sampler
To complete this achievement, you need to sample sausages from different vendors in Drustvar. These vendors are typically hostile to Horde players, but you can still complete the achievement if you trade sausages from an Alliance character. Alternatively, these sausages are available on the Auction House.
Sausage Vendors
| Vendor Name | Location | Sausage Sold |
| Charisse Payton | Boralus [70.5, 21.1] | Rosco Fryer’s Mostly-Meat Brat, Goldshire Farms Smoked Sausage, Roland’s Famous Frankfurter, Timmy Gene Sunrise Pork |
| Alisha Darkwater | Falconhurst [26.7, 72.5] | Fried Boar Sausage |
Better, Faster, Stronger
For this achievement, you need to drink Mysterious Brews around the Crimson Forest in Drustvar. Each Mysterious Brew grants a random effect, which can either be positive (Witch’s Boon) or negative (Witch’s Curse). You must collect all four positive Witch’s Boon effects and the negative Witch’s Curse: Newt.
Mysterious Brew Locations
| Location Name | Coordinates |
| Mysterious Brew 1 | [18.83, 56.81] |
| Mysterious Brew 2 | [18.98, 53.61] |
| Mysterious Brew 3 | [19.00, 58.28] |
| Mysterious Brew 4 | [19.02, 59.22] |
| Mysterious Brew 5 | [19.19, 54.19] |
| Mysterious Brew 6 | [19.88, 57.35] |
| Mysterious Brew 7 | [19.97, 54.62] |
| Mysterious Brew 8 | [19.98, 55.15] |
| Mysterious Brew 9 | [20.02, 55.05] |
Drust the Facts, Ma’am
This achievement requires you to find and read all Drust Stele scattered around Drustvar. These are clickable tables on the ground. Visit each location and interact with the Stele to earn credit.
Drust Stele Locations
| Stele Name | Coordinates |
| The Circle | [37.12, 63.80] |
| The Tree | [27.35, 48.33] |
| Sacrifice | [27.60, 57.60] |
| The Cycle | [19.06, 57.87] |
| The Flayed Man | [56.55, 85.83] |
| The Ritual | [50.77, 73.71] |
Cursed Game Hunter
For this achievement, you need to kill one of each cursed creature in Drustvar. Below are the creatures you need to hunt and their locations.
Cursed Creatures Locations
| Creature Type | Coordinates |
|---|---|
| Thornclaws (Hexed Thornclaw) | [32.21, 61.70] |
| Goats (Hexed Craghopper) | [53.87, 20.72] |
| Deer (Hexcrazed Doe) | [56.80, 41.48] |
| Pigs (Fallhaven Pig) | [58.62, 34.61] |
| Wolves (Bewitched Darkmaw) | [58.95, 29.92] |
| Ravens (Bonepicker Raven) | [53.17, 36.02] |
Everything Old Is New Again
Only Alliance characters can complete this achievement, which involves finding and returning relics of the Order of the Embers to the Gol Var ruins in Drustvar. You can access the Gol Var ruins after completing the Drustvar storyline.
Relic Locations
| Relic Name | Coordinates |
| Order of Embers Hat | [55.43, 27.14] |
| Order of Embers Crossbow | [35.52, 51.87] |
| Order of Embers Knife | [32.58, 58.91] |
| Order of Embers Flask | [64.87, 67.79] |
Gol Var Cave Entrance
| Location Name | Coordinates |
| Gol Var Cave | [44.83, 27.41] |
Loremaster achievements
Loremaster achievements require completing all major questlines in specific locations. For the Battle for Azeroth (BfA) expansion, you’ll need to play through these quests with both an Alliance character and a Horde character to unlock the achievement.
We won’t provide tips to skip quests or speed through them, as these are designed to be straightforward and are easily tracked using your map. Additionally, if you’ve been working on other achievements, you may already have some progress toward this goal.
Take the time to immerse yourself in the rich lore and captivating stories of the BfA expansion as you complete these quests for Honeyback Hivemother!
Conclusion
Earning the Honeyback Hivemother mount is no easy task, but the challenge makes the reward even more valuable. Once you’ve obtained the Honeyback Hivemother, consider setting your sights on Jani’s Trashpile mount as your next goal. It is another large milestone so if you currently lack time you can always buy A Farewell to Arms boost.
Stay patient, complete quests at your own pace, and you’ll achieve the Honeyback Hivemother mount before you know it!
Have you tried working toward the Honeyback Hivemother? Share your experience in the comments below!


Comments