WoW Dragonflight Season 3: Everbloom Mythic Plus Guide
Hello there, and welcome back to our Dragonflight Season 3 Mythic+ series! Today, we will discuss the Everbloom Mythic Plus Guide.
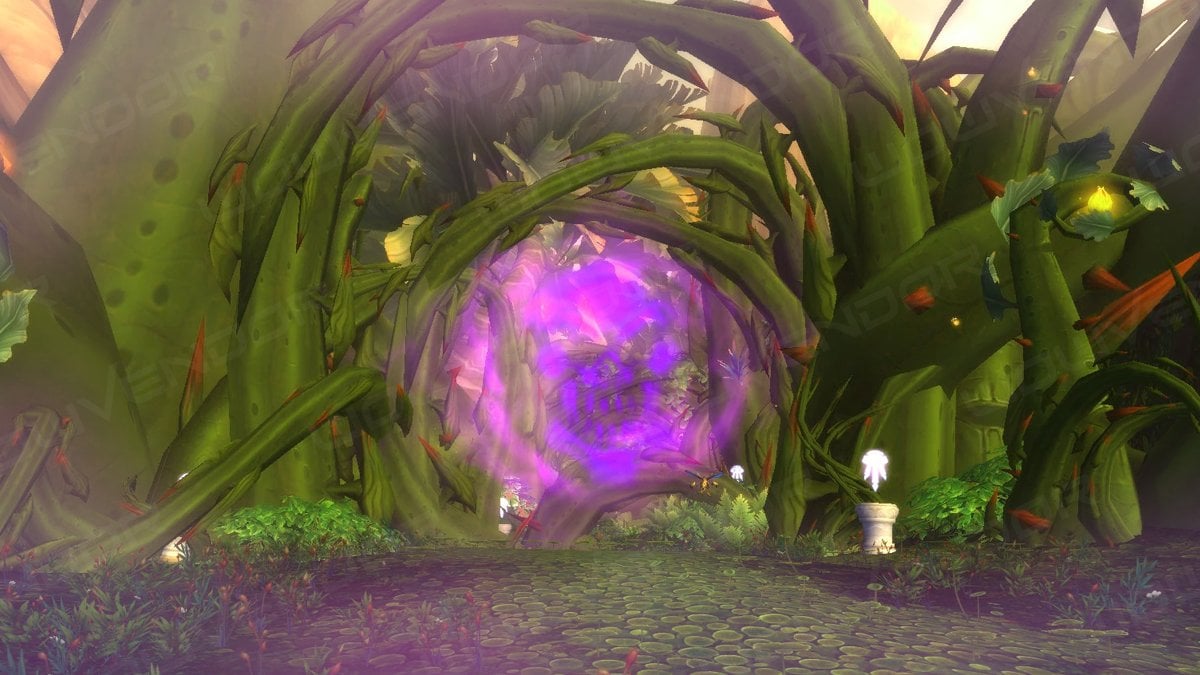
Table of Contents
Key Takeaways
- Everbloom is in the east of Gorgrond, accessible through the Everbloom Wilds near Grove Warden Yal. Another way to get to Everbloom is to use the portal in Millennia’s Threshold, Valdrakken.
- In this Everbloom Mythic Plus guide, you will find trash and boss strategies for all four bosses: Witherbark, Ancient Protectors, Archmage Sol, and Yalnu.
- Everbloom offers loot up to ilvl 470, potentially reaching ilvl 483 in the Great Vault.
- Completing Everbloom will reward you with six achievements.
Last time, we brought you the Waycrest Manor Mythic Plus guide, so if you haven’t checked it out yet, be sure to follow the link. As for today, we’ll walk you through all the boss and trash fights, showcasing the main mechanics, strategies, and rewards that Everbloom has to offer.
Originally, the Everbloom dungeon was introduced in Warlords of Draenor. Joining the Dragonflight Season 3 M+ roster, Everbloom was revamped. The instance features four bosses for you to conquer and a treasure trove of valuable loot to earn. In this Everbloom Mythic Plus guide, we’ll walk you through all the boss and trash fights, showcasing the main mechanics, strategies, and rewards.
Where is Everbloom Entrance
Everbloom is located east of Gorgrond, with the entrance nestled in Everbloom Wilds near Grove Warden Yal.
The most convenient route to get to Mythic Plus Everbloom is to use the portal from Valdrakken. Travel to Millennia’s Threshold and jump into the second portal on your left for a quick trip to Gorgrond. Once there, mount up and follow the pin on the map. You’ll find the Everbloom entrance hidden within the vegetation, marked by a pink glowing portal.
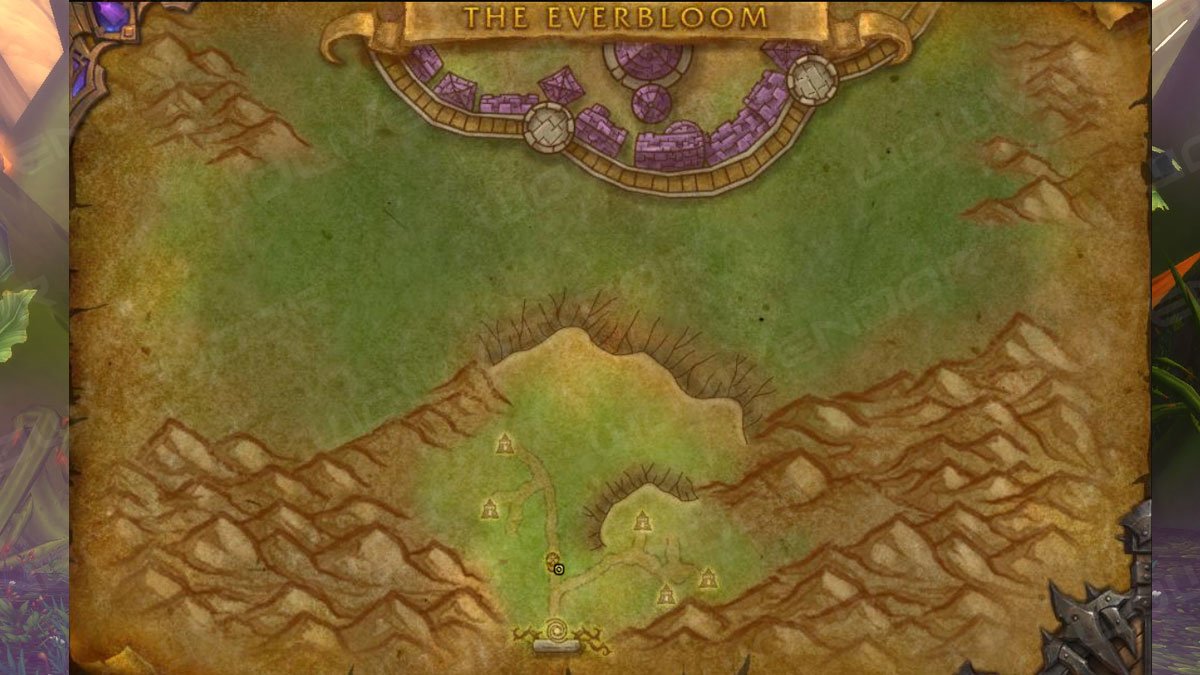
Full Everbloom Walkthrough
Everbloom Layout

Witherbark
Witherbark Trash Guide
- Prioritize interrupting Everbloom Naturalist’s Choking Vines cast, which stuns targeted players and inflicts heavy damage.
- Help your Tank by interrupting Dancing Thorns‘ single-target damage.
- Dreadpetals deal heavy tank damage, applying a stackable Dreadpetal Pollen debuff that increases damage taken and reduces movement speed. This can be kicked or dispelled.
- Rockspine Stingers debuff random players with a stacking Venom Burst effect, inflicting a heavy-hitting DoT that explodes after a few seconds, damaging everyone in a 5-yard area. Use a Poison removal here, and be careful not to pull too many Stingers.
- Interrupt or Enrage-dispel Enraged Growth to prevent enraging a nearby enemy.
- Interrupt Everbloom Menders‘ Healing Waters to prevent enemy healing.
- Gnarlroot will spawn a root at each player’s location, so stack up for this cast and quickly burst down the roots before Living Leaves goes off, or else you’ll be silenced.
Witherbark Boss Guide
First off, Tanks should position the boss as far from the water as possible, keeping him at the edges of the arena. Always direct Parched Gasp away from the group and use defensives during this frontal cast.
On zero energy, the boss gets hit with the Brittle Bark debuff, entering a brittle state and taking 100% more damage. When the energy bar is maxed out again, the debuff expires, and the double-damage intermission ends. During this intermission, Aqueous Globules spawn from the lake and slowly move toward the boss. He’ll gain 25 energy for each Globule that reaches him, so four of them will be enough for a full recharge.
Another crucial mechanic is Unchecked Growth, where marked players are pursued by vines that create Unchecked Growth upon reaching their target.

The best strategy our Everbloom Mythic Plus guide recommends for this fight is to use the Growths to build a wall, blocking Witherbark in the corner or near the wall. It’s done to prolong the Brittle Bark debuff and stop Aqueous Globules from reaching the boss and replenishing his energy. Unchecked Growths destroy Globules on contact, saving you time and maximizing boss damage.
When Globules step on Growths, an add will spawn, so Tanks need to pick them up and the rest should just dish out all the damage they can on the boss. Healers have to keep their teammates’ health in check, as each Globule swallowed by the Growth causes group-wide damage.
Ancient Protectors
Ancient Protectors Trash Guide
This encounter mostly includes the same mobs as the previous one, with a few bonus foes added.
Twisted Abominations pose a significant threat due to their Noxious Eruption — a big AoE attack with an additional DoT effect. Heal through this and mitigate the damage with defensives. Also, the Poisonous Claws cast will cause heavy tank damage, along with a dispellable poison DoT. Defensives can be used if necessary.
Also, be aware of Melded Berserkers’ Bounding Whirl leap that always targets random ranged players. Additionally, these mobs will constantly Enrage themselves, so if you do have Enrage dispels, feel free to use them.
Ancient Protectors Boss Guide
The Ancient Protectors present a council-style fight featuring three bosses with separate health pools: one mobile boss, Delhu, and two stationary casters, Telu and Gola, that can’t be tanked.
Telu and Gola cast Water Bolts randomly, along with Nature’s Wrath. Interrupt these casts and be sure to save at least one kick for their specials: Toxic Bloom for Telu and Revitalize for Gola, both crucial to interrupt. If Toxic Bloom succeeds, it’ll stun all party members for 4 seconds, which can quickly lead to a wipe. Revitalize must be kicked to prevent boss healing.
Gola and Telu will also take turns casting Terrestrial Fury and Torrential Fury, causing significant group-wide AoE damage. DPS should use defensives, and Healers must prioritize healing due to the high damage output during these casts.
Tanks should watch their movement: every time Delhu casts Noxious Charge, you need to move away from the rest of the group. Once the ability connects with the tank, large swirls will spawn under each player within a 10-yard radius. Do not leave the swirls in melee range and avoid them to prevent Nature damage.
The most optimal strategy for this fight is to always drag Delhu on top of the active boss for interrupts, with DPS focusing on Talu since he is the most dangerous of the two casters.
Archmage Sol

Archmage Sol Trash Guide
The trash leading to Archmage Sol is the deadliest in the dungeon, as most of these mobs are immune to CC and you’ll have to purely rely on interrupts to stop their casts.
- Kick Infested Icecallers‘ Frostbolt spam-casts and be cautious of their Cold Fusion that summons a circle of ice orbs that move inwards. Avoid those to not get stunned and hit with big Frost damage.
- Pytrid Pyromancers‘ Pyroblast is a deadly cast if successful, which makes it your top-priority interrupt. Also, be careful with Cinderbolt Salvo, which deals a ton of damage, firing bolts at random players. Heal through this channel, and don’t forget to use defensives to assist your healers.
- Kick Addled Arcanomancer‘s Arcane Blast, a potentially lethal ability, and avoid Spatial Disruption by baiting it out far enough to prevent group-wide AoE damage.
- Hapless Assistants will auto-attack your tank and hit them with Fungal Fist that can either be outranged or mitigated by defensives.
Archmage Sol Boss Guide
This one is the toughest fight in the dungeon due to the hectic ability rotation and overlapping casts.
Throughout the encounter, the boss will rotate between three schools of magic: Fire, Frost, and Arcane, casting Cinderbold Storm, Glacial Fusion, or Spatial Compression as her ultimates. On top of that, from the second cast onwards, a Growing Infestation spore image will replicate her previously used spell, giving you nasty ability overlaps.
The battle begins with Cinderbold Storm, inflicting significant group damage and leaving fire swirls on the ground. Avoid the swirls, and don’t be shy to use your defensives. Healers should be prepared for intense group healing.
In her Frost phase, Archmage Sol summons rings of frozen spheres with Glacial Fusion that works very similar to the Cold Fusion cast. The strategy here is the same: dodge the spheres to avoid stuns and high ticking damage. On the first Glacial Fusion, Cinderbold Storm will be replicated, so Healers should get ready for the increased damage output.
Transitioning to the Arcane phase, Sol casts Spatial Compression orbs. Bait this by having a range DPS stand as far away from the group as possible. Once the orb lands, it pulls players in, so be very careful about your positioning as you’ll need to have enough room to dodge the mirrored abilities.
Yalnu
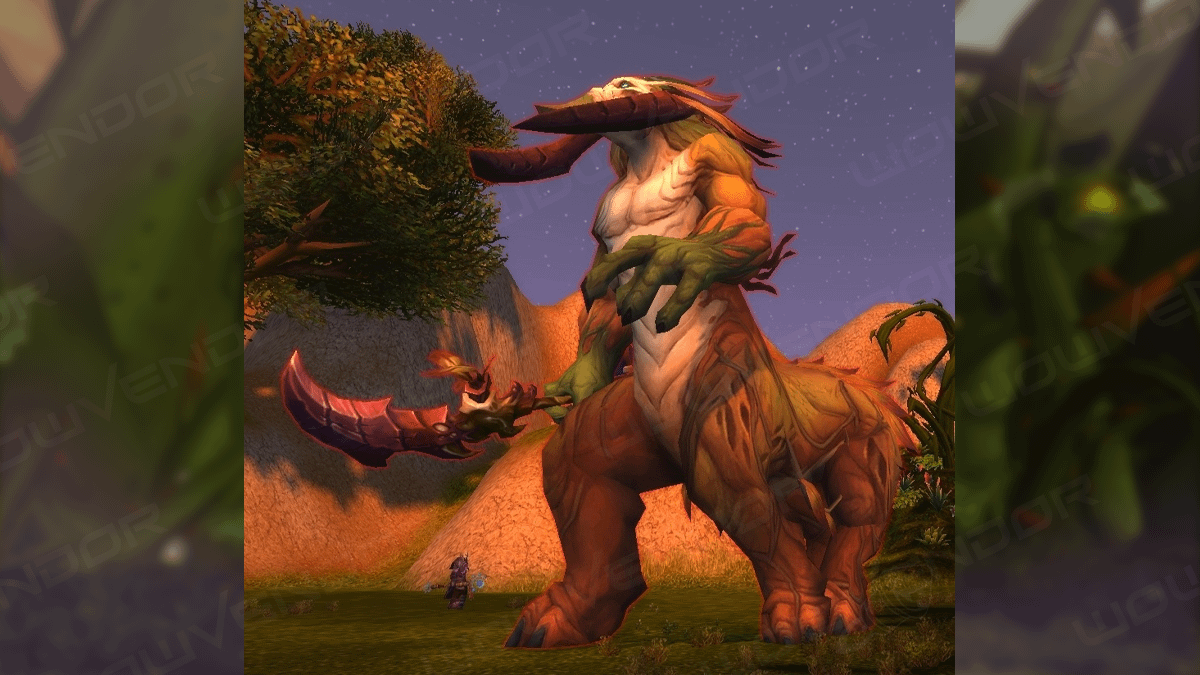
Yalnu Boss Guide
Yalnu, the final boss of the Everbloom dungeon, is the easiest fight of all four if you manage to keep the adds under control.
Firstly, Tanks must make sure they pick up the boss’s threat and position him facing a wall or the cliff to keep the team safe from his Colossal Blow frontal attack. Dodging it is crucial, as it applies stuns and inflicts significant Nature damage.
Throughout the fight, Yalnu takes three times more damage from the Brushfire debuff. This effect is nullified when Flourishing Ancients are present in the arena. Spawned by the boss’s Verdant Eruption cast, these mobs have a nasty frontal and need to be eliminated quickly to get the Brushfire damage amplifier back on. Also, Healers should be mindful of the Ancients’ big AoE damage.
During the Genesis cast, Yalnu creates sprouting that must be trampled before they transform into Feral Lashers. You can trample a sprouting by simply walking over it, so we recommend saving some movement speed buffs for this mechanic to ensure fast and effective clears. If Lashers do spawn, interrupt their Lasher Venom cast. In case you don’t get rid of all the Lashers by the end of Genesis, tank-pull them under the boss to get easy cleaves.
The main goal for this fight is to clear all spawns to keep the 300% damage debuff on the boss. If spawns do happen, tanks should quickly pick up threat while the rest will be focusing on taking them down. Be sure to always control adds and not let them overrun the group.
Everbloom Loot Table
The dungeon boasts a wealth of loot, with items scaling up to ilvl 470 at the end of the run and potentially reaching ilvl 483 in the Great Vault.
Take a look at the table below for a glimpse at the exclusive boss loot that awaits you in Everbloom:
| Name | Type | Boss |
| Bracers of Swirling Light | Cloth Wrist | Archmage Sol |
| Coagulated Genesaur Blood | Trinket | Yalnu |
| Desiccated Husk Shield | Shield | Yalnu |
| Gauntlets of Burning Focus | Leather Hands | Witherbark |
| Hoof of Yalnu | 1H Mace | Yalnu |
| Interloper’s Mossy Skull | Off-Hand | Ancient Protectors |
| Leafhide Penetrator | Crossbow | Witherbark |
| Morningscale Cowl | Mail Head | Archmage Sol |
| Rivet-Sealed Waistplate | Plate Waist | Ancient Protectors |
Everbloom Achievements
The dungeon offers six unique achievements for players to earn:
- The Everbloom is rewarded for defeating Yalnu. Its Heroic and Mythic versions can be earned by beating the boss on the respective difficulties or higher.
- You’ll get Keystone Hero: The Everbloom for completing the instance on M+20 or higher on timer. You’ll also earn Teleport: The Everbloom as an additional reward.
- If you set your sights on the Water Management achievement, it’s vital to conquer Witherbark on Heroic or higher without him refilling his energy bar.
- The Weed Whacker achievement is given to those who manage to take down Yalnu while keeping all the Kirin Tor mages alive on Heroic or higher.
Conclusion
On that note, our Everbloom Mythic Plus guide comes to a close. We hope it has been useful and helped your group better prepare for the dungeon and ensure a much smoother clear.
If you’re taking your first steps into M+ dungeons, we recommend checking out our Mythic+ Guide for Newbies, where we delve into the mode, provide valuable tips for beginners, along with the rest of our M+ guides. Also, stay tuned for our next entry, where we’ll cover a full walkthrough for WoW Dark Heart Thicket.
With that said, good luck on those keys, guys, and happy gaming!


Comments