DotI: Galakrond’s Fall Mythic Plus Guide
Previously, we covered the WoW Atal’Dazar Mythic+ Guide. And today, we are going to have a deep dive into the details of the Dawn of the Infinite: Galakrond’s Fall Mythic Plus Guide.

Table of Contents
Key Takeaways
- Galakrond’s Fall is part of the Dawn of the Infinite megadungeon. Now, it’s a separate instance with harder boss mechanics and increased danger in certain trash pulls. The entrance is near Valdrakken in southern Thaldraszus.
- Be mindful of the Chronikar trash mobs, especially the Infinite Timeslicer. You will need to deal with mechanics like Eon Shatter, Eon Residue puddles, and the combination of Chronoshear and Sheared Lifespan spells.
- Trash packs in Manifested Timeways require careful management of AoE abilities and interrupts. The boss fight involves adapting to Accelerating and Decaying Time effects, with a focus on dispelling Chrono-faded debuffs rapidly.
- Exercise caution during the Infinite Infiltrator trash encounter and manage defensive cooldowns. The Blight of Galakrond boss fight features the crucial Corrosion mechanic and transforms through three phases with unique challenges.
- The final trash packs introduce Iridikron’s Creation and dangerous Stonebolt attacks. The boss fight with Iridikron focuses on reducing the enemy’s energy, with coordination required during various AoE mechanics like Stonecracker Barrage and Extinction Blast.
Galakrond’s Fall is the first part of the Dawn of the Infinite megadungeon added in Patch 10.1.5. Being one of the Dragonflight M+ dungeons in Season 3, it now features intensified difficulty in boss mechanics and increased danger in certain trash pulls. So, you may want to navigate this dungeon with extra caution.
Where Is DotI: Galakrond’s Fall
The Dawn of Infinite mega-dungeon is located near Valdrakken. You can quickly reach Galakrond’s Fall entrance in southern Thaldraszus. With your Dragonriding mount, you will get there from Valdrakken almost instantly.
Full DotI: Galakrond’s Fall Walkthrough
Galakrond’s Fall Layout
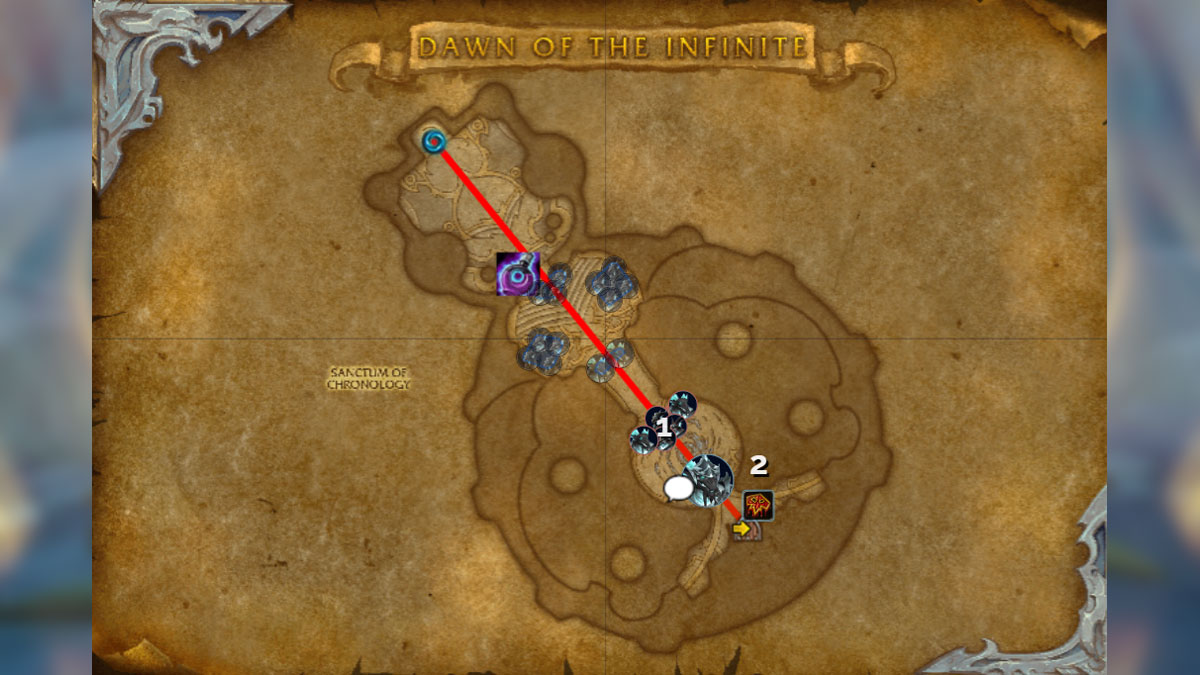
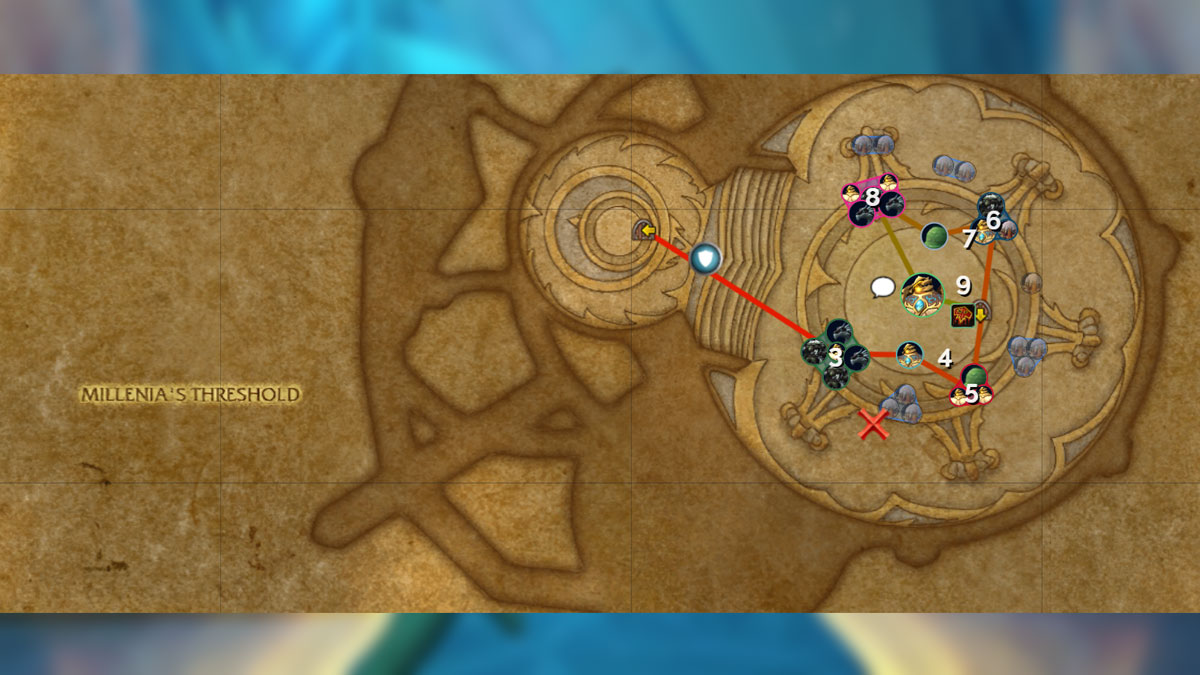
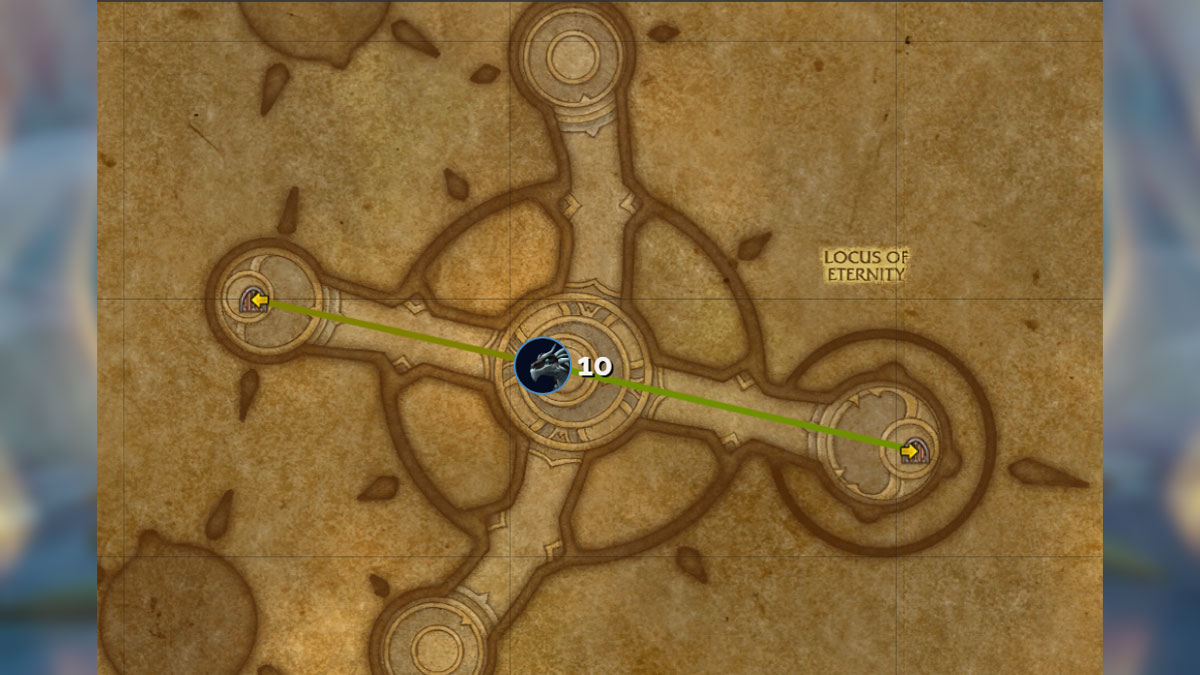
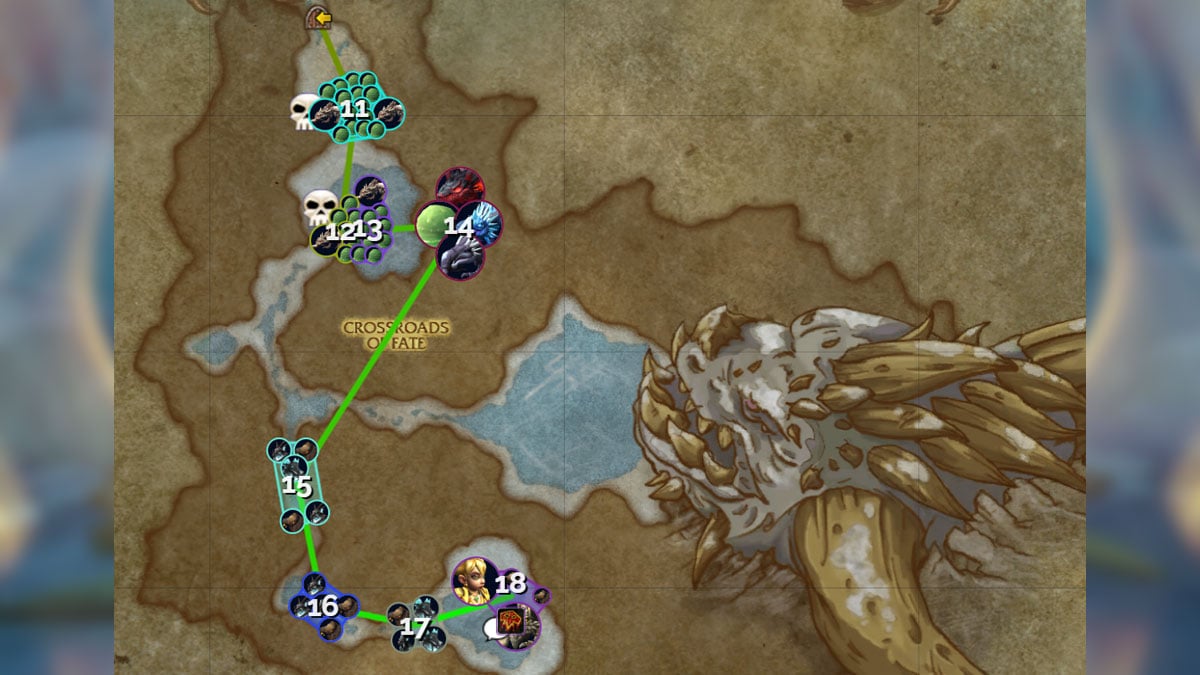
For effective preparation, consider the instance layout. Instead of a traditional map of Galakrond’s Fall locations, we provide visual screenshots of a popular M+ route by Bunten. Ignore specific symbols and lines as they vary based on your team’s strategy and weekly affixes. Focus on precise trash locations and routes between encounters. For further guidance essential Mythic+ features, you may want to check out our Mythic+ Guide for Newbies.
Chronikar

Chronikar Trash Guide
Infinite Timeslicer mob can quickly inflict tons of damage with Temposlice, amplified by a stacking debuff. You need to dispel the debuff immediately. Use crowd control effects to stop the skill’s channeling.
Infinite Chronoweaver’s Chronomelt hurts you badly and decreases your movement, attack, and casting speed. It can be interrupted, but it’ll be more difficult to do so with Timeslicers around.
The Epoch Ripper mob teleports to a random player, casts an AoE Timerip, and then returns to its original target. You’ll inevitably fight all three types of mobs at least once. So, be prepared to cope with the effects of all mechanics simultaneously.
Chronikar Boss Guide
Chronikar won’t be a serious obstacle on the way to Galakrond’s Fall mythic chest. There are two key mechanics:
- Using Eon Shatter, the boss jumps and lands on two players in succession. Unpleasant damage can be received from both the jump and the Eon Fragments.
- Then, small Eon Residue puddles eventually appear in the same area. Soak them to avoid massive damage from Residue Blast. Beware of the spreading Withering Sandpool puddles. Tanks and Healers will also have to worry about the dangerous combination of Chronoshear and Sheared Lifespan spells.
Manifested Timeways
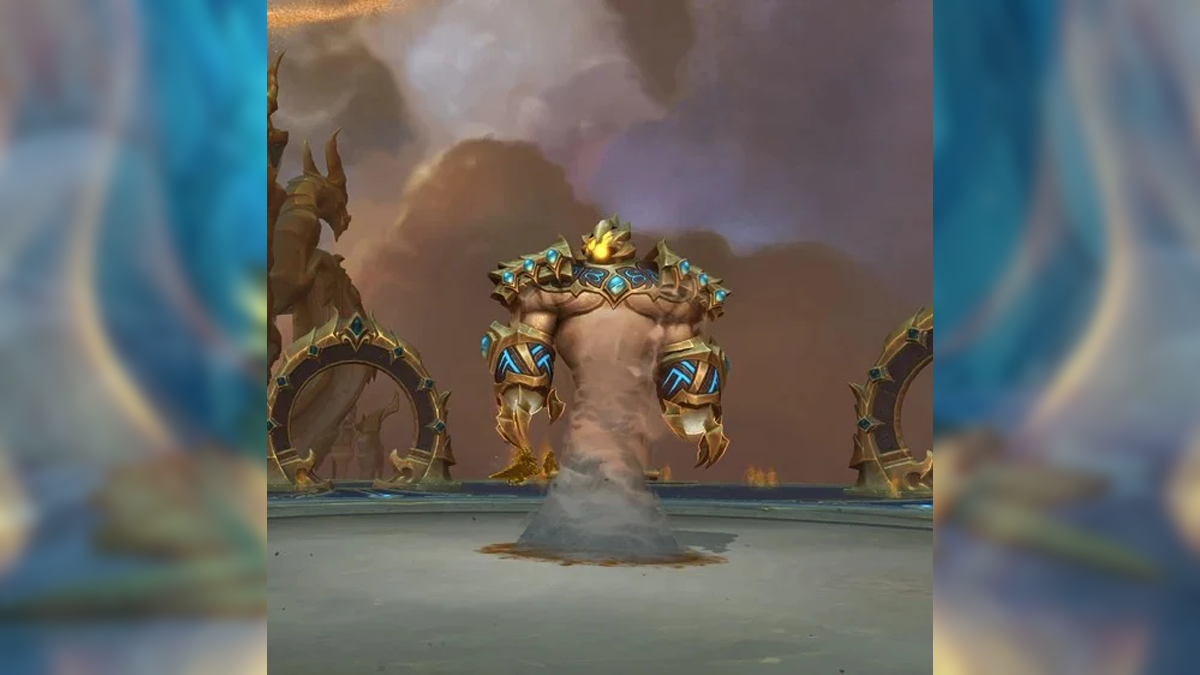
Manifested Timeways Trash Guide
The most temporal-themed trash packs of the Galakrond’s Fall can make you nervously look at the timer. For instance, Timestream Leech’s Enervate is a threatening AoE. Its consequences can be prevented in two ways. You can interrupt the mob casting it, and you can remove its effect from an ally.
But dispelling Timestream Anomaly’s Bloom effect will be of a much higher priority. Furthermore, you’ll periodically have to dispel Coalesced Moment’s Tainted Sands and interrupt its painful Infinite Bolt. And there are still three other mobs in the room.
Coalesced Time is the most dangerous among them. Its Infinite Bolt Volley has the highest interrupt priority. Players affected by Time’s Chronoburst must spread out to prevent multiplying the damage. Chronoburst can be dispelled, but it’ll be safer to start moving in case it’s not. Beware of awakening the Interval mob during this process. You will have to worry about interrupting one more spell or avoiding its AoE too. That’ll be especially dangerous if some nasty AoE affixes are active.
Manifested Timeways Boss Guide
The boss divides the room into four segments, usually called “pizza slices”. Dark segments apply the Decaying Time DoT, and light ones apply the Accelerating Time. Periodic damage is inevitable. Stay in the segment with Decaying Time to reduce periodic damage and gain a small buff. Fragments of Time is also easier to avoid in there.
However, players who got Chrono-faded need to run into an area of another type for a while. The dispel of this debuff in the Accelerating Time zone minimizes the damage from the Chronofade wave. But even minimized damage poses a serious threat. Chrono-faded always targets two random party members, requiring rapid healing between dispels to avoid a potential party wipe.
Blight of Galakrond

Blight of Galakrond Trash Guide
The next trash encounter to mention in DotI: Galakrond’s Fall Guide is represented by the lone mob Infinite Infiltrator. Its only Infinite Fury spell will make you press your crucial defensive and healing cooldowns. Dodge the Timeless Curse projectiles to avoid massive damage and long stuns.
This sort of mini-boss is followed by Risen Dragons surrounded by packs of Blight Chunks. Beware, Chunks’ deaths amplify the Dragons’ melee damage, which already poses a threat due to the endless AoE of the Necrotic Outburst aura. Periodic Blight Spew stun spell increases the overall AoE damage. There are two packs of trash with two Risen Dragons in each. It’s highly recommended not to combine them.
Blight of Galakrond Boss Guide
In this three-phase encounter, the key mechanic is Corrosion. This effect can be transferred to an ally by touching another player’s model. All Blight of Galakrond boss guides recommend giving it to the Tank, who will most likely survive the Corrosion. But most importantly, the Tank is always in the conical range of the Blight Reclamation, which removes Corrosion. If it’s not removed in 12 seconds, the affected character eventually goes mad for 20 seconds and fights his former allies, leading to a potential wipe even on low M+ keystone levels. During the first phase, avoid various green puddles and whirlwinds.
The last ones stop appearing in the second phase when your enemy turns into the dragon Ahnzon. Beware of his AoE tornadoes from Necrotic Winds. These tornadoes have an irritating knock-back effect. Corrosion can no longer be removed. Therefore, as the battle progresses, the debuff must pass through more allies before reaching the Tank. Don’t forget to pass it within 12 seconds.
The third and last phase changes your enemy again. Ahnzon is replaced by Loszkeleth and Dazhak. Break the cages cast by the first enemy on your allies with Necrofrost. Besides, be careful with the new AoE Incinerating Blightbreath the second dragon casts. Fortunately, these bosses’ shared HP is a perfect reason to make use of your own AoEs.
Iridikron the Stonescaled
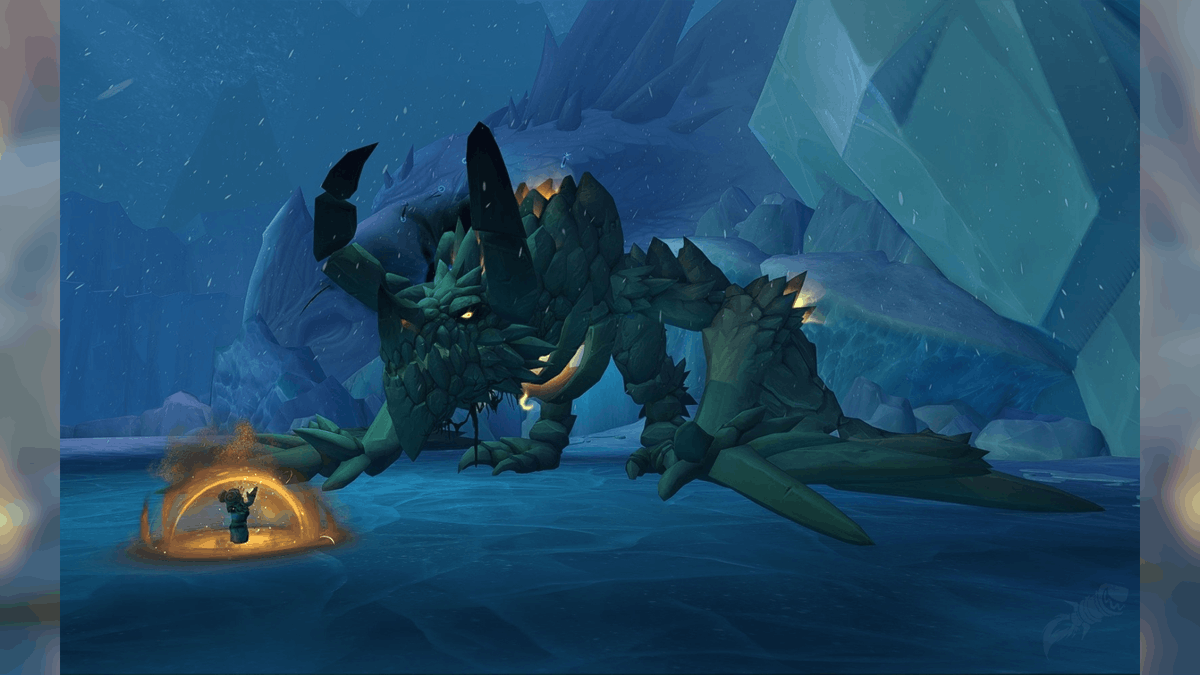
Iridikron the Stonescaled Trash Guide
The last Dawn of the Infinite: Galakrond’s Fall trash packs contain a new enemy type: Iridikron’s Creation. Their Stonebolt is dangerous due to its stacking DoT. It can be interrupted. However, you should prioritize interrupting the Infinite Chronoweaver’s Chronomelt. Considering that Infinite Timeslicers and Epoch Rippers are once again your enemies here.
Here, you’ll have to fight in narrow passages. On one hand, this will help you use AoE abilities more efficiently. On the other hand, some affixes will give you hell. Although the dungeon is nearing its end, taking your time here will be especially useful. Be sure to use the WoWVendor’s Dragonflight Mythic Boost if you doubt you’ll have enough time to overcome such cases.
Iridikron the Stonescaled Boss Guide
Your main task is to reduce the enemy’s energy, not HP. In a sense, the basic guide for fighting Iridikron the Stonescaled boss is to survive. During the first phase, its energy increases. The most dangerous obstacle is the Stonecracker Barrage mechanic. You and all your allies except for Tank must share the Barrage’s effect by staying in the big circle with NPC ally Chromie. The Tank, in turn, must stand in a little circle in front of you.
Pulverizing Exhalation and Earthsurge are two more AoE mechanics. The boss casts the first skill in a cone in front of him and, at the same time, spawns Pulverizing Creations near two random allies. Avoid the spell. Make sure the elementals appear close to each other to deal with them fast and be able to interrupt their spells quickly. During Earthsurge, the boss gains a shield and sends Rending Earthspikes around. Destroy the shield as soon as possible.
The solo-target skill Extinction Blast can be more dangerous than these AoEs. The player targeted by Blast must run into Chromie’s bubble to survive the ability’s damage. However, you may need to press defensives even under this powerful protection. Besides, Chromie shares the damage you receive and Blast’s effect makes her Exhausted. A Healer must watch her HP, as Chromie’s death means your party’s losing the fight and a valued ally as she increases the party’s Haste by 50% after you survive the Barrage mechanic. When Iridikron starts channeling his deadly Cataclysmic Obliteration, Chromie greatly improves your cooldown rate and resource regeneration. Damage and Haste are increased, too. This is the only way you can survive the second phase and deprive Iridikron of his energy. When it ends, the fight ends too.
DotI: Galakrond’s Fall Loot Table
Galakrond’s Fall in Dragonflight’s Season 3 provides an opportunity to get up to 470 ilvl End of the Dungeon and up to 483 ilvl Great Vault loot. However, you won’t find cloaks, rings, and necks in this instance. The table below will give a glimpse of Galakrond’s Fall loot:
| Name | Type | Boss |
| Vigorous Sandstompers | Leather Boots | Chronikar |
| Nick of Time | Dagger | Manifested Timeways |
| Dazhak’s Dessicated Wingbones | Plate Shoulder | Blight of Galakrond |
| Stonecracker Knuckles | Mail Hands | Iridikron the Stonescaled |
| Bronze Defender’s Vesture | Cloth Chest | Chronikar |
| Accelerating Sandglass | Trinket | Manifested Timeways |
| Ancestor’s Necromantic Focus | Off-Hand | Blight of Galakrond |
| Iridal, the Earth’s Master | Staff | Iridikron the Stonescaled |
DotI: Galakrond’s Fall Achievements
These are the achievements you can get for Galakrond’s Fall M+ runs:
- Dawn of the Infinite: Galakrond’s Fall: this one is given for defeating Iridikron. Unlike other instances, it doesn’t have other tiers because DotI is a megadungeon.
- Keystone Hero: Dawn of the Infinite: a basic achievement for M+20 or higher successful dungeon walkthrough. The reward is a portal to the dungeon’s entrance.
- A Slime in Need: pick up the Lost Slime in the boss room before the fight and let the boss hit you with a Blight Reclamation spell while it’s on your back.
- Crunch Time: let Chronikar destroy the Infused Hourglass before you defeat the boss.
- Chaotic Time: deal with Manifested Timeways with 3 Chaotic Time portals activated. For this, you must power up portals in the room by killing Interval mobs near them. This can be done only before the boss fight.
Conclusion
This concludes our Dawn of the Infinite: Galakrond’s Fall Mythic+ Guide. Don’t forget to check out a couple of videos to better understand the described tactics. Also, be sure to read about the second part of this mega-dungeon in our upcoming DotI: Murozond’s Rise M+ Guide!






Comments