WoW Dragonflight Season 3: Atal’Dazar Mythic Plus Guide
Welcome, brave adventurers, to your ultimate WoW Atal’Dazar Mythic Plus Guide for Dragonflight Season 3!
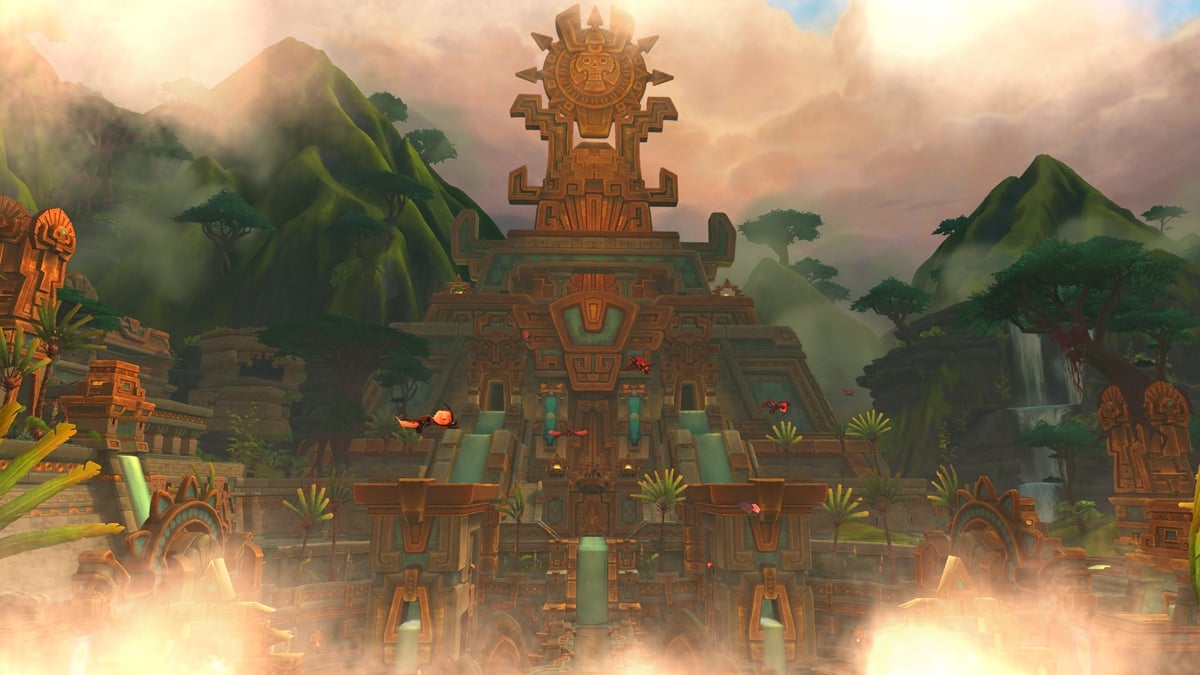
Table of Contents
Key Takeaways
- Atal’Dazar entrance is in the western part of the Zuldazar mountains. Use the Timeways portal in Valdrakken to reach Millennia’s Threshold and quickly jump to Zuldazar’s Golden Road. From there, it’s a short and straightforward journey to the dungeon.
- Detailed strategies for Rezan, Vol’kaal, Priestess Alun’za, and Yazma are provided, including trash management tips, key abilities, and optimal approaches for Mythic Plus runs.
- Specific tips for handling trash mobs.
- Atal’dazar loot table, achievements, and rewards.
Last time, we walked you through the perils of the Abyssal Depths in our WoW Throne of the Tides Mythic+ guide, and now let’s take a trip to the ancient pyramids of Atal’Dazar! The BfA dungeon has been added to the M+ rotation in Dragonflight Season 3, standing as a max-level, four-boss instance with all difficulty tiers, including Mythic and Mythic+.
In this guide, you will find a comprehensive overview of the dungeon, encounters with all the key boss abilities and mechanics, and tips and strategies for your group to have a smooth run through Atal’Dazar.
Where Is Atal’Dazar Entrance
Atal’Dazar entrance is in the western part of the Zuldazar mountains. Unlike in BfA, you don’t need to search for a faction-specific Atal’dazar flight path or trek long distances to reach your destination. In Dragonflight, you can use the Timeways portal in Valdrakken to reach Millennia’s Threshold and quickly jump to Zuldazar’s Golden Road. From there, it’s a short and straightforward journey to the instance.
Full Atal’Dazar Walkthrough
Below, you will find a full Atal’dazar Mythic plus walkthrough with not only detailed tactics for boss encounters and a guide to navigate through the trash along the way.
Atal’Dazar Layout


Atal’Dazar features an open-floor-plan design, allowing flexibility in boss order based on group composition and chosen routes. Some paths let you avoid specific trash groups, with certain routes being more optimal for higher keystone levels. Regardless of the chosen route, the final boss, Yazma, will only become available if you have conquered all three previous encounters. This Atal’dazar guide won’t recommend a specific boss sequence but rather provides insights into each encounter to help you organize groups more effectively.
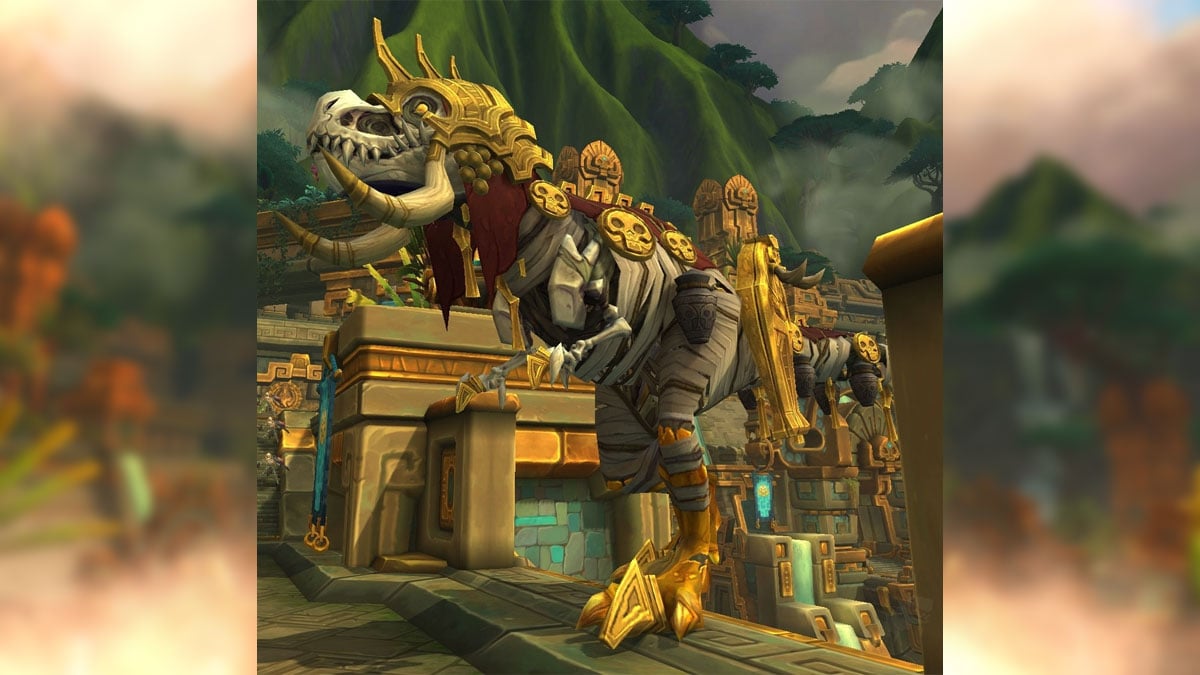
Rezan
Rezan Trash Guide
- Approaching the arena, beware of the fire-shooting tiki masks. They can be deadly, especially on higher keys.
- Toxic Saurids will jump at random players with Leaping Thrash and deal AoE damage to anyone within 4 yards. Use defensives before engaging to mitigate the impact.
- Feasting Skyscreamers cast Terrifying Screech; interrupt it to avoid group-wide Fear.
- Focus on Dinomancer Kish’o and her companions. Kish’o’s repeated Quickshots on the tank. Deadly Aim casts on non-tanks are unavoidable. Eliminate this add as fast as you can.
- Kish’o’s Dino Might buffs companions with healing and CC immunity. Kick or Purge it as soon as possible. Avoid Frenzied Charge, as it deals heavy damage and stuns all players in its path. Lastly, move away from Wild Thrash‘s 8-yard radius damage to stay safe.
Rezan Boss Guide
Rezan is the easiest fight in the instance. However, you will still want to look out for the piles of bones scattered around the arena. Any misstep by your group or the boss triggers the Ancient Dry Bones cast, causing adds to spawn. Here are other key abilities and mechanics that you may want to pay attention to:
Serrated Teeth
Tanks should be extra cautious of Serrated Teeth. It applies a brutal bleed, particularly on higher keys. Use your defensives wisely and consider rotating them with each cast for maximum effectiveness.
Terrifying Visage
Terrifying Visage fears any player in the line of sight. Avoid it by positioning the boss near pillars or stairs. Immunity abilities or swift dispels can also help in nullifying the effect. Shamans equipped with Tremor Totem can help the group to remain in place once every two casts.
Pursuit
Pursuit randomly fixates on a DPS, having Rezan relentlessly chase them down. In such a case, run along the edge of the encounter space, staying as far from the boss as possible. Beware of the Devour ability: if you get hit by it, it will most likely result in certain death.
Counter Pursuit by using spells that turn you invisible or make the enemy lose their target. It’s crucial to apply the spells only after Pursuit is in full swing and the boss has already started to move.
Optimal Strategy: Pillar Tactics
Tanks should lure Rezan to one of the pillars along the arena’s edge to block Terrifying Visage. Healers dispel Fear and support Tanks during Serrated Teeth. DPS should stay alert and be mindful of the Pursuit mechanic to keep Rezan at bay.
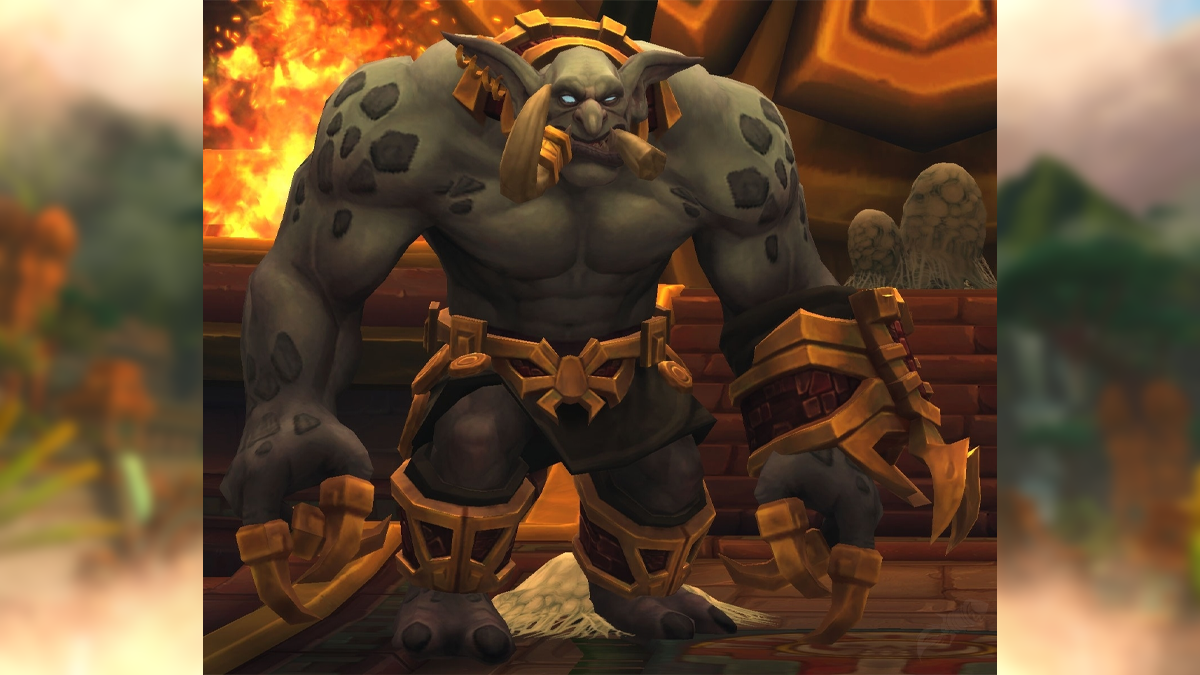
Vol’kaal
Vol’kaal Trash Guide
- The Witch-Doctor will spam-cast Venom Blast, so interrupt it promptly. Deal with Unstable Hex by stopping or dispelling it.
- Counter Shieldbearer’s Bulwark of Juju by pulling enemies away from the shield or using hard CC to interrupt the channeling. Tanks should avoid Shield Bash to prevent damage and interrupts.
- Stalkers patrol the stairs in stealth, applying stuns and increasing nature damage taken. Use AoE to get them out of stealth before engaging and employ poison dispels to counter debuffs.
- When facing Honor Guards, eliminate Totems to prevent group-wide damage and halt adds’ healing. Ensure your tank manages the Rending Maul bleed.
Vol’kaal Boss Guide
Vol’kaal presents a dynamic two-phase encounter that demands precision and coordination from your group.
Phase 1: Reanimation Totems
The main focus is the Reanimation Totems. With the Totems active, Vol’kaal is immune to damage. You must destroy all of them almost simultaneously to initiate the next phase. Assign your DPS to all three Totems and ensure everyone knows their part. After one Totem is down, you’ll have only 7 seconds before the remaining ones fully regenerate. Keep a close watch on the Totems’ health and damage them evenly to get them all down within the time limit.
As for other mechanics, the boss’s Toxic Leap randomly targets players within an 8-yard radius. He will also cast Noxious Stench, dealing moderate damage and applying a stacking Disease effect. Interrupt the cast as soon as you can to avoid taking serious damage from high stacks.
Phase 2: Boss Damage
In the second phase, the boss becomes vulnerable. Deal as much damage as you can fast. Other than the Toxic Leap and Noxious Stench, beware of the Toxic Pools. The pools inflict significant damage every 2 seconds you stay within, so avoid them or rush out immediately.
Have your tank kite the boss along the arena’s edge at a speed that allows melee and DPS enough room to deal damage without suffering the floor effects. It’s vital to take the boss down quickly, as this phase poses a significant challenge for your healers. The group must control Noxious Stench to avoid stacking and deploy their healing cooldowns wisely.
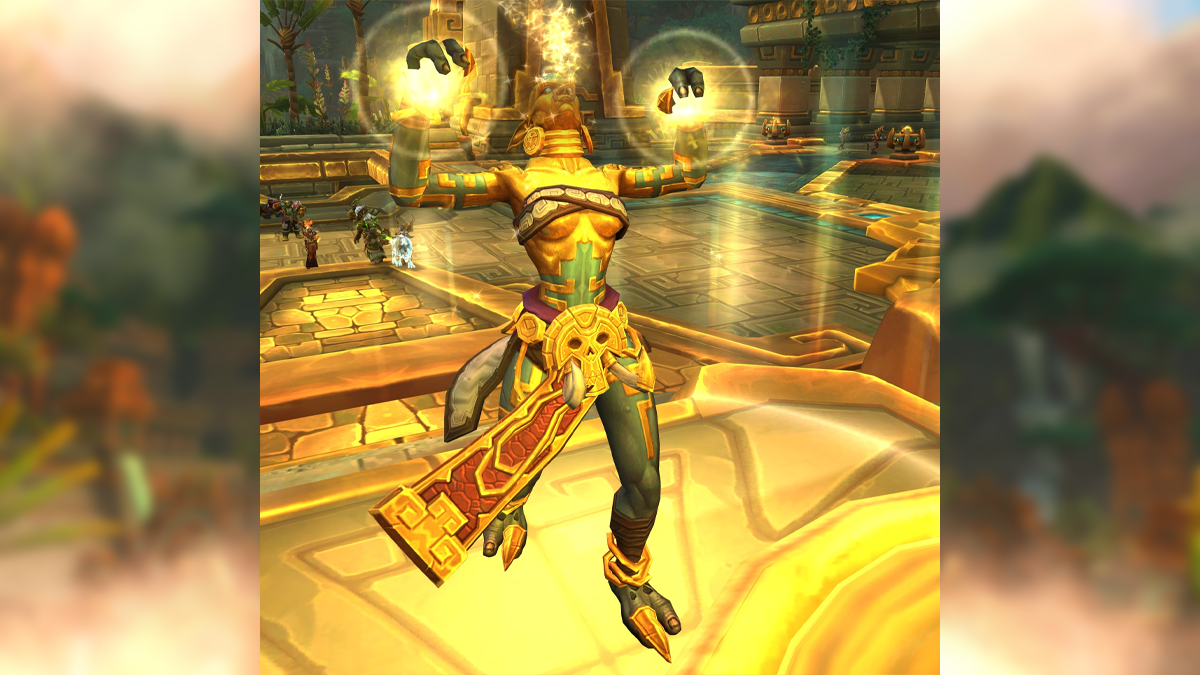
Priestess Alun’za
Priestess Alun’za Trash Guide
- Tanks should be cautious of the Guard adds and their Fervent Strike. The cast deals Physical damage and can be mitigated by any CC.
- Interrupt Fanatic’s Rage from Juggernauts to prevent the adds from getting their speed and damage buffs. Have someone bait and dodge Merciless Assault.
- Prioritize kicking the Confessor’s healing Mending Word and Bwonsamdi’s Mantle that makes enemies immune to CC.
- Interrupt Augur’s Wildfire, saving a kick for Fiery Enchant.
- Focus on Colossus when it appears, as nearby mob deaths boost its damage.
- Use defensives on Soulburn.
- The Priestess add shares the boss’s blood pool soaking mechanic, which we’ll cover in detail below.
Priestess Alun’za Boss Guide
During the fight with Priestess Alun’za, addressing the Spirit of Gold adds is crucial. They must be either crowd-controlled or eliminated to prevent boss healing. It’s recommended to get rid of the initial spawns. However, well-coordinated groups can master CC for all adds with no problems at all. The approach here is entirely up to you.
Tainted Blood
The central mechanic revolves around Tainted Blood pools spawning around the arena. Avoid these pools until the Priestess casts Transfusion. During Transfusion, she will channel life from all party members to regenerate health. Step into a Tainted Blood pool on the ground to counter this. Managing the Spirit of Gold here is extremely important as they can steal the blood pools, enabling the boss to heal.
Gilded Claws
Tanks should be vigilant for the Gilded Claws buff. With it, the boss deals high magic damage with each melee attack. DPS should prioritize purging this buff whenever possible.
Molten Gold
Dodge the Molten Gold orbs. In case any party member does get hit, Healers must be prepared to dispel the debuff. Make sure to have your cooldowns ready during the Transfusion channel to keep the group’s health under control.
Final Boss: Yazma
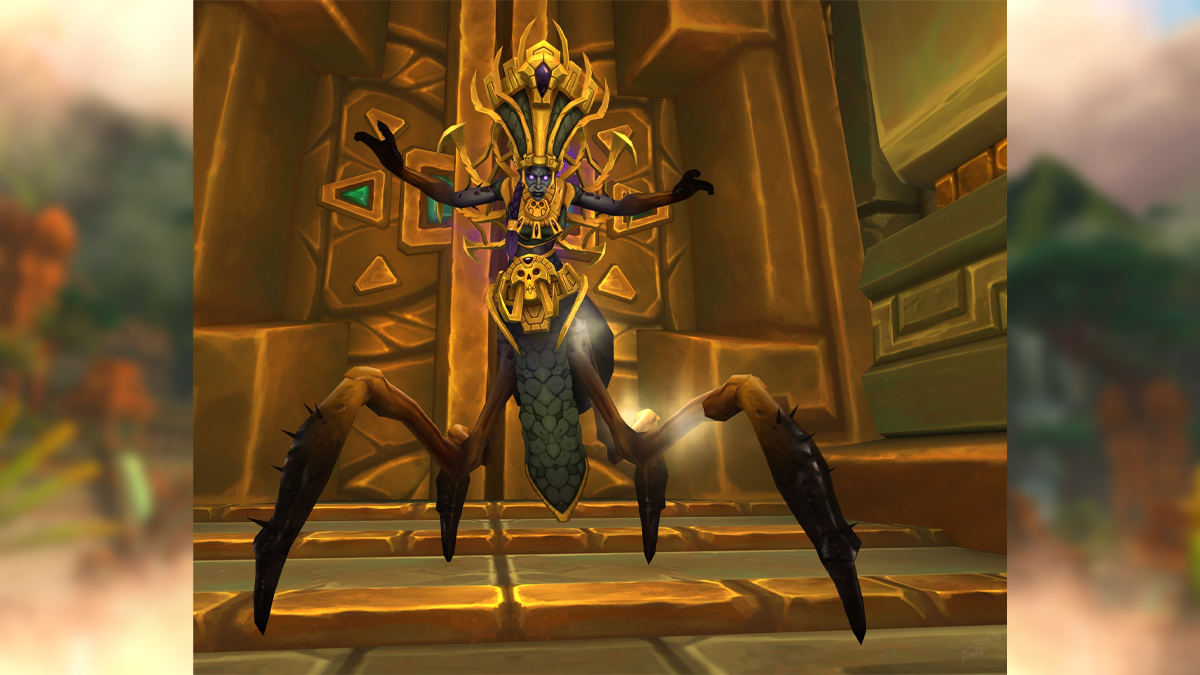
Yazma Boss Guide
As the final boss, Yazma awaits at the journey’s end. You must defeat all three previous bosses to engage in the Yazma encounter. There are no unique adds waiting for you before this fight. You may encounter some of the enemies we’ve discussed in the Rezan Trash section. Additionally, your group will have to navigate through spiders, so be cautious and try to avoid contact with them, especially on higher keys.
Soulrend Cast
Once full, Yazma’s energy bar triggers Soulrend, ripping a soul fragment from each player and dealing damage to the entire group. The Soulspawns born from this ability will attempt to reach the boss. If they manage to do so, the group will suffer massive stacking DoT damage. The main strategy here is to keep the adds away from the boss and prevent their connection with CCs and slows.
Skewer and Wracking Pain
Tanks should beware of Skewer as it inflicts heavy physical damage. Keep an eye on Wracking Pain as it applies a nasty DoT effect. Interrupt it whenever possible.
Echoes of Shadra
To survive Yazma, it’s critical to evade Echoes of Shadra. Any contact with them, especially on high keys, is lethal, so stay away from the nasty spiders at all costs, even if it means interrupting your attacks on the boss or Soulspawns.
Atal’Dazar Loot Table
Atal’Dazar offers you the chance to unlock a treasure trove of loot, reaching an impressive 470 ilvl at the end of the dungeon and 483 in the Great Vault. Here’s a glimpse of the Atal’dazar loot table:
| Name | Type | Boss |
| Belt of Gleaming Determination | Leather Waist | Priestess Alun’za |
| Coif of the Court Spider | Mail Head | Yazma |
| Disc of Indomitable Will | Shield | Rezan |
| Drape of the Loyal Vassal | Back | Vol’kaal |
| Embellished Ritual Sabatons | Plate Boots | Priestess Alun’za |
| Hallowed Ossein Longbow | Bow | Rezan |
| Loa Betrayer’s Vestments | Cloth Chest | Yazma |
| Seal of the Regal Loa | Ring | Rezan |
| Shambling Berserker’s Leggings | Leather Legs | Vol’kaal |
| Soulrender’s Fang | Dagger | Yazma |
Atal’Dazar Achievements
Atal’Dazar offers these achievements for players to earn.
- The main Atal’Dazar achievement has three tiers: one for defeating Yazma on any difficulty, one for Heroic, and one for Mythic.
- Keystone Hero: Atal’Dazar: beat the dungeon at M +20 and higher within the time limit. It will also reward you with the Teleport: Atal’Dazar for instant dungeon access.
- It’s Lit: defeat Yazma on Mythic with all four Shadowflame Scones lit.
- Bringing Hexy Back: Beat all of the dungeon’s bosses on Mythic with at least one player from your group under the Unstable Hex effects.
Conclusion
We hope our Atal’Dazar M+ guide was helpful and informative, providing you with valuable insights to excel in this dungeon. We will see you again in Galakrond’s Fall M+ guide! For more guides on the exciting dungeon from Dragonflight Season 3 rotation, make sure to check out this article:


Comments