Cataclysm Classic Blackwing Descent Guide
In this Cataclysm Classic Blackwing Descent guide, you’ll find everything you need to know. From how to get their and raid layout to boss strategies and rewards!
Table of Contents
- Where is Blackwing Descent in Cataclysm Classic
- Full Cataclysm Classic Blackwing Descent Walkthrough
- Blackwing Descent Loot Table
- Blackwing Descent Achievements
- Blackwing Descent FAQ
- Conclusion
Blackwing Descent is one of two primary raids in Cataclysm Classic Phase 1. Serving as a continuation of Blackwing Lair’s story, Blackwing Descent allows the player to get deeper into Blackrock Mountain and see the culmination of that arc.
Where is Blackwing Descent in Cataclysm Classic

The entrance to Blackwing Descent location is Blackrock Mountain, which appears in both Searing Gorge and Burnings Steppes. One of the highest peaks has a platform with the entrance at coordinates [23.21; 26.36].
How to Get to Blackwing Descent Alliance
Alliance players can take the nearest flight point from Stormwind City or travel to Blackwing Descent entrance on their own.
How to Get to Blackwing Descent Horde
Horde players can teleport from Orgrimmar to Twilight Highlands and fly to Blackrock Mountain. Alternatively, you can take a zeppelin to Stranglethorn Vale and fly to your destination.
Full Cataclysm Classic Blackwing Descent Walkthrough
Blackwing Descent Raid Layout
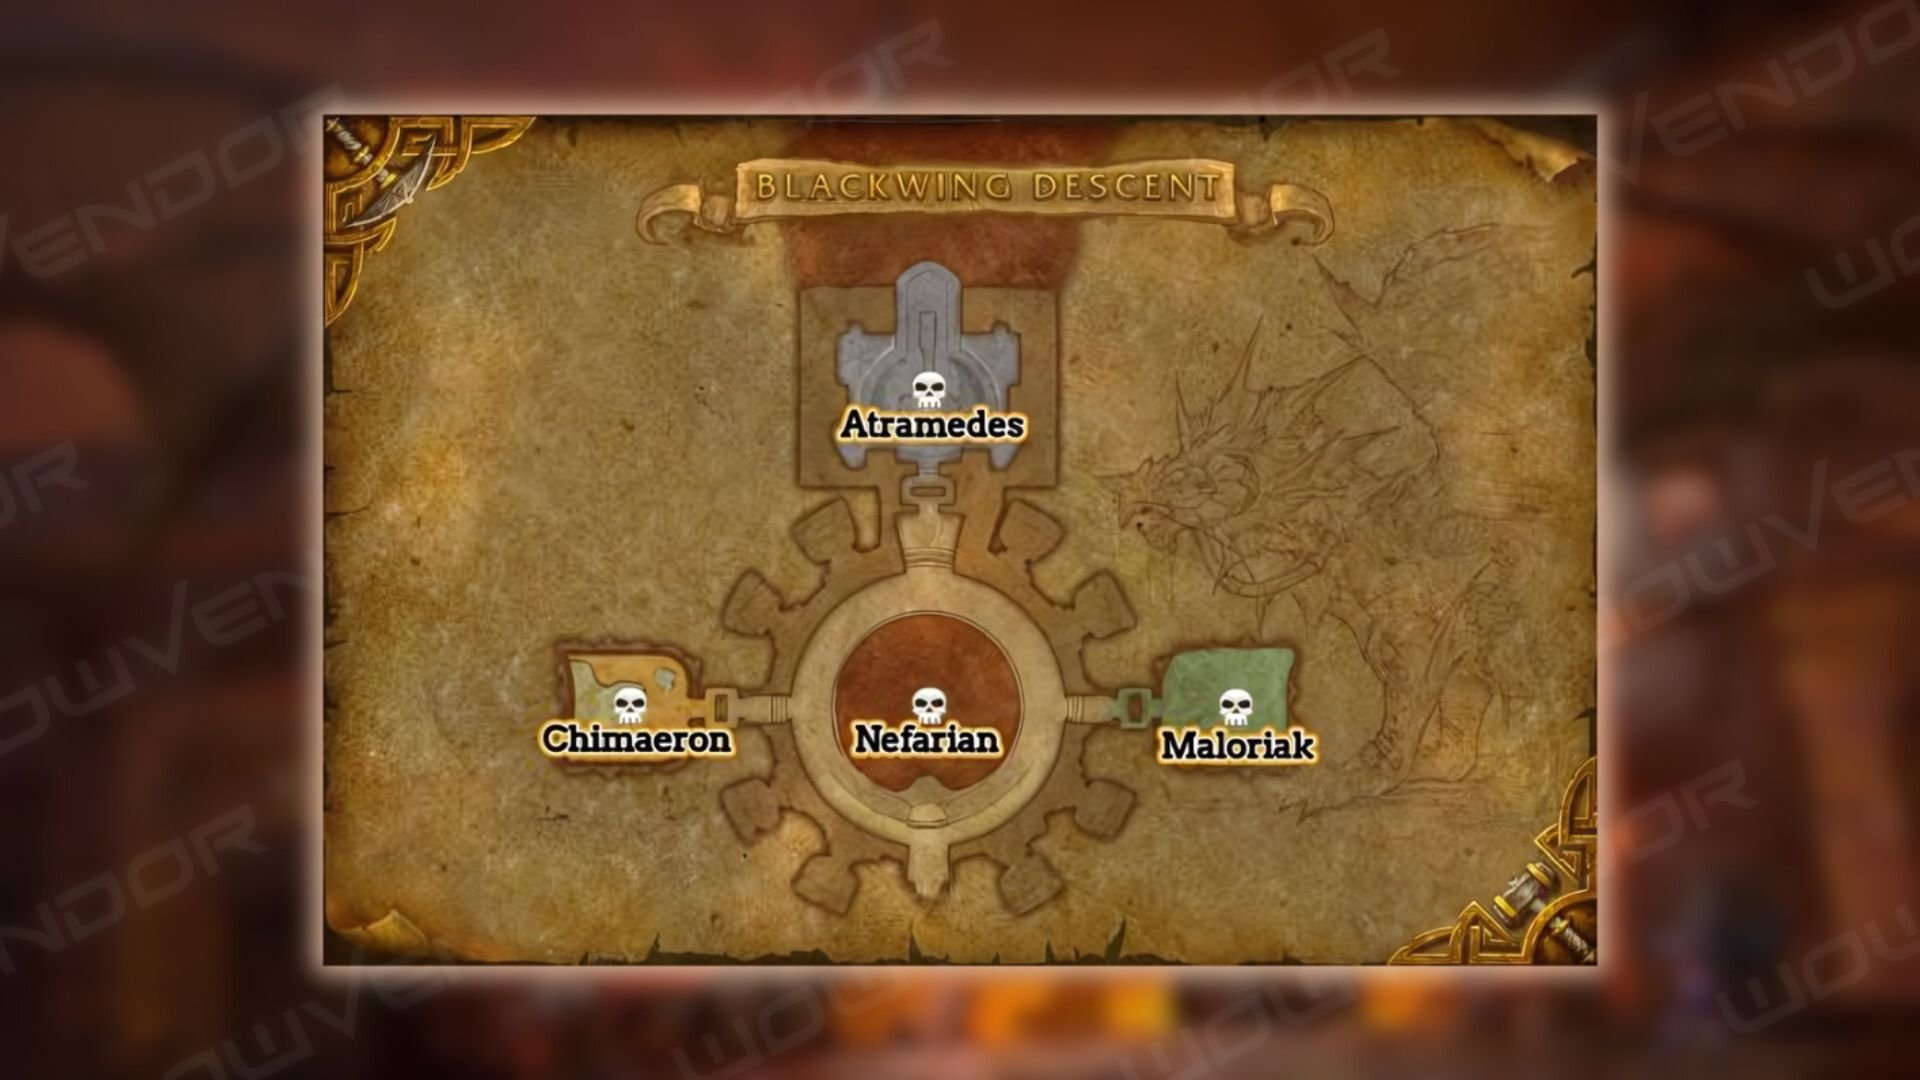
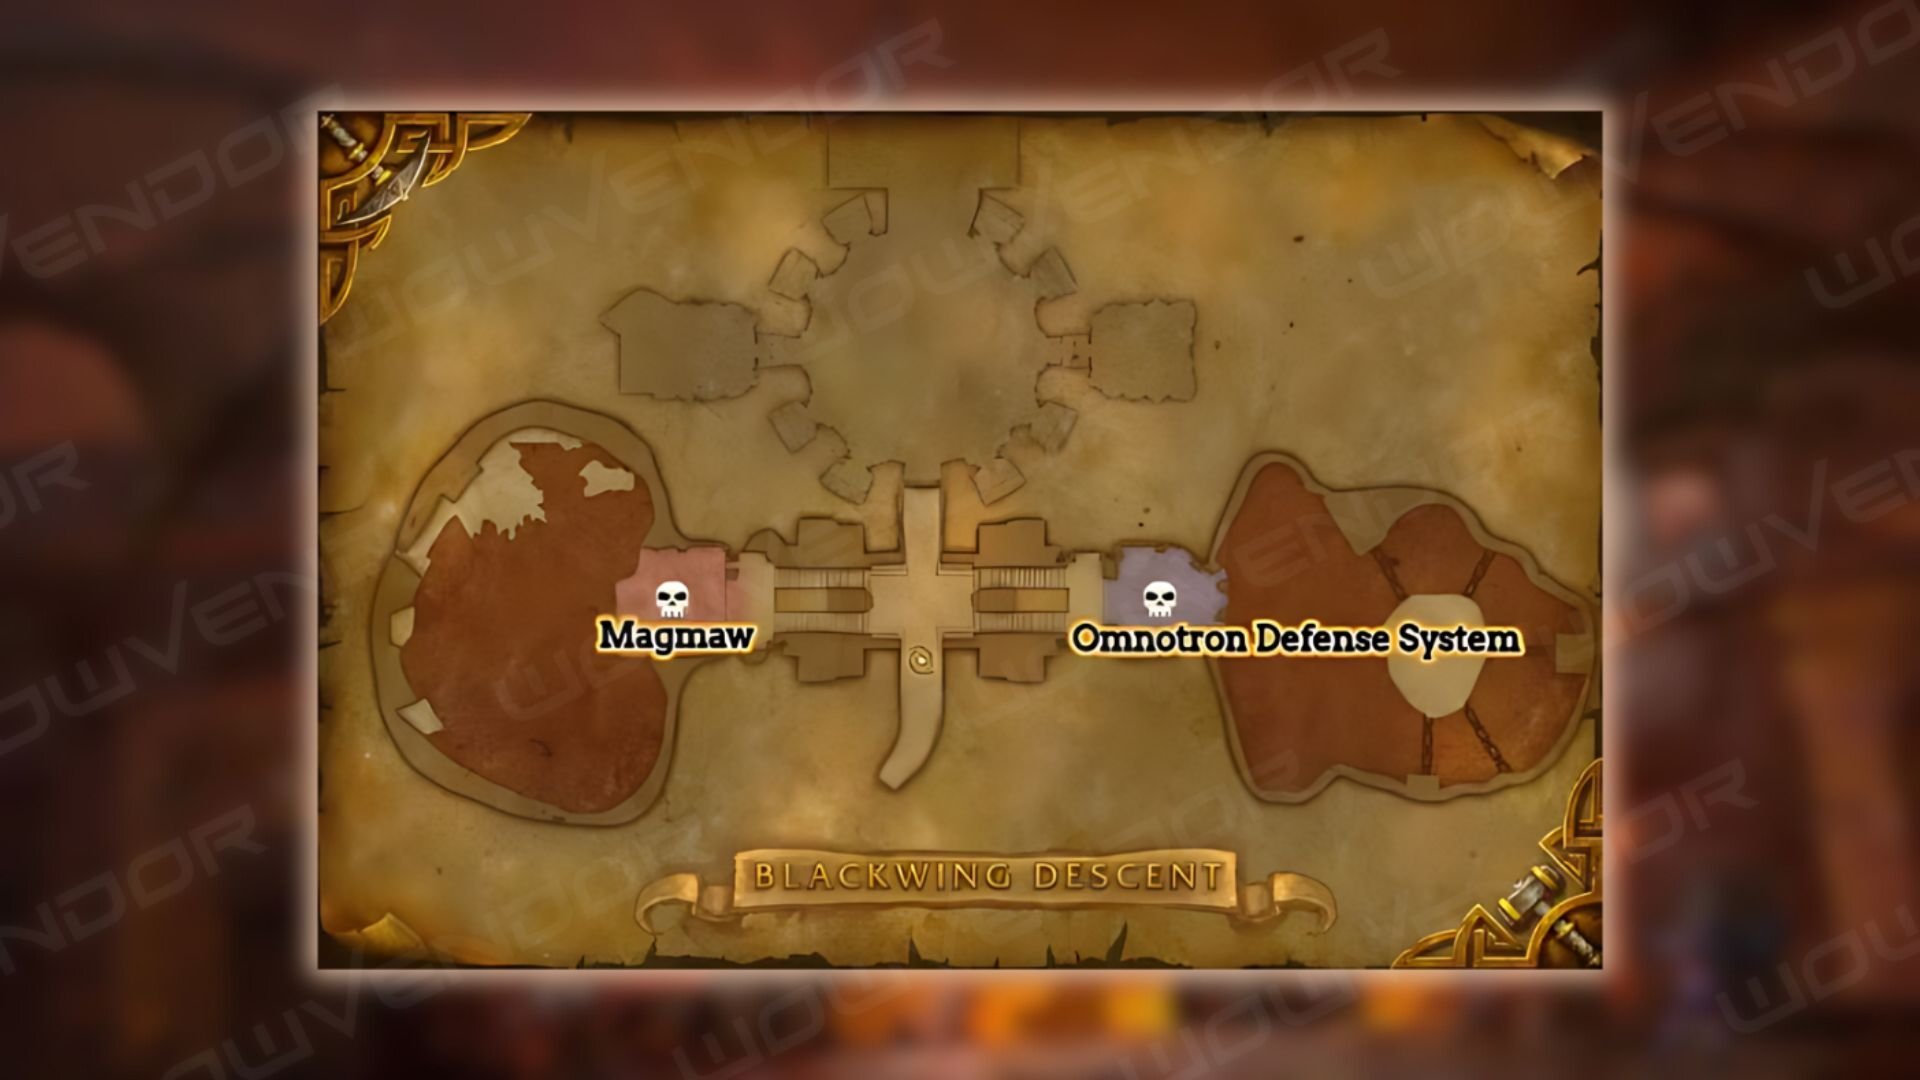
The first level of the raid has two wings, each containing one boss. Defeating both of them in any order allows you to proceed to the second level—a central arena with three more rooms connected to it. Each room has another boss that needs to be defeated before you can confront Nefarian.
Omnotron Defense System Boss Guide
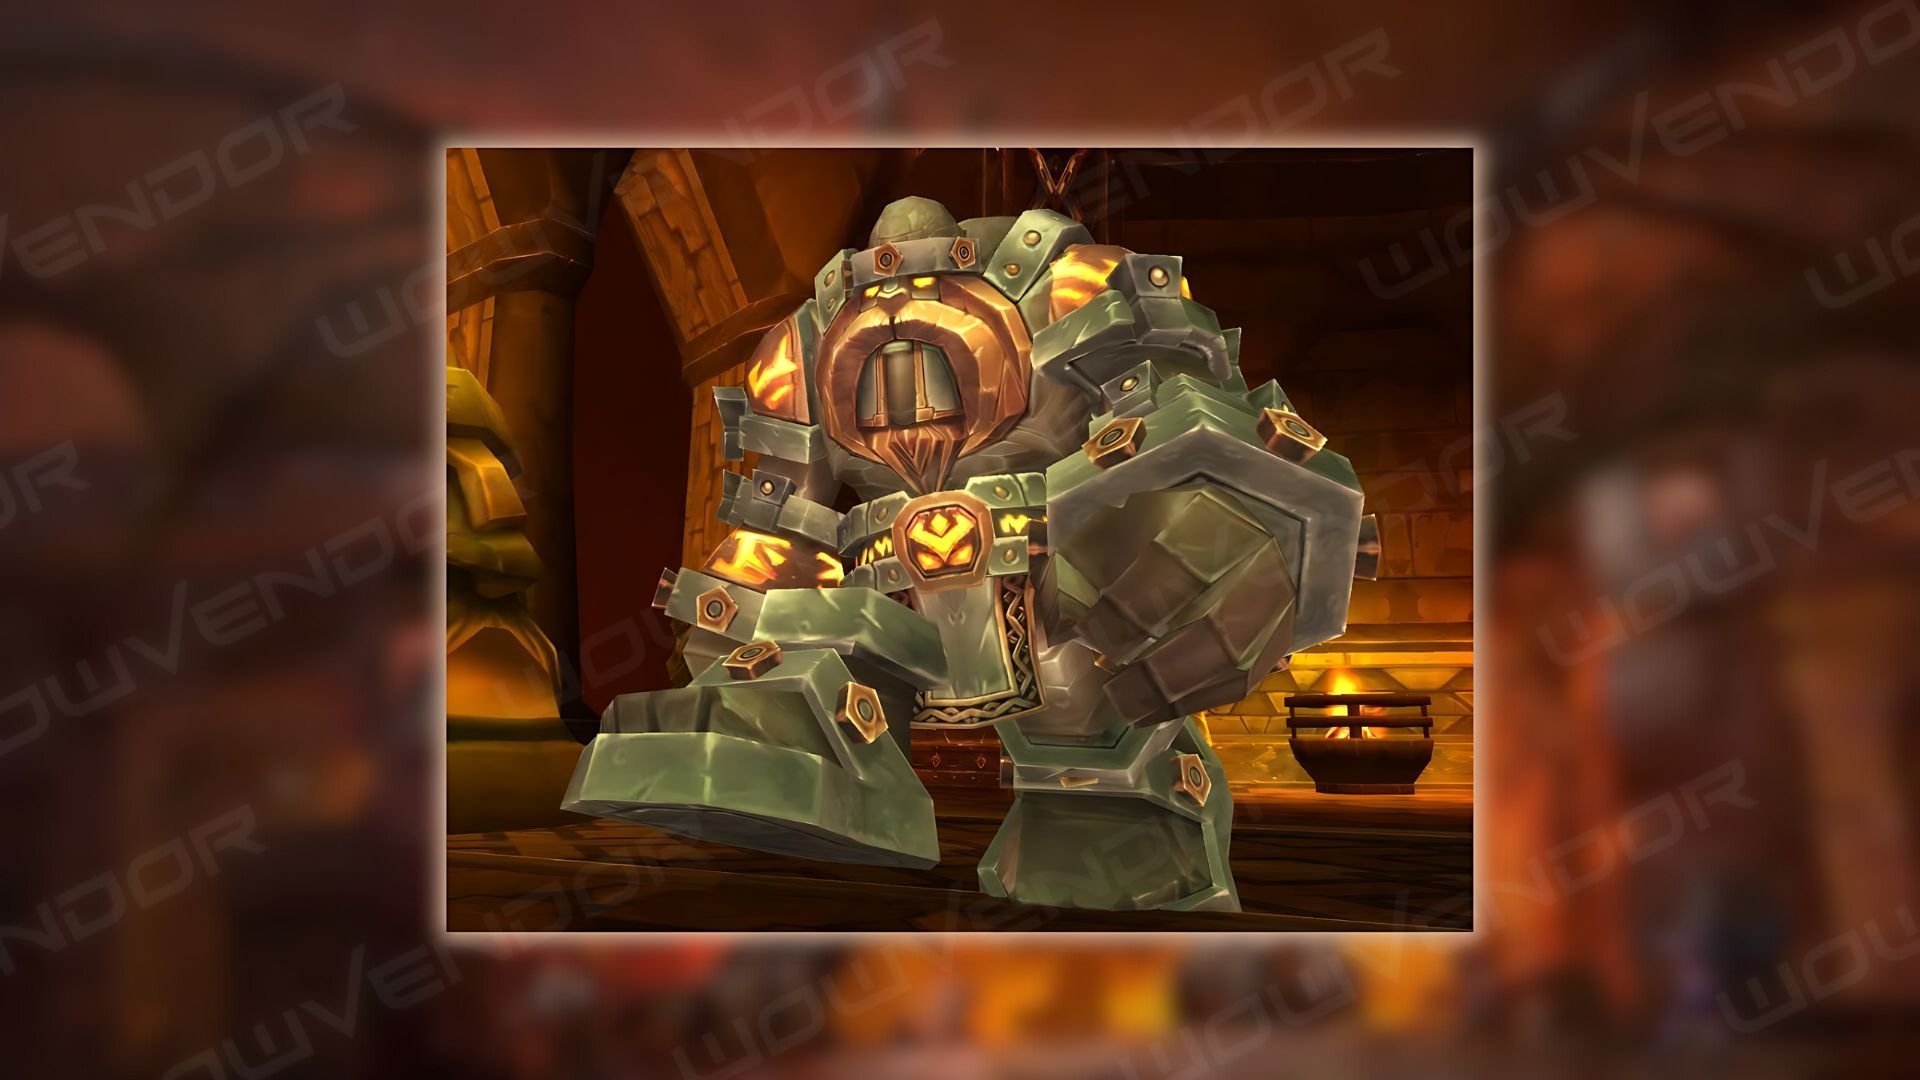
The fight consists of four golems sharing one Health pool. Each has unique mechanics and an Energy bar. Only two out of four constructs are active at a time. When a golem’s Energy reaches 50%, it gets a defensive buff. When Energy reaches 0, the enemy shuts down, and another activates.
Since both golems start the encounter with full Energy, players can use cleaves or DoTs to deal increased damage. Focus on attacking one golem since the other is protected by a defensive buff. Avoid attacking buffed golems to prevent raid damage or harmful status effects.
On Heroic, Nefarian occasionally infuses golems with Shadows, boosting their abilities.
Magmatron
- Incineration Security Measure — a raid-wide unavoidable damage. Can overlap with Electric Discharge, so using healing cooldowns is advised.
- Acquiring Target + Flamethrower — selects a random player and fires a line AoE at them after a short delay. Avoid by moving to the side. On Heroic only, if infused with Shadow, the selected player is Rooted and can’t move. Dispel the Root or have the raid move away from the targeted player. Using abilities like Feign Death or Ice Block can also avoid the attack.
- Barrier — activates when reaches 50% Energy. If destroyed, deals severe damage to the whole raid.
Electron
- Electric Discharge — deals chain lightning damage to multiple nearby targets, with each jump increasing in damage. Can overlap with the Incineration Security Measure, so use healing and defensive cooldowns.
- Lightning Conductor — marks a target, making them deal damage to all nearby players. If infused with Shadow (on Heroic only), the target also constantly deals raid-wide damage that scales with distance from the Lighting Conductor. The target should stay close to the raid but not close enough to hit them with the Lightning Conductor.
- Unstable Shield — activates when it reaches 50% Energy. Doesn’t prevent damage, but retaliates with Static Shock when struck, dealing damage to the target and all players around it.
Toxitron
- Chemical Bomb — targets a player and creates an area of toxic gas at their location, increasing damage taken from all sources for everyone inside. Move bosses into the area but avoid standing in it. If infused with Shadow (on Heroic only), the zone also deals damage and pulls the raid in. Use movement cooldowns to escape quickly.
- Poison Protocol — Toxitron spawns a Poison Bomb every 3 seconds, fixating on a random player. If it reaches the target, it explodes, leaving a damaging zone, so kill it quickly. Using movement-impairing abilities is recommended.
- Poison Soaked Shell — activates at 50% Energy. Doesn’t prevent damage, but retaliates by stacking the DoT effect if struck. The DoT can be cleansed, but as long as players have a DoT on them, they deal extra damage. So if your Healer can outheal the DoT, you may want that added damage. Generally, avoid hitting the barrier unless instructed otherwise.
Arcanotron
- Power Generator — creates a zone under a random player, boosting damage and Mana regeneration for those inside. If infused with Shadow (on Heroic only), the generator becomes unstable, boosting damage but exploding shortly after. Move out before the explosion to avoid heavy damage.
- Arcane Annihilator — a heavy-hitting single-target nuke. Can be interrupted.
- Power Conversion — activates at 50% Energy. Doesn’t prevent damage, but each time Arcanotron is struck, he receives stacking damage and cast time buff. Avoid attacking at all costs.
The difficulty comes from pairs being random, so you should be ready to deal with various combinations of the mechanics. Save healing and defensive cooldowns for Magmatron and Electron, the most dangerous combination. Avoid damaging barriers to prevent complications.
Magmaw Boss Guide
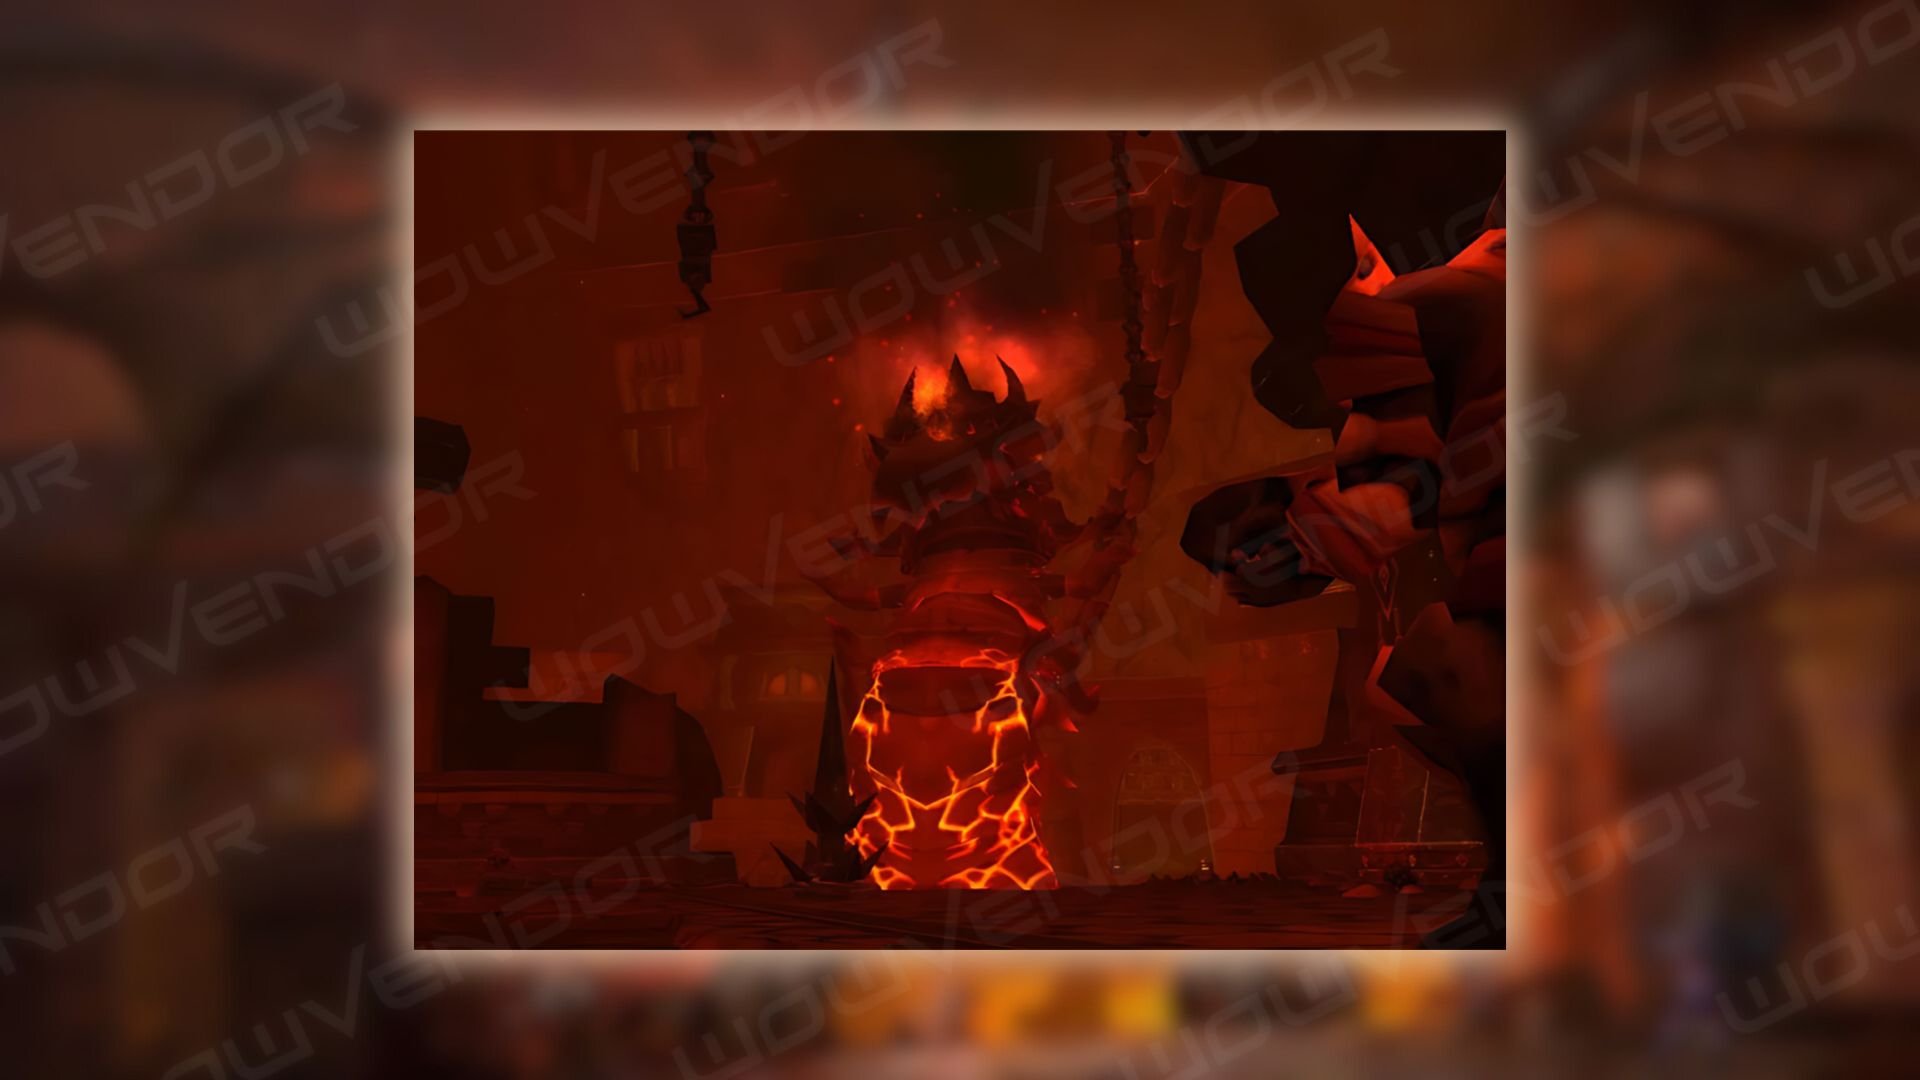
After Massive Crush, several players can click the boss to climb on its back. Then, use a Launch Hook action and hit a spike to the ground. This will expose the boss’s weak point, making it suffer 100% increased damage.
- Magma Spit — deals damage to 3 random players.
- Lava Spew — a raid-wide damage over several seconds.
- Molten Tantrum — if there is no one in its melee range, the boss goes into a frenzy, getting a buff that increases fire damage dealt by 100%. Avoid triggering that.
- Pillar of Flame — creates a knockback AoE under a random player, exploding after a delay and spawning Lava Parasites. These adds move slowly towards players, burrowing into them on contact, inflicting a heavy ticking DoT. Group up ranged players to bait the initial AoE, then move out together and cleave the adds before they reach any player. Use movement impairment abilities to control the adds.
- Mangle — deals heavy DoT to the MT for 30 seconds. If not resolved in time, it kills the tank. If resolved, the tank is afflicted with the armor reduction debuff, so a tank swap is necessary. Either healers or the tank himself should use defensive cooldowns to survive that attack.
- Massive Crush — A huge AoE covering half of the fight area, following Mangle. Avoid it by moving to the safe half. After that, Magmaw will be briefly stunned, allowing players (preferably melee) to climb on his back. Use Launch Hook and throw the AoE at the spike protruding from the ground. You need to throw 2 (10-man version)/ 3 (25-man version) hooks successfully to impale the boss, making him vulnerable for 30 seconds, while also saving the tank from Mangle. Use this time to deal as much damage as possible with burst and damage cooldowns like Bloodlust. When Magwam recovers, its aggro resets.
- Blazing Inferno — Heroic only. Nefarian casts a meteor at random players, which spawns Blazing Bone Constructs. Dodge meteors, off-tank should grab and cleave adds. When skeletons reach critical health, they cast Armageddon — a heavy heating raid-wide AoE. Finish them before they end the cast. Blazing inferno can appear even when Magmaw is impaled.
- Shadowflame Barrage — Heroic only, relacing Blazing Inferno when Magmaw reaches 25% Health. Nefarian bombards players with unavoidable AoEs. Players need to spread out to prevent overlapping.
Chimaeron Boss Guide
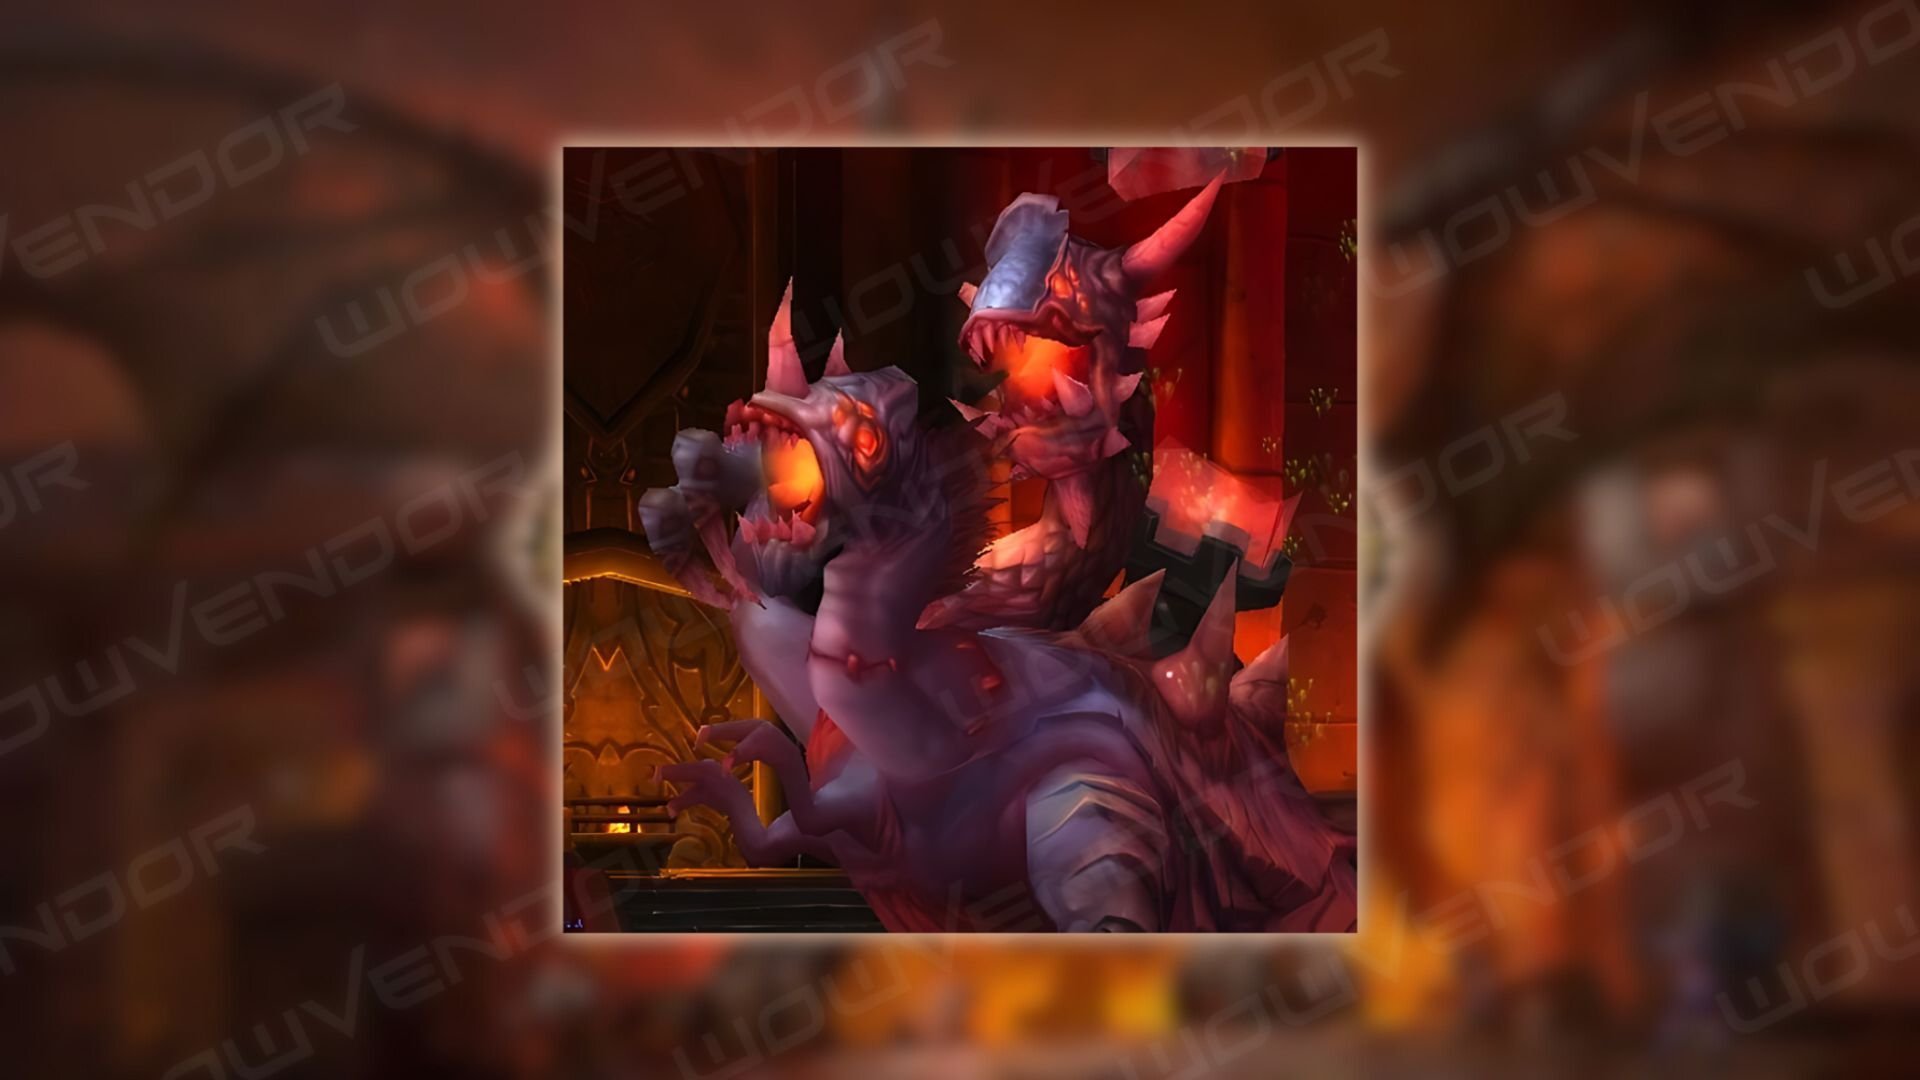
A Bile-O-Tron device grants a buff preventing death if players have over 10,000 current Health. Healers need to make sure that everyone in the raid has enough HP to benefit from this effect. Bile-O-Tron will go offline for a short time, and with it, the buff will be gone, so some mechanics will be solved differently.
At 25% Health, Bile-O-Tron, and the buff will be gone permanently.
- Caustic Slime — an AoE around the player that splits damage between all players hit. If Mixture buff is up, players can take hits solo if they have over 10K Health and AoEs don’t overlap. If the buff is gone, however, the raid needs to stack and split damage, with healers topping everyone quickly between each hit.
- Break — a tank-buster that reduces healing done (to hinder DK self-healing) and increases physical damage taken. Not a threat if the tank is under Mixture buff.
- Double Attack — make the enemy strike two times with the next hit. Ensures Mixture won’t help to survive the hit. Have a fully healed OT to swap the boss to take that hit and swap back to prevent OT from getting Break.
- Massacre —used after every 3rd (Normal)/ 5th (Heroic) cast of Caustic Slime. A raid-wide attack that deals damage equal to the target’s maximum Health. Can only be survived with Mixture buff. Every 3rd Massacre use turns off Bile-O-Tron temporarily. The group needs to stack together to share damage from the next Caustic Slime casts until Bile-O-Tron turns on again. Use healing and defensive cooldowns for that.
- Feud — Normal only. Prevents the boss from doing physical attacks until Bile-O-Tron comes back online. This doesn’t happen on Heroic so to ensure tanks’ survival, two tanks should swap between each other to prevent stacking Break. A third tank or a plate DPS should take the boss for Double Attack.
- Mortality — At 25% Health, the boss enrages, permanently turning off Bile-O-Tron and applying a 99% healing reduction debuff. He also becomes immune to Taunt but takes 10% increased damage. Use powerful buffs like Bloodlust to burst the boss. It’s advised to trigger Mortality either before Massacre, or right after, when everyone’s Health is topped.
- Mocking Shadows — Heroic only. Cast by Nefarian after Mortality. Constantly deals damage to the whole raid, reducing the time the raid has to finish the boss. Going into the last phase with max Health is necessary.
Atramedes Boss Guide
Each player gets a Sound meter that, when reaching 100, instantly kills them. Sound builds up when players take damage.
Use Ancient Dwarven Shields scattered around the arena to reset Sound for everyone, interrupt Atramedes casting, and put him in a Vertigo state. Beware, when he recovers, he destroys the shield used. 14 shields are available on Normal, but only 7 on Heroic. You have to defeat the boss before you run out of Shields.
The boss has two phases:
Grounded
- Players should position in line
- Sonar Pulse — sends a disk of energy that increases players’ Sound on hit. Avoid it.
- Modulation — a raid-wide attack, damage scales with the target’s Sound. Use healing cooldowns or mitigation.
- Searing Flames — a raid-wide attack that ramps up in damage with every second and leaves a DoT zone. Interrupt by using Ancient Dwarven Shield before the cast finishes to avoid damage.
- Sonic Breath — a beam of fire that follows the chosen target. The targeted players should lure the breath to one side while the whole raid moves to the opposite to avoid being clipped.
- Devastation — an AoE that kills anyone with 100 Sound.
- Obnoxious Fiend — Heroic only. Two adds spawned by Nefarian latch onto two random players, constantly increasing their Sound. Take them down ASAP.
Airborne
- Players should move constantly between two selected spots. Both are for easier time dodging the boss’s attacks.
- Sonar Bomb — an AoE thrown at the target player’s location. Dodge it as getting hit deals damage and significantly increases Sound.
- Sonic Fireball — a follow-up AoE thrown at the location where the Sonar Bomb landed.
- Roaring Flame Breath — a tracking fire breath aimed at a random player, leaving a DoT zone. The targeted player should kite this, but it will ramp up in speed. Another player should use the Ancient Dwarven Shield to reset its speed. Beware: Atramedes will target the shield user.
Split your resources wisely since Shields are finite. Avoid unnecessary damage to prevent Sound build-up.
Maloriak Boss Guide
The boss alternates between color phases and abilities. Normal mode has three colors: Red, Blue, and Green, with Green always being third. Heroic mode adds a fourth color, Dark, always the first in the cycle. At 25% health, the boss enters a soft enrage phase.
- Arcane Storm — used during any phase. Hard-hitting raid-wide. Can be interrupted.
- Remedy — powerful HoT buff, ramps up in power with each tick. A Magic effect must be either dispelled or stolen.
Red
- Consuming Flames — a DoT applied to a random player, making them take 50% increased damage. Any magical damage taken with this DoT increases the strength of each tick by 50% of that magical damage. The player with the DoT should avoid taking any damage while the effect is on.
- Scorching Blast — a thin cone-shaped AoE that shares damage between all players. Everyone but OT and the person affected by Consuming Flames should stack together to split the damage.
- Release Aberrations — spawn adds that make each other resistant to damage. OT needs to grab them and kite away from the boss until the Green phase.
Blue
- Biting Chill — targets a random player with AoE damage over 10 seconds to them and nearby players. Spread out to avoid damage. Use personal mitigation tools if targeted.
- Flash Freeze — entombs a random target and everyone within 5 yards in ice for 30 seconds. Both the initial cast and ice breaking deal damage. Players should stay 5 yards apart to ensure only one person is frozen at a time.
- Release Aberrations — same as the Red phase.
Green
- Debilitating Slime — finishes the color cycle. The slime explosion removes damage resist buffs from adds and increases damage dealt to anyone by 100%. OT must bring adds to the boss so the raid can cleave them fast.
Dark (Heroic only)
- Vile Swill — Adds spawn and continuously create DoT zones across the arena. OT should grab them, while others quickly focus them down.
- Engulfing Darkness — an 8-second debuff applied to MT that prevents any healing received every 10 seconds. Healers have 2 seconds to top MT’s HP between casts.
- Release Aberrations — Similar to the Red phase. But this time, OT will be busy with Dark Sludges, so it’s advised to interrupt the cast.
Last Phase
- Release All — the start of soft enrage. The boss releases all the remaining adds, including two Prime Subjects, and stops cycling through colors. OT should grab all the adds and kite them.
- Magma Jets — a line AoE aimed at MT, leaves behind a DoT zone. MT should aim it at the wall and move out after each cast.
- Absolute Zero — spawning ice orbs that move constantly and explode when come in contact with players, dealing heavy damage. Avoid them.
- Acid Nova — a raid-wide DoT effect. Use healing and defensive cooldowns to survive that attack.
Use damage buffs and strong cooldowns like Bloodlust for the last phase to down the enemy quickly.
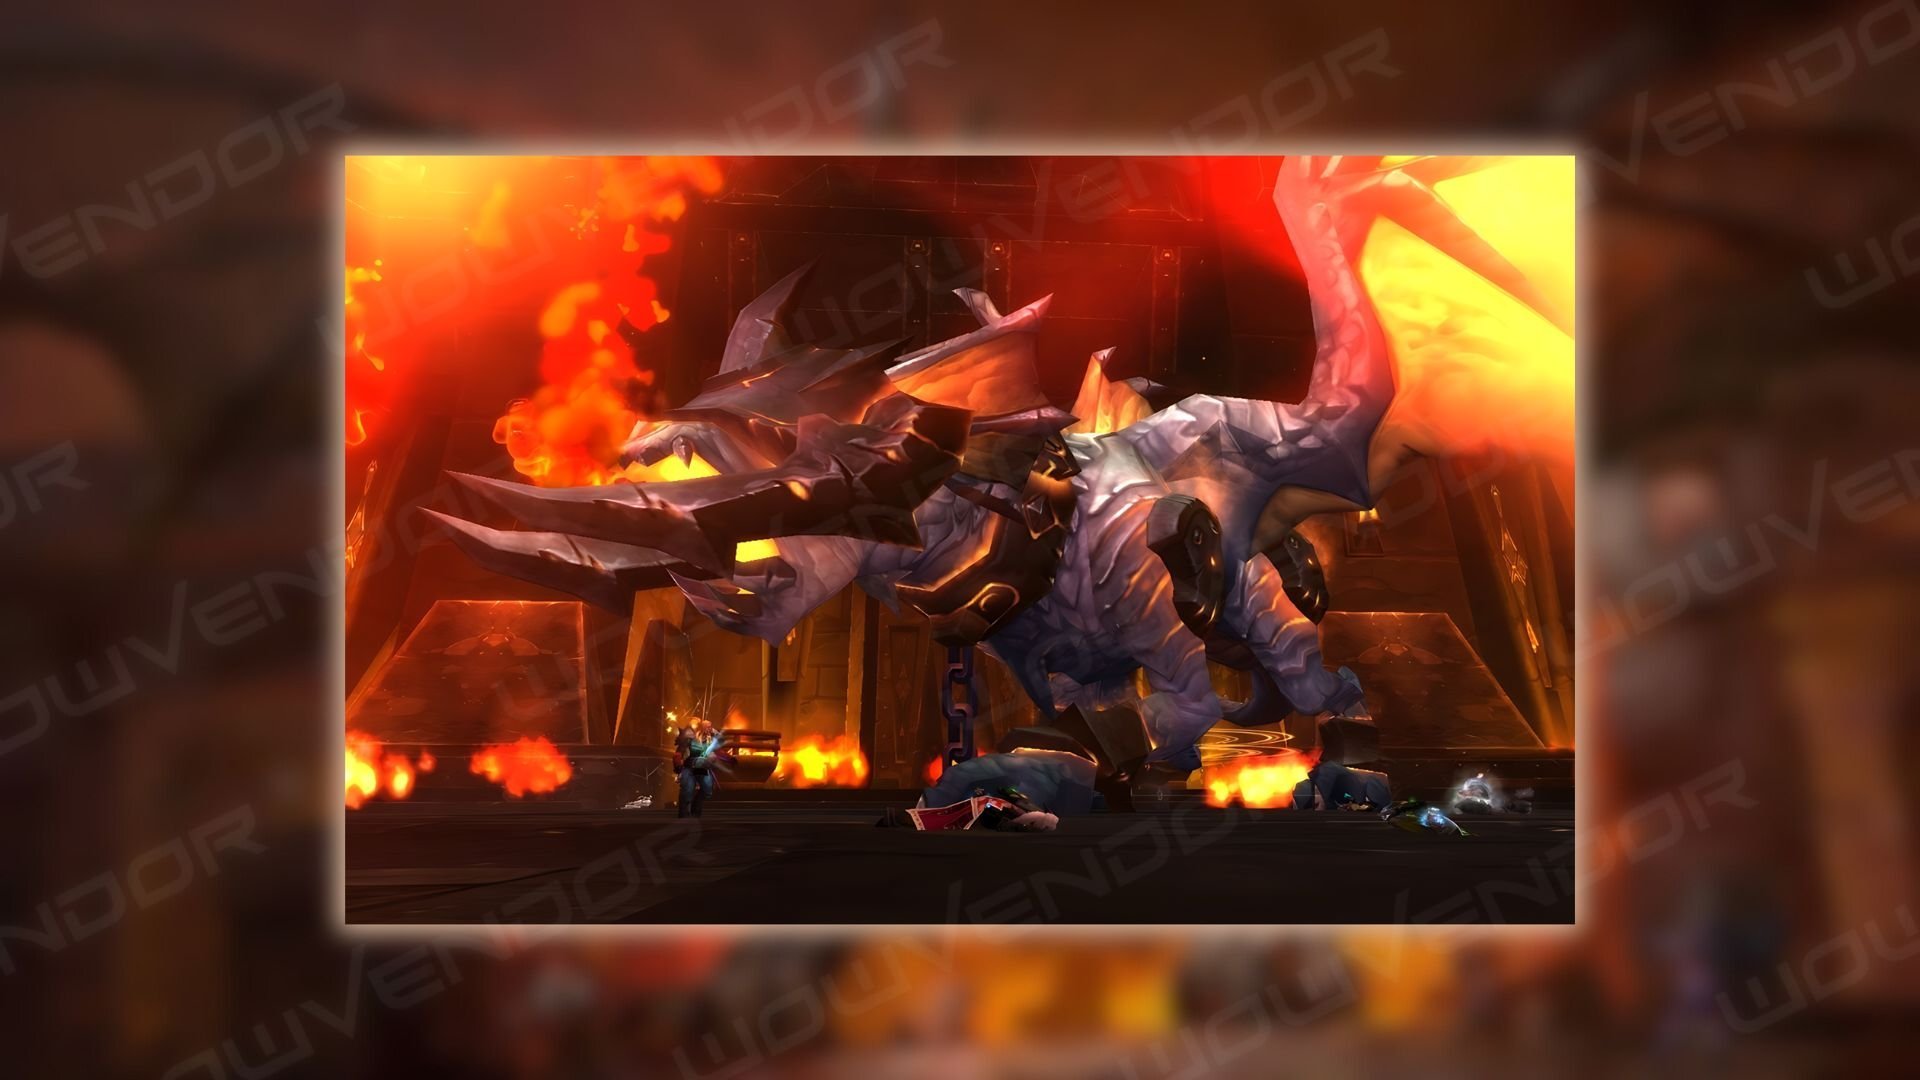
Nefarian Boss Guide
Nefarian has several phases. Every 10% health loss triggers Electrocute — a powerful raid-wide AoE. Avoid overlapping it with other mechanics. Healers need to keep everyone healthy during this.
Phase 1
Defeat Onyxia before her Energy bar fills to 100. Failing to do so will result in a wipe. The bar fills overtime when Nefarian uses Electrocute.
If both dragons are close to each other, the Children of the Deathwing buff activates, making them attack 100% faster. Split the bosses to opposite edges of the arena, facing their sides towards the center to avoid this.
Nefarian
- Hail of Bones — the boss raises Animated Bone Warriors while also damaging the raid. Over time, these adds become stronger, but they also lose Energy. Kite them. Once their Energy runs out, they die. But they can be reanimated by some attacks.
- Shadowflame Breath — This frontal conal AoE completely recharges Skeleton adds. Avoid letting them get hit by it.
- Tail Lash — a back cleave. Deals physical damage and stuns players hit.
- Dominion — Heroic only. Players lose control and move towards a deadly portal. While affected, they can Siphon Power from Nefarian for a stacking damage buff or Break Free to regain control. Healers can instantly break free, while others may benefit from the damage buff. However, they must stop before reaching the portal.
Onyxia
- Lightning Discharge — a conal AoE from Onyxia’s sides. When her sides spark, either the tank should position her so her tail faces the raid, or players should move to her back where it’s safe. Decide what to do before this encounter.
- Shadowflame Breath — same as Nefarian’s.
- Tail Lash — same as Nefarian’s.
If Onyxia is nearly defeated, and there’s time before her enrage, focus on damaging Nefarian. Kill Onyxia before her Energy reaches 100. Remember, each time Nefarian loses 10% health, he casts Electrocute, which charges Onyxia.
Phase 2
Onyxia’s death starts the second phase. Nefarian floods the room with lava, leaving only three safe columns. Each has a Chromatic Prototype add. The raid should split into three groups. Members of each group should be decided beforehand. Each must include a healer (even in 10-man runs, getting a 3rd healer is advised) and several interrupts. Defeat these three adds, who cast the Blast Nova AoE non-stop. Use interrupts to prevent it.
Nefarian bombards random players with Shadowflame Barrage, dealing moderate damage. On Heroic, he also applies Explosive Cinders, a DoT that explodes for heavy damage and knockback when it expires. Affected players should use personal mitigation cooldowns and stand in lava until it wears off.
Ranged players can still attack Nefarian during this phase, but beware, as it may trigger Electrocute. When all adds are dead, the lava recedes. The raid should jump off the platforms.
Phase 3
This phase is straightforward, similar to the first one but without Onyxia. Nefarian retains all moves from Phase 1 with a new addition:
- Shadowblaze Spark — creates spreading fire in a selected area. Deals damage to any player who touches it and completely recharges skeletons. MT should tank the boss in one half of the arena, while other tank kites adds in the other half. Move adds away from fire and don’t get hit by back cleave.
The scariest thing, especially on Heroic, is Electrocute. This attack deals a lot of damage, so plan your healing and defensive cooldowns in advance.

Blackwing Descent Loot Table
All 6 bosses in this Blackwing Descent loot table for 10 and 25 players on Normal and Heroic difficulty drop 359 and 372-item level armor, trinkets, and weapons.
Omnotron Defense System Loot Table
10-Player Normal
| Name | Type |
| Power Generator Hood | Cloth |
| X-Tron Duct Tape | Cloth |
| Organic Lifeform Inverter | Dagger |
| Passive Resistor Spaulders | Leather |
| Poison Protocol Pauldrons | Leather |
| Circuit Design Breastplate | |
| Voltage Source Chestguard | |
| Electron Inductor Coils | Plate |
| Jumbotron Power Belt | Plate |
| Life Force Chargers | Plate |
| Lightning Conductor Band | Finger |
| Security Measure Alpha | Finger |
10-Player Heroic
| Name | Type |
| Power Generator Hood | Cloth |
| X-Tron Duct Tape | Cloth |
| Organic Lifeform Inverter | Dagger |
| Passive Resistor Spaulders | Leather |
| Poison Protocol Pauldrons | Leather |
| Circuit Design Breastplate | |
| Voltage Source Chestguard | |
| Electron Inductor Coils | Plate |
| Jumbotron Power Belt | Plate |
| Life Force Chargers | Plate |
| Lightning Conductor Band | Finger |
| Security Measure Alpha | Finger |
25-Player Normal
| Name | Type |
| Power Generator Hood | Cloth |
| X-Tron Duct Tape | Cloth |
| Organic Lifeform Inverter | Dagger |
| Passive Resistor Spaulders | Leather |
| Poison Protocol Pauldrons | Leather |
| Circuit Design Breastplate | |
| Voltage Source Chestguard | |
| Electron Inductor Coils | Plate |
| Jumbotron Power Belt | Plate |
| Life Force Chargers | Plate |
| Lightning Conductor Band | Finger |
| Security Measure Alpha | Finger |
25-Player Heroic
| Name | Type |
| Power Generator Hood | Cloth |
| X-Tron Duct Tape | Cloth |
| Organic Lifeform Inverter | Dagger |
| Passive Resistor Spaulders | Leather |
| Poison Protocol Pauldrons | Leather |
| Circuit Design Breastplate | |
| Voltage Source Chestguard | |
| Electron Inductor Coils | Plate |
| Jumbotron Power Belt | Plate |
| Life Force Chargers | Plate |
| Lightning Conductor Band | Finger |
| Security Measure Alpha | Finger |
Magmaw Loot Table
10-Player Normal
| Name | Type |
| Crown of Burning Waters | Cloth |
| Flame Pillar Leggings | Cloth |
| Incineratus | Dagger |
| Parasitic Bands | Leather |
| Scorched Wormling Vest | Leather |
| Leggings of Lethal Force | |
| Lifecycle Waistguard | |
| Lava Spine | One-Handed Sword |
| Breastplate of Avenging Flame | Plate |
| Molten Tantrum Boots | Plate |
| Symbiotic Worm | Trinket |
| Akirus the Worm-Breaker | Two-Handed Mace |
10-Player Heroic
| Name | Type |
| Crown of Burning Waters | Cloth |
| Flame Pillar Leggings | Cloth |
| Incineratus | Dagger |
| Parasitic Bands | Leather |
| Scorched Wormling Vest | Leather |
| Leggings of Lethal Force | |
| Lifecycle Waistguard | |
| Lava Spine | One-Handed Sword |
| Breastplate of Avenging Flame | Plate |
| Molten Tantrum Boots | Plate |
| Symbiotic Worm | Trinket |
| Akirus the Worm-Breaker | Two-Handed Mace |
25-Player Normal
| Name | Type |
| Crown of Burning Waters | Cloth |
| Flame Pillar Leggings | Cloth |
| Incineratus | Dagger |
| Parasitic Bands | Leather |
| Scorched Wormling Vest | Leather |
| Leggings of Lethal Force | |
| Lifecycle Waistguard | |
| Lava Spine | One-Handed Sword |
| Breastplate of Avenging Flame | Plate |
| Molten Tantrum Boots | Plate |
| Symbiotic Worm | Trinket |
| Akirus the Worm-Breaker | Two-Handed Mace |
25-Player Heroic
| Name | Type |
| Crown of Burning Waters | Cloth |
| Flame Pillar Leggings | Cloth |
| Incineratus | Dagger |
| Parasitic Bands | Leather |
| Scorched Wormling Vest | Leather |
| Leggings of Lethal Force | |
| Lifecycle Waistguard | |
| Lava Spine | One-Handed Sword |
| Breastplate of Avenging Flame | Plate |
| Molten Tantrum Boots | Plate |
| Symbiotic Worm | Trinket |
| Akirus the Worm-Breaker | Two-Handed Mace |
Chimaeron Loot Table
10-Player Normal
| Name | Type |
| Brackish Gloves | Cloth |
| Einhorn’s Galoshes | Cloth |
| Double Attack Handguards | Leather |
| Manacles of the Sleeping Beast | Leather |
| Chaos Beast Bracers | |
| Chimaeron Armguards | |
| Burden of Mortality | Plate |
| Massacre Treads | Plate |
| Plated Fists of Provocation | Plate |
| Bile-O-Tron Nut | Finger |
| Heart of Rage | Trinket |
| Finkle’s Mixer Upper | Wand |
10-Player Heroic
| Name | Type |
| Brackish Gloves | Cloth |
| Einhorn’s Galoshes | Cloth |
| Double Attack Handguards | Leather |
| Manacles of the Sleeping Beast | Leather |
| Chaos Beast Bracers | |
| Chimaeron Armguards | |
| Burden of Mortality | Plate |
| Massacre Treads | Plate |
| Plated Fists of Provocation | Plate |
| Bile-O-Tron Nut | Finger |
| Heart of Rage | Trinket |
| Finkle’s Mixer Upper | Wand |
25-Player Normal
| Name | Type |
| Brackish Gloves | Cloth |
| Einhorn’s Galoshes | Cloth |
| Double Attack Handguards | Leather |
| Manacles of the Sleeping Beast | Leather |
| Chaos Beast Bracers | |
| Chimaeron Armguards | |
| Burden of Mortality | Plate |
| Massacre Treads | Plate |
| Plated Fists of Provocation | Plate |
| Bile-O-Tron Nut | Finger |
| Heart of Rage | Trinket |
| Finkle’s Mixer Upper | Wand |
25-Player Heroic
| Name | Type |
| Brackish Gloves | Cloth |
| Einhorn’s Galoshes | Cloth |
| Double Attack Handguards | Leather |
| Manacles of the Sleeping Beast | Leather |
| Chaos Beast Bracers | |
| Chimaeron Armguards | |
| Burden of Mortality | Plate |
| Massacre Treads | Plate |
| Plated Fists of Provocation | Plate |
| Bile-O-Tron Nut | Finger |
| Heart of Rage | Trinket |
| Finkle’s Mixer Upper | Wand |
Atramedes Loot Table
10-Player Normal
| Name | Type |
| Ironstar Amulet | Neck |
| Themios the Darkbringer | Bow |
| Bracers of the Burningeye | Cloth |
| Mantle of Roaring Flames | Cloth |
| Helm of the Blind Seer | Leather |
| Sark of the Unwatched | Leather |
| Boots of Vertigo | |
| Gloves of Cacophony | |
| Battleplate of Ancient Kings | Plate |
| Legguards of the Unseeing | Plate |
| Kingdom’s Heart | Shield |
| Bell of Enraging Resonance | Trinket |
10-Player Heroic
| Name | Type |
| Ironstar Amulet | Neck |
| Gauntlets of the Forlorn Conqueror | Armor Token |
| Gauntlets of the Forlorn Protector | Armor Token |
| Gauntlets of the Forlorn Vanquisher | Armor Token |
| Themios the Darkbringer | Bow |
| Bracers of the Burningeye | Cloth |
| Mantle of Roaring Flames | Cloth |
| Helm of the Blind Seer | Leather |
| Sark of the Unwatched | Leather |
| Boots of Vertigo | |
| Gloves of Cacophony | |
| Battleplate of Ancient Kings | Plate |
| Legguards of the Unseeing | Plate |
| Kingdom’s Heart | Shield |
| Bell of Enraging Resonance | Trinket |
25-Player Normal
| Name | Type |
| Ironstar Amulet | Neck |
| Themios the Darkbringer | Bow |
| Bracers of the Burningeye | Cloth |
| Mantle of Roaring Flames | Cloth |
| Helm of the Blind Seer | Leather |
| Sark of the Unwatched | Leather |
| Boots of Vertigo | |
| Gloves of Cacophony | |
| Battleplate of Ancient Kings | Plate |
| Legguards of the Unseeing | Plate |
| Kingdom’s Heart | Shield |
| Bell of Enraging Resonance | Trinket |
25-Player Heroic
| Name | Type |
| Ironstar Amulet | Neck |
| Gauntlets of the Forlorn Conqueror | Armor Token |
| Gauntlets of the Forlorn Protector | Armor Token |
| Gauntlets of the Forlorn Vanquisher | Armor Token |
| Themios the Darkbringer | Bow |
| Bracers of the Burningeye | Cloth |
| Mantle of Roaring Flames | Cloth |
| Helm of the Blind Seer | Leather |
| Sark of the Unwatched | Leather |
| Boots of Vertigo | |
| Gloves of Cacophony |
Maloriak Loot Table
10-Player Normal
| Name | Type |
| Cloak of Biting Chill | Cloak |
| Belt of Arcane Storms | Cloth |
| Legwraps of the Greatest Son | Cloth |
| Aberration’s Leggings | Leather |
| Leggings of Consuming Flames | Leather |
| Treads of Flawless Creation | |
| Tunic of Failed Experiments | |
| Mace of Acrid Death | One-Handed Mace |
| Belt of Absolute Zero | Plate |
| Dragon Bone Warhelm | Plate |
| Flash Freeze Gauntlets | Plate |
| Jar of Ancient Remedies | Trinket |
10-Player Heroic
| Name | Type |
| Leggings of the Forlorn Conqueror | Armor Token |
| Leggings of the Forlorn Protector | Armor Token |
| Leggings of the Forlorn Vanquisher | Armor Token |
| Cloak of Biting Chill | Cloak |
| Belt of Arcane Storms | Cloth |
| Legwraps of the Greatest Son | Cloth |
| Aberration’s Leggings | Leather |
| Leggings of Consuming Flames | Leather |
| Treads of Flawless Creation | |
| Tunic of Failed Experiments | |
| Mace of Acrid Death | One-Handed Mace |
| Belt of Absolute Zero | Plate |
| Dragon Bone Warhelm | Plate |
| Flash Freeze Gauntlets | Plate |
| Jar of Ancient Remedies | Trinket |
25-Player Normal
| Name | Type |
| Cloak of Biting Chill | Cloak |
| Belt of Arcane Storms | Cloth |
| Legwraps of the Greatest Son | Cloth |
| Aberration’s Leggings | Leather |
| Leggings of Consuming Flames | Leather |
| Treads of Flawless Creation | |
| Tunic of Failed Experiments | |
| Mace of Acrid Death | One-Handed Mace |
| Belt of Absolute Zero | Plate |
| Dragon Bone Warhelm | Plate |
| Flash Freeze Gauntlets | Plate |
| Jar of Ancient Remedies | Trinket |
25-Player Heroic
| Name | Type |
| Leggings of the Forlorn Conqueror | Armor Token |
| Leggings of the Forlorn Protector | Armor Token |
| Leggings of the Forlorn Vanquisher | Armor Token |
| Cloak of Biting Chill | Cloak |
| Belt of Arcane Storms | Cloth |
| Legwraps of the Greatest Son | Cloth |
| Aberration’s Leggings | Leather |
| Leggings of Consuming Flames | Leather |
| Treads of Flawless Creation | |
| Tunic of Failed Experiments | |
| Mace of Acrid Death | One-Handed Mace |
| Belt of Absolute Zero | Plate |
| Dragon Bone Warhelm | Plate |
| Flash Freeze Gauntlets | Plate |
| Jar of Ancient Remedies | Trinket |
Nefarian Loot Table
10-Player Normal
| Name | Type |
| Rage of Ages | Neck |
| Helm of the Forlorn Conqueror | Armor Token |
| Helm of the Forlorn Protector | Armor Token |
| Helm of the Forlorn Vanquisher | Armor Token |
| Shadow of Dread | Cloak |
| Mantle of Nefarius | Cloth |
| Shadowblaze Robes | Cloth |
| Belt of the Nightmare | Leather |
| Spaulders of the Scarred Lady | |
| Crul’korak, the Lightning’s Arc | One-Handed Axe |
| Andoros, Fist of the Dragon King | One-Handed Mace |
| Belt of the Blackhand | Plate |
| Pauldrons of the Apocalypse | Plate |
| Akmin-Kurai, Dominion’s Shield | Shield |
| Prestor’s Talisman of Machination | Trinket |
| Reclaimed Ashkandi, Greatsword of the Brotherhood | Two-Handed Sword |
10-Player Heroic
| Name | Type |
| Rage of Ages | Neck |
| Crown of the Forlorn Conqueror | Armor Token |
| Crown of the Forlorn Protector | Armor Token |
| Crown of the Forlorn Vanquisher | Armor Token |
| Shadow of Dread | Cloak |
| Mantle of Nefarius | Cloth |
| Shadowblaze Robes | Cloth |
| Belt of the Nightmare | Leather |
| Spaulders of the Scarred Lady | |
| Crul’korak, the Lightning’s Arc | One-Handed Axe |
| Andoros, Fist of the Dragon King | One-Handed Mace |
| Belt of the Blackhand | Plate |
| Pauldrons of the Apocalypse | Plate |
| Akmin-Kurai, Dominion’s Shield | Shield |
| Prestor’s Talisman of Machination | Trinket |
| Reclaimed Ashkandi, Greatsword of the Brotherhood | Two-Handed Sword |
25-Player Normal
| Name | Type |
| Rage of Ages | Neck |
| Helm of the Forlorn Conqueror | Armor Token |
| Helm of the Forlorn Protector | Armor Token |
| Helm of the Forlorn Vanquisher | Armor Token |
| Shadow of Dread | Cloak |
| Mantle of Nefarius | Cloth |
| Shadowblaze Robes | Cloth |
| Belt of the Nightmare | Leather |
| Spaulders of the Scarred Lady | |
| Crul’korak, the Lightning’s Arc | One-Handed Axe |
| Andoros, Fist of the Dragon King | One-Handed Mace |
| Belt of the Blackhand | Plate |
| Pauldrons of the Apocalypse | Plate |
| Akmin-Kurai, Dominion’s Shield | Shield |
| Prestor’s Talisman of Machination | Trinket |
| Reclaimed Ashkandi, Greatsword of the Brotherhood | Two-Handed Sword |
25-Player Heroic
| Name | Type |
| Rage of Ages | Neck |
| Crown of the Forlorn Conqueror | Armor Token |
| Crown of the Forlorn Protector | Armor Token |
| Crown of the Forlorn Vanquisher | Armor Token |
| Shadow of Dread | Cloak |
| Mantle of Nefarius | Cloth |
| Shadowblaze Robes | Cloth |
| Belt of the Nightmare | Leather |
| Spaulders of the Scarred Lady | |
| Crul’korak, the Lightning’s Arc | One-Handed Axe |
| Andoros, Fist of the Dragon King | One-Handed Mace |
| Belt of the Blackhand | Plate |
| Pauldrons of the Apocalypse | Plate |
| Akmin-Kurai, Dominion’s Shield | Shield |
| Prestor’s Talisman of Machination | Trinket |
| Reclaimed Ashkandi, Greatsword of the Brotherhood | Two-Handed Sword |
Blackwing Descent Achievements
In Blackwing Descent, you can earn a total of 16 achievements:
Personal Achievements
Here are the personal achievements you can earn by participating in the Blackwing Descent raid:
- Blackwing Descent: Defeat all the raid bosses.
- Heroic: Magmaw: Conquer Magmaw on Heroic difficulty
- Heroic: Omnotron Defense System: Triumph over Omnotron Defense System on Heroic difficulty
- Heroic: Maloriak: Defeat Maloriak on Heroic difficulty
- Heroic: Atramedes: Win a victory over Atramedes on Heroic difficulty
- Heroic: Chimaeron: Overcome Chimaeron on Heroic difficulty
- Heroic: Nefarian: Triumph over Nefarian on Heroic difficulty. As a reward, you will surely obtain the glorious title <Name>, Blackwing’s Bane.
Guild Achievements
Obtaining the following achievements involves grouping up with your guild members:
- Blackwing Descent Guild Run: Defeat all the raid bosses with the help of your guild.
- Heroic: Nefarian Guild Run: Conquer Heroic-difficulty Nefarian with your guild.
- Realm First! Nefarian: You and your guild must be the first to defeat Nefarian on the realm.
Miscellaneous Achievements
Each achievement mentioned below is quite tricky to obtain, as you must meet specific requirements during the fight:
- Parasite Evening: Triumph over Magmaw without getting infected by Lava Parasites.
- Achieve-a-tron: Overcome the Omnotron Defense System without getting hit by Static Shock, Poison Bomb, Flamethrower, and Arcane Annihilator.
- Silence is Golden: Conquer Atramedes having your sound bar at less than 50%
- Full of Sound and Fury: Your teammates are allowed to die no more than twice to win a victory over Chimaeron
- Aberrant Behavior: Defeat Aberrations in a 10-second span and then Maloriak himself.
- Keeping it in the Family: Damage Nefarian below 50% health before he lands in the final phase. Afterward, triumph over him.
Blackwing Descent FAQ
What is the difficulty in Blackwing Descent?
Normal and Heroic. This raid is challenging but not as hard as Firelands or Dragon Soul.
What level is the Blackwing Descent raid?
Blackwing Descent is an 85-level raid, meaning your character must be at level 85 to participate.
Is Blackwing Descent the same as Blackwing Lair?
No, they are not the same. Despite also being in Blackrock Mountain, the Blackwing Descent is its separate raid. It acts as the second part of the story, introduced in Blackwing Lair.
How many bosses are in Blackwing Descent?
There are six bosses in Blackwing Descent, including Magmaw, the Omnotron Defense System, Chimaeron, Atramedes, Maloriak, and Nefarian.
How to go to Blackwing Descent?
To go to the Blackwing Descent raid, follow this sequence:
- First, travel to Iron Summit at coordinates [40.80, 68.02] in Searing Gorge.
- Afterward, fly directly to Blackrock Mountain at [41.42, 89.89].
- Once there, find the Blackwing Descent entrance at [23.15, 26.41] and enter the raid.
Conclusion
And this is it for our Blackwing Descent bosses guide. We gathered all the information and strategies to make sure you have no trouble clearing this raid with your group. So go on, conquer one of the first raids Cataclysm Classic has to offer!


Comments