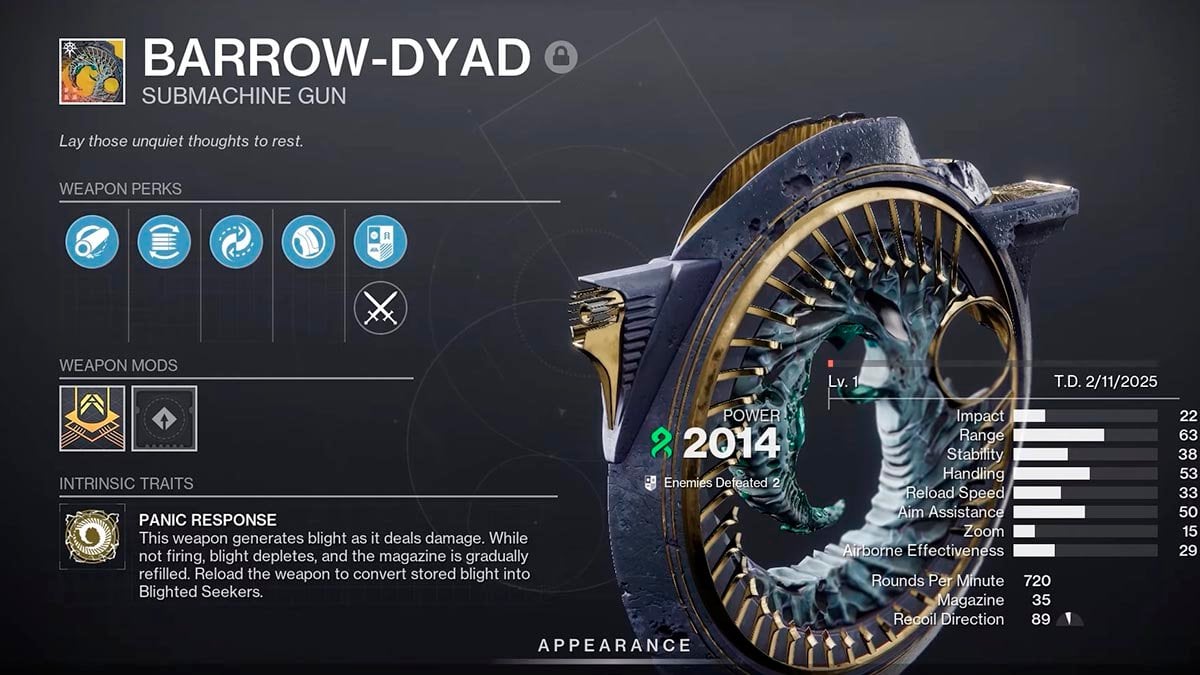
How to get and upgrade Exotic SMG Barrow-Dyad in Destiny 2
Learn how to get the Exotic SMG Barrow-Dyad and upgrade it with Catalysts and Trait in secret Exotic missions with this easy-to-follow Destiny 2 guide.
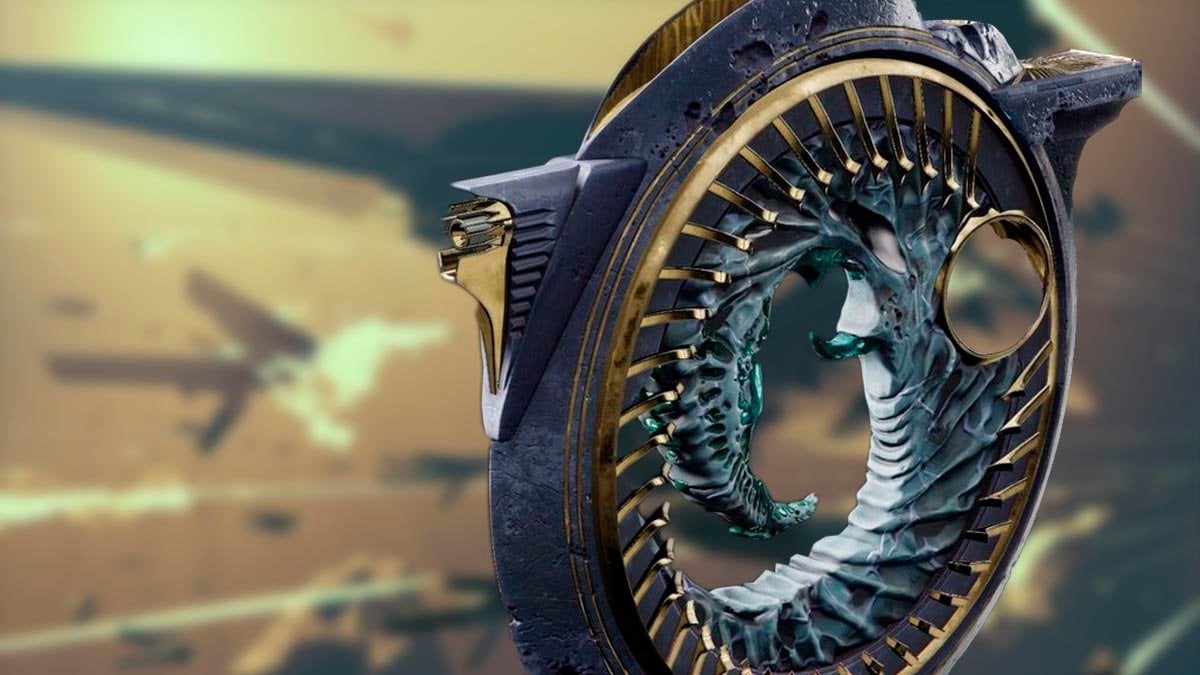
Table of Contents
Key takeaways:
- Locate the first Fragment in the Nether.
- Solve some puzzles in the Blight.
- Visit Shaping slab for the starting quest and follow the questline.
- Complete Derealize Exotic mission to loot Barrow-Dyad.
- Upgrade your Barrow-Dyad with a Perk and Catalysts. Learn below how to unlock these secret upgrades.
The only way to get the new Barrow-Dyad is to complete long questline filled with combat, exploration, and looting. You’ll need to discover a secret location to even start this mission. Don’t worry—we’ve got you covered with a 13-step guide to walk you through the process. And don’t forget to upgrade your Barrow-Dyad with a Perks and Catalysts, which can be obtained through additional secret quests. Let’s get started.
Related posts:

How to get Barrow-Dyad
First, let’s figure out how to get the Barrow-Dyad. Once we have it, we can focus on upgrading it.

How to start the Barrow-Dyad mission
There is no starting quest giver or official launch point for this mission. It’s a secret, you’ll need to know where to find it. Simply follow the steps below.
Requirements — The Final Shape. Episode: Heresy.
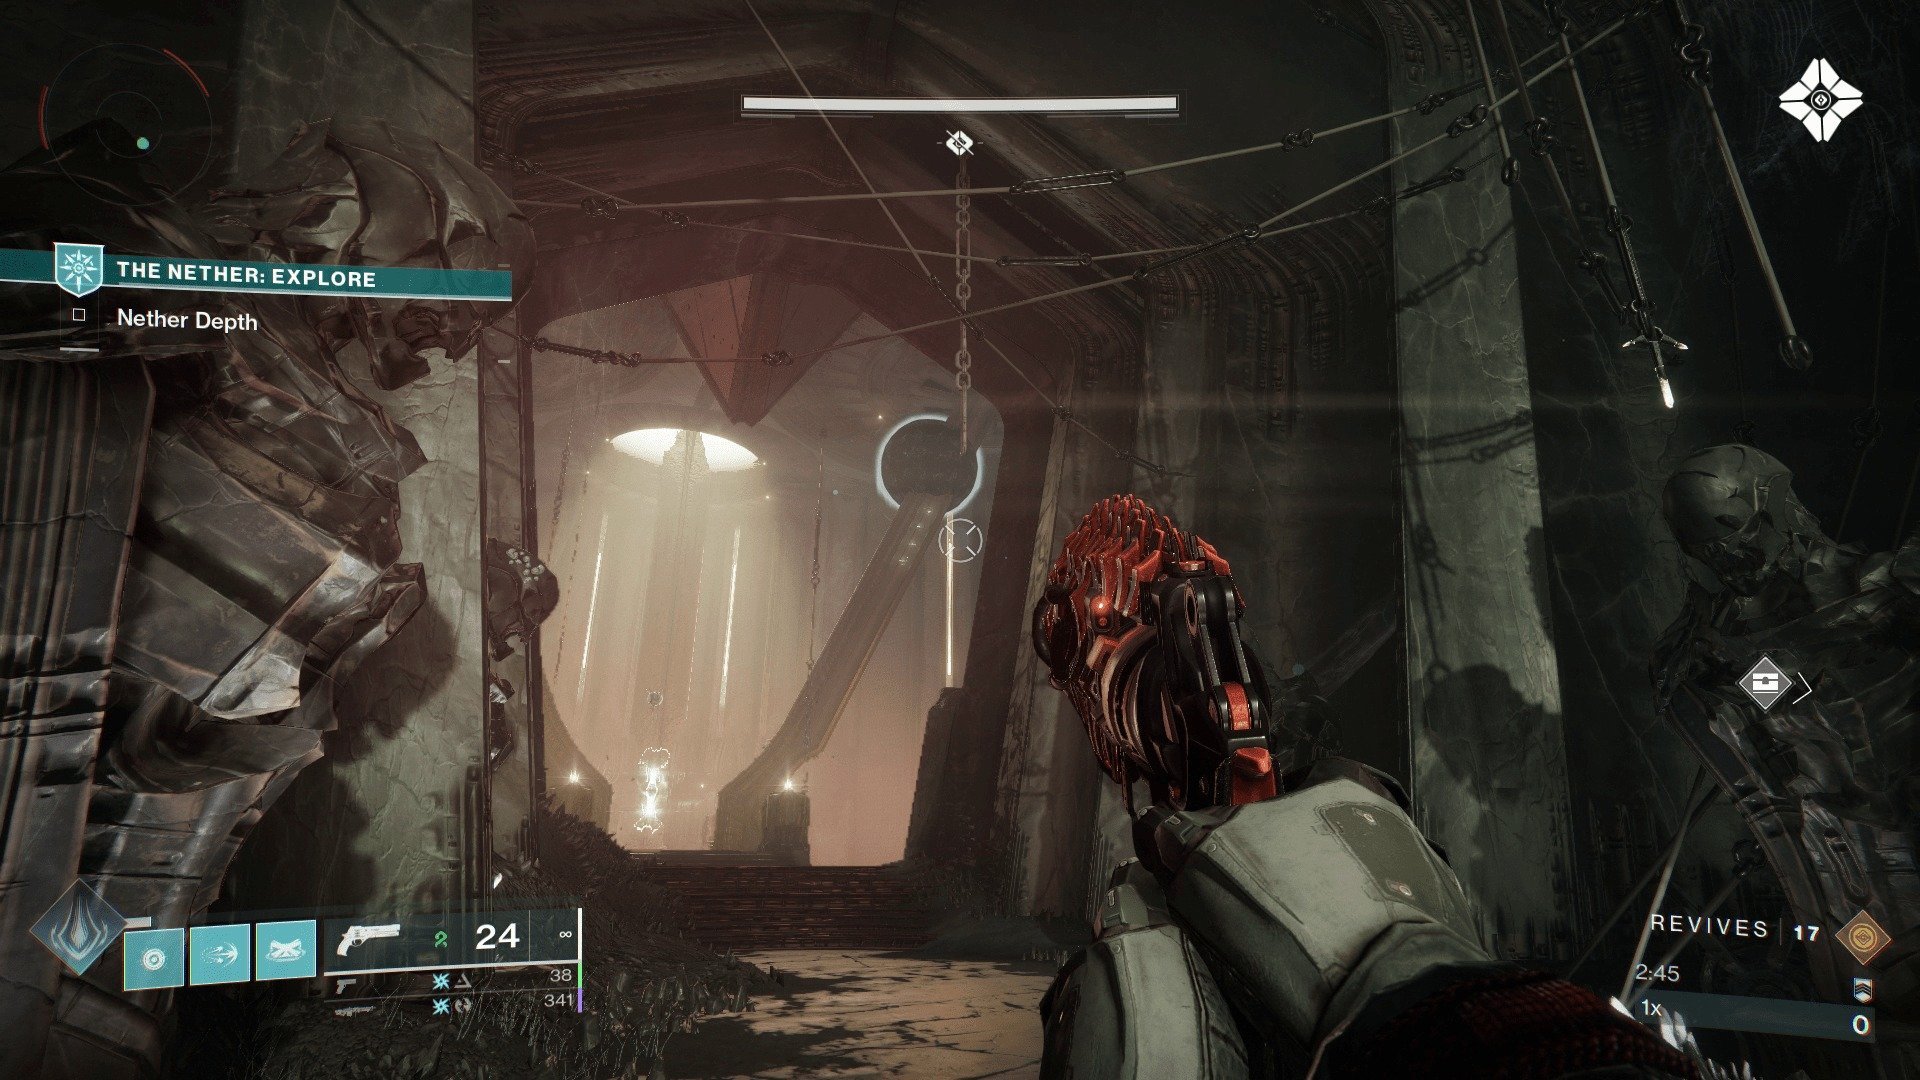
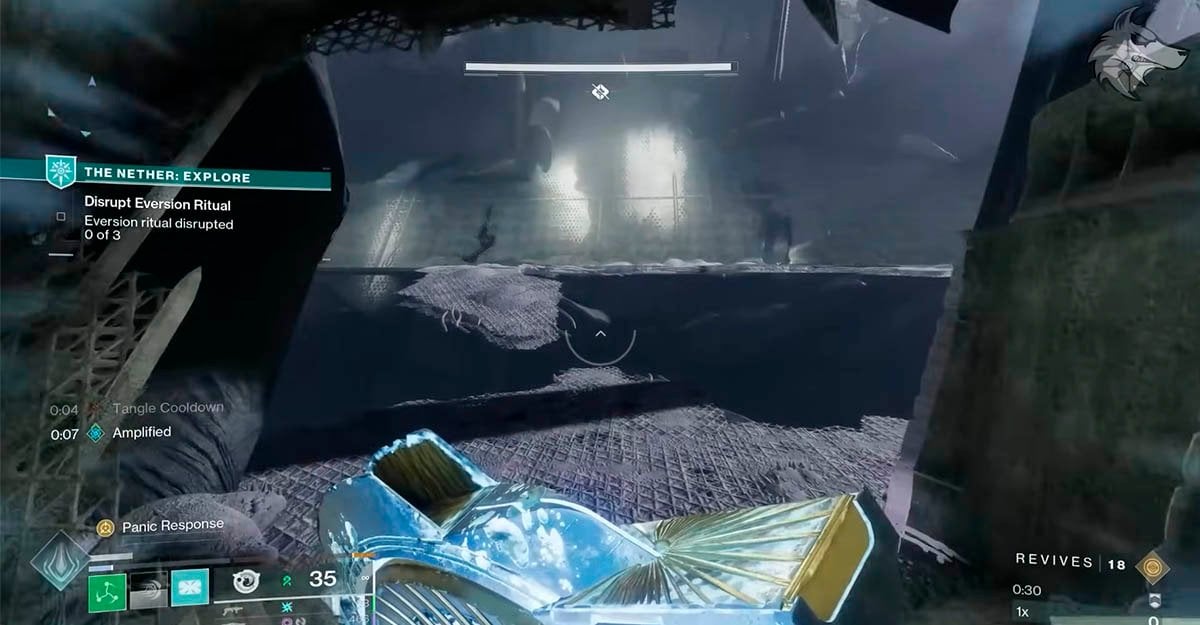
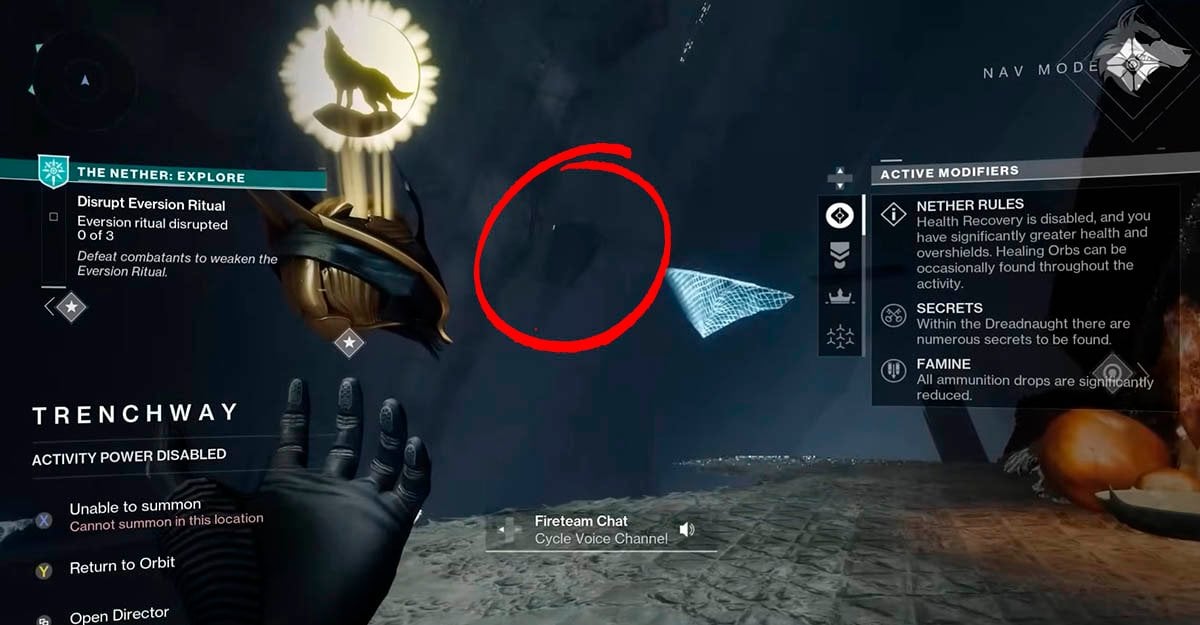
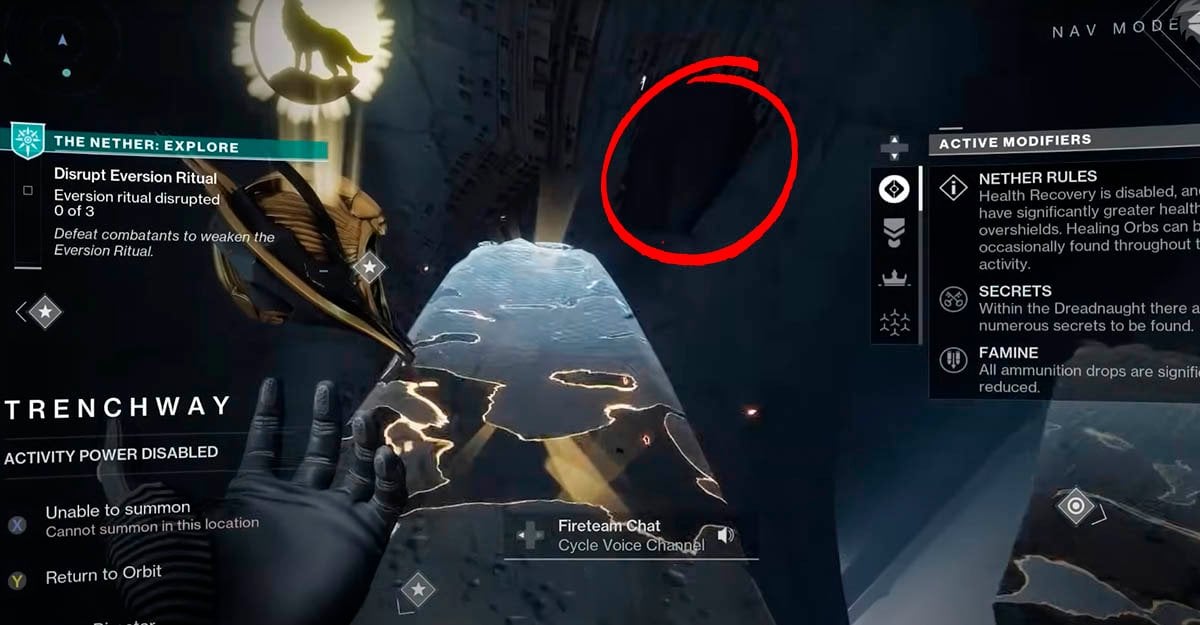
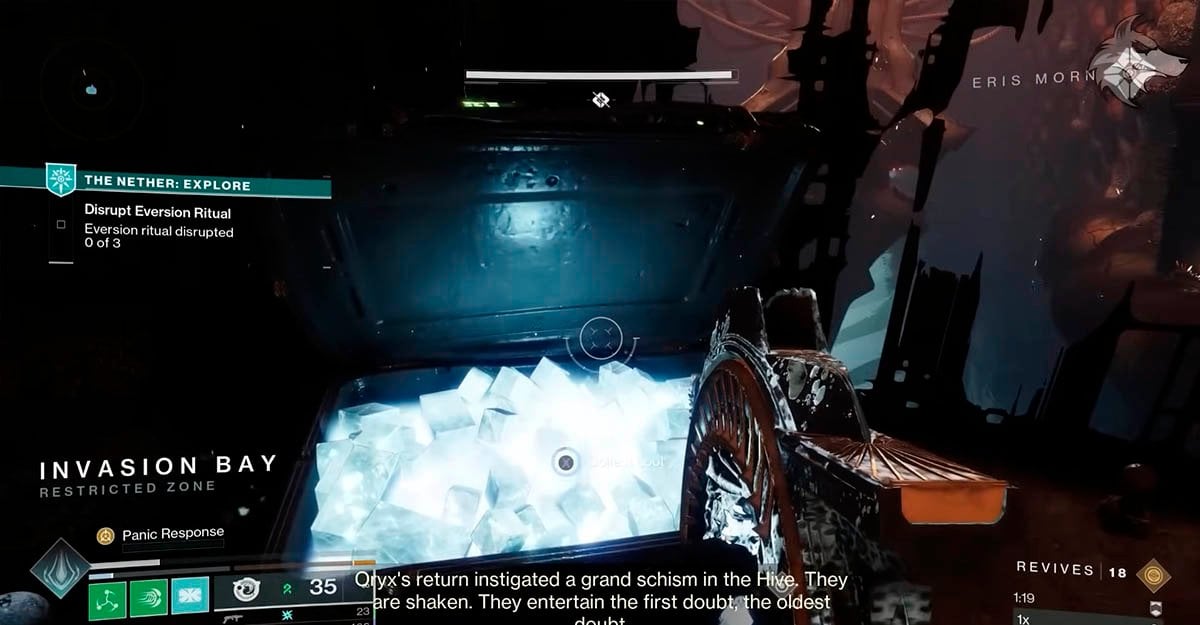
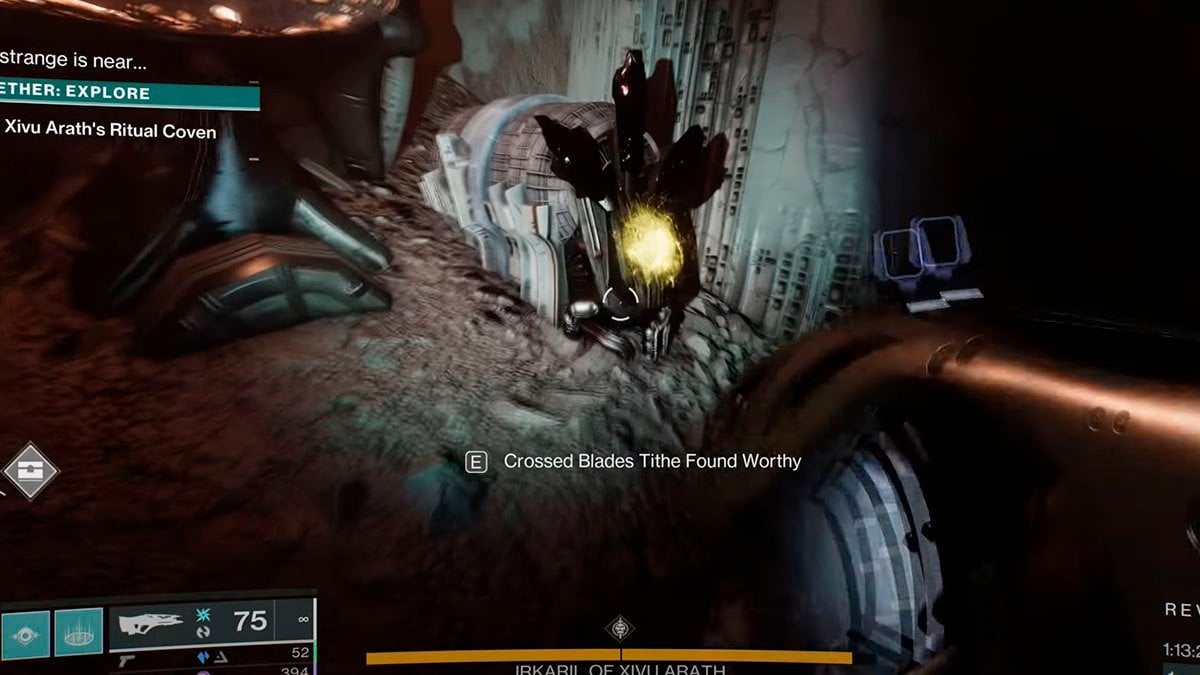
Step 1 — Launch the Nether in Explore mode.
Step 2 — Look for the Blight in the sky and enter it.
It can spawn randomly in the Trenchway, Hall of Souls, or other Nether locations. Look up for it and find your way close to it to enter.
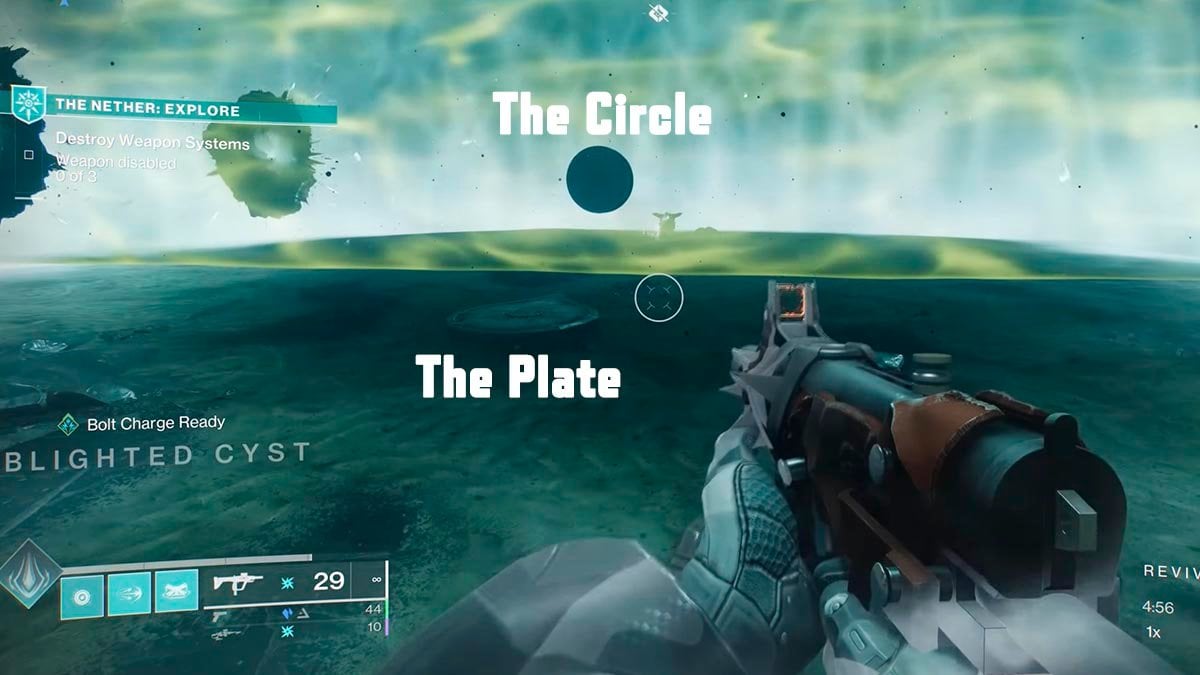
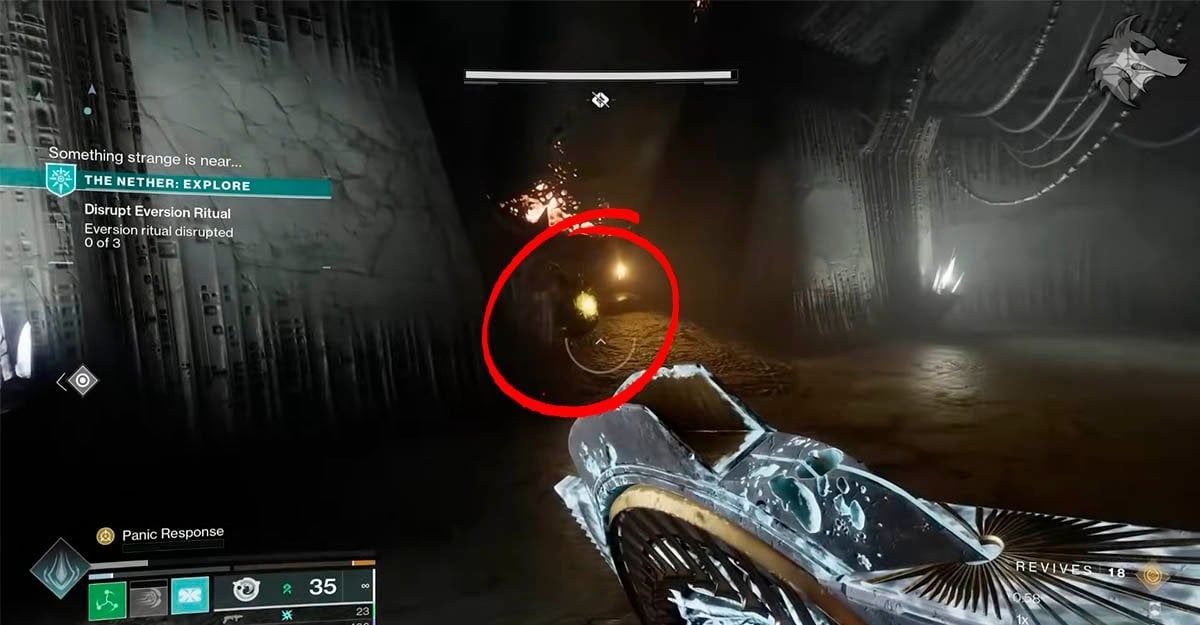
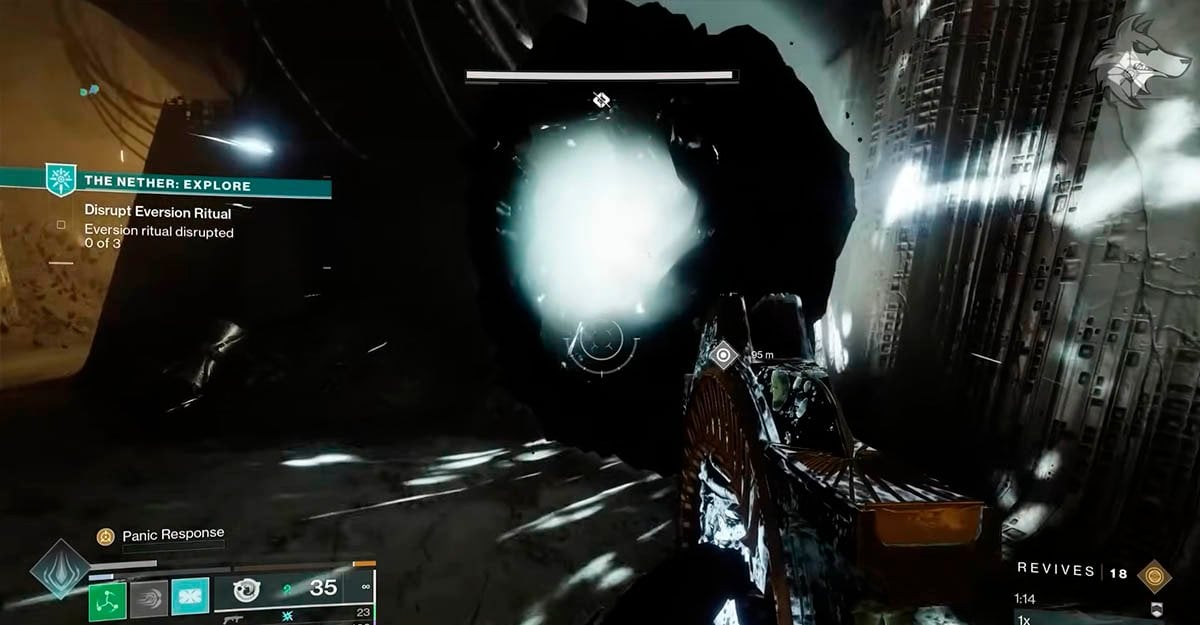
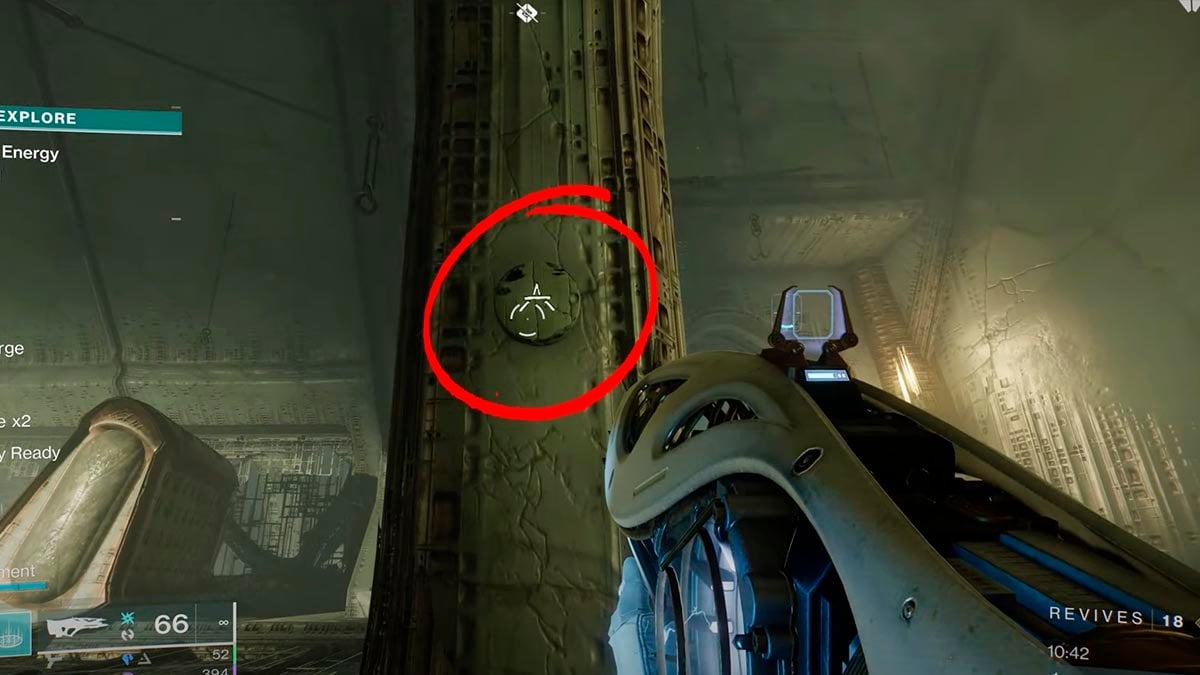
Step 3 — Get the first Fragment.
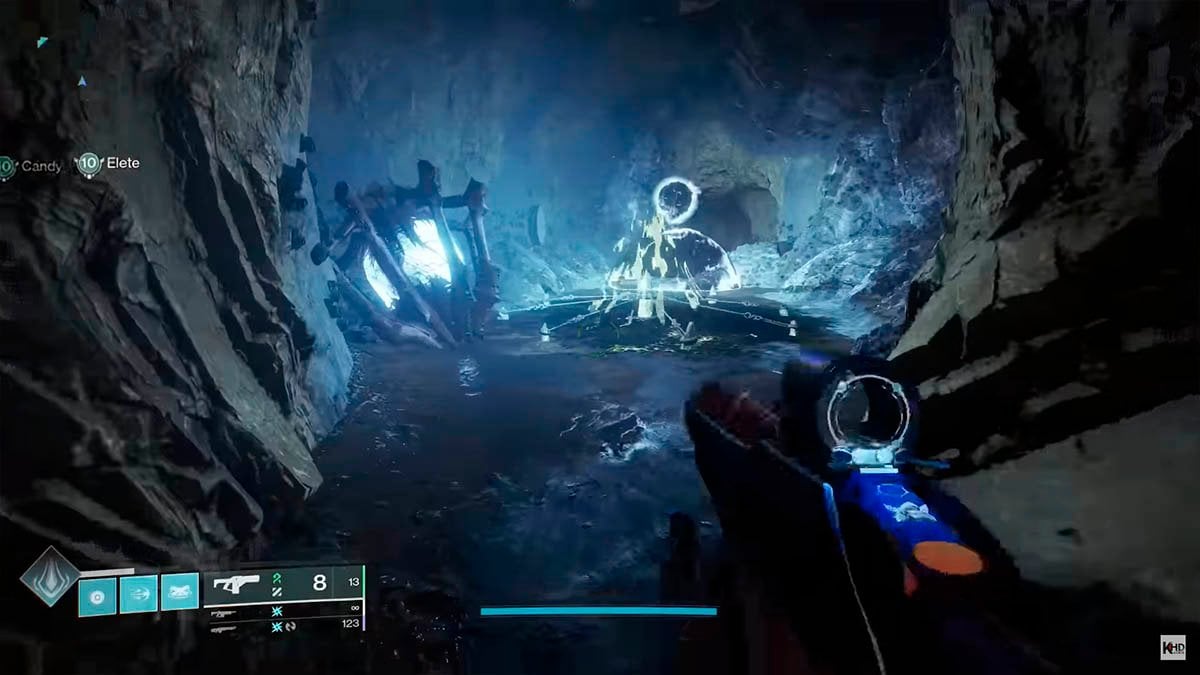
Step onto the Plate facing the circle in the center of the room and shoot the circle. Watch for the whisper text on your HUD and follow the direction it provides. This will teleport you to the next room, where you can collect the Osseous Fragment.
Complete the Taken path mission
This mission feels like a bit of filler with some busy work, but it won’t take much of your time.
Step 1 — Go to Shaping slab and get the quest.
Exit the Nether and head to the Shaping Slab located in Eris Morn’s apartment within the HELM, the Last city, Earth.
Here, you will receive The Taken Path quest.

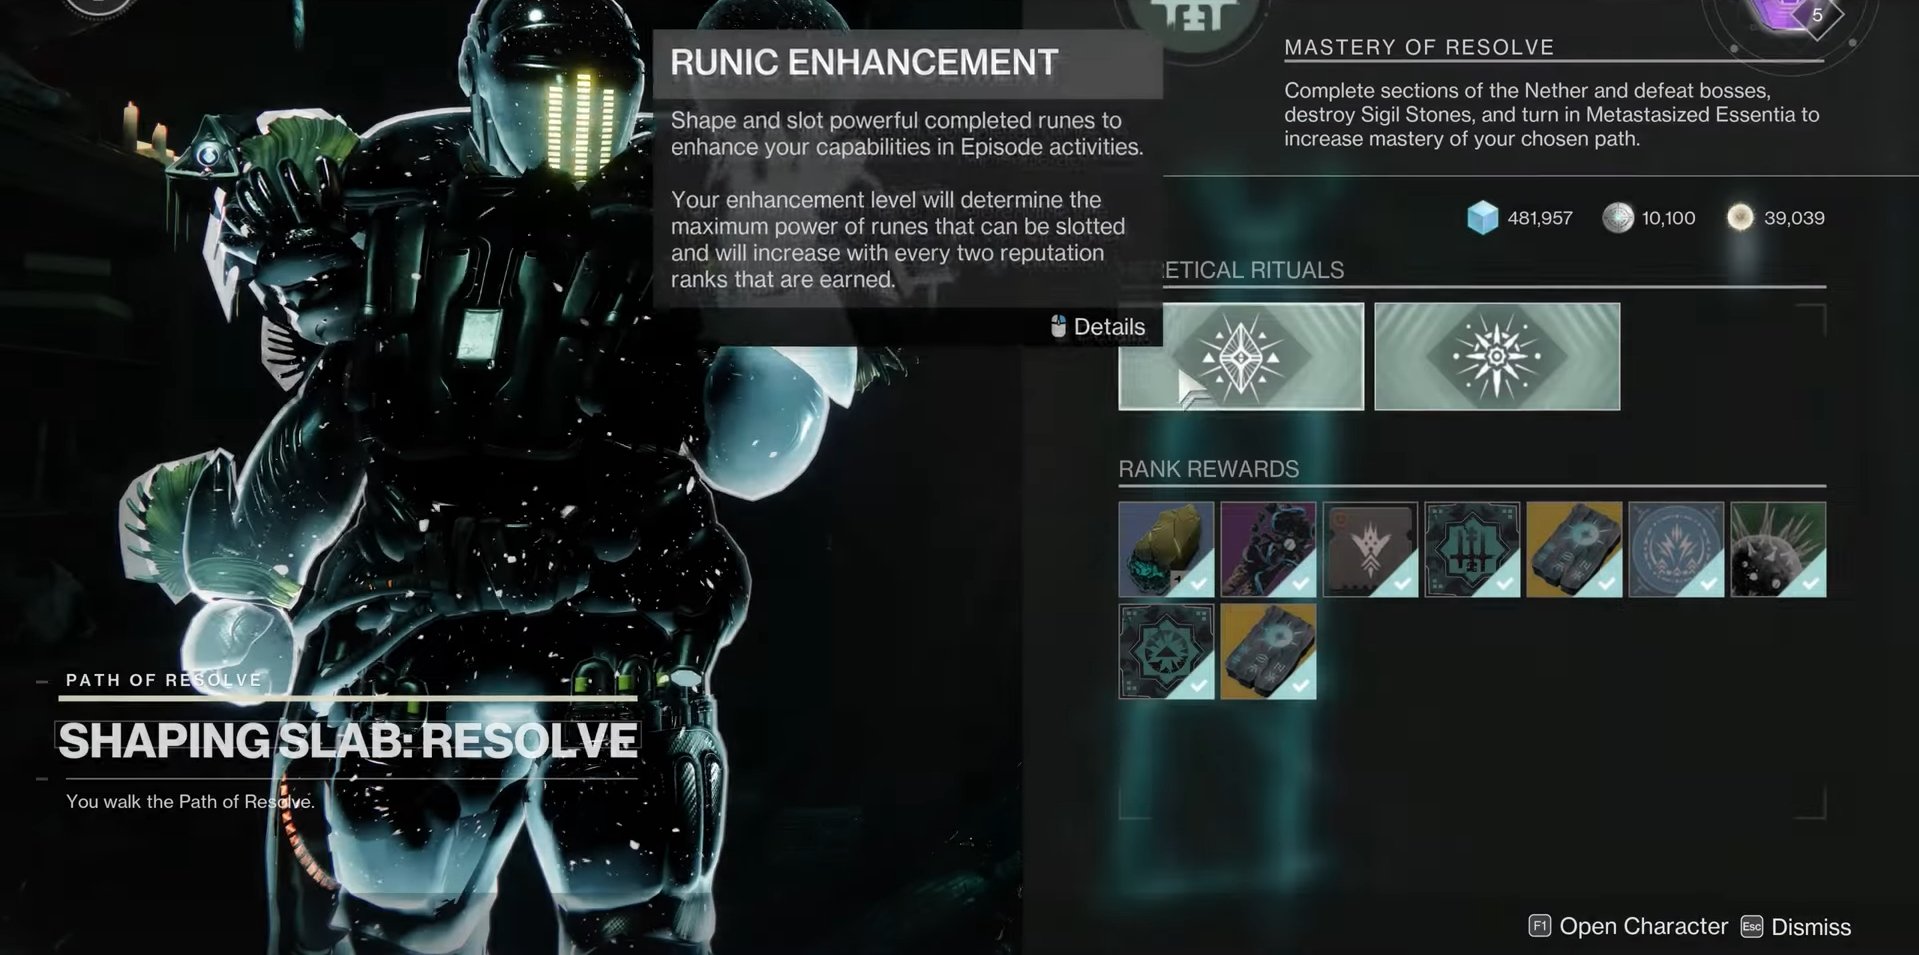
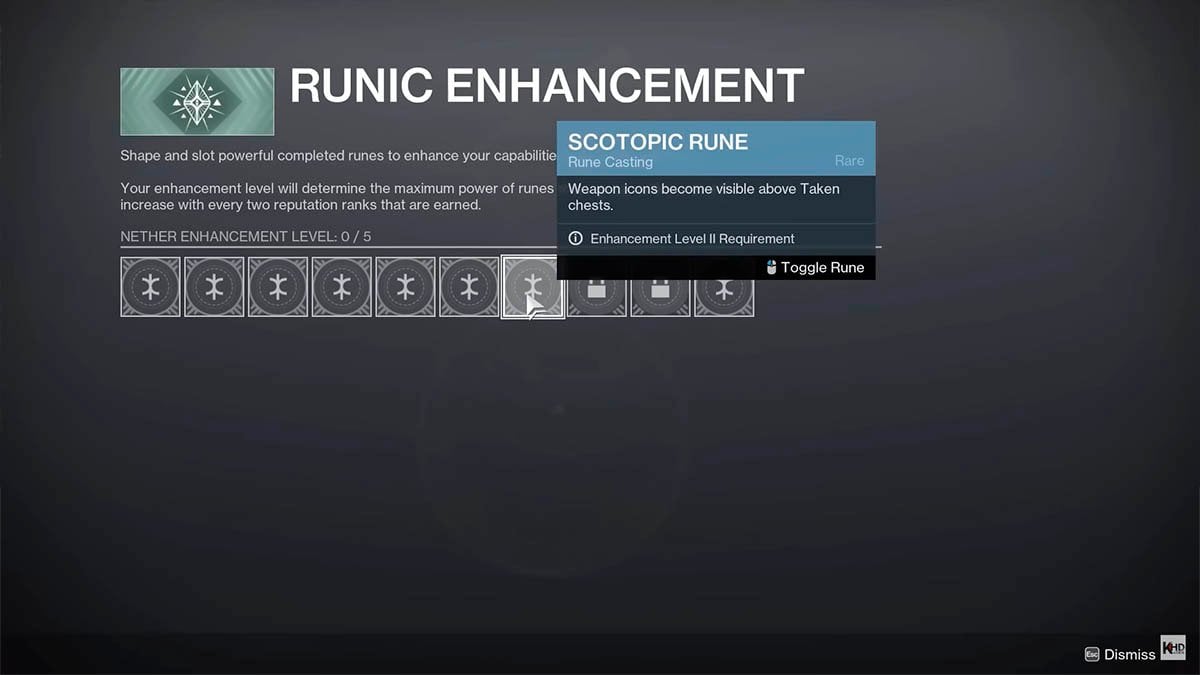
Step 2 — Get the Scotopic rune.
Receive the Taken path quest, and interact with Shaping Slab further. Find Heretical rituals and Runic Enhancement in it. Open it and unlock Scotopic rune in 7th slot.
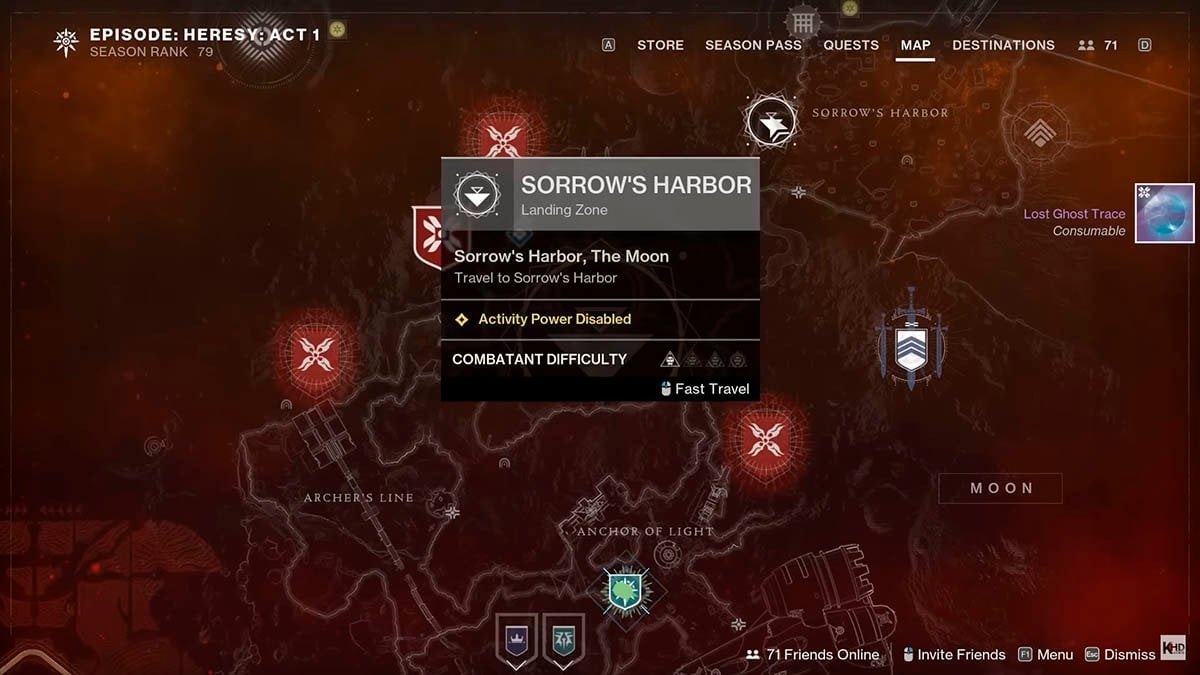
Step 3 — Find the second Fragment in Sorrow’s harbor.
Head to Sorrow’s Harbor and enter the K1 Revelation Lost Sector located within it. Here, you will find a new Plate similar to the one you encountered in the Nether. Repeat the same actions as in Step 3: stand on the Plate and shoot the nearby circle. Watch for the whisper text on your HUD and follow the directions provided. You will then be teleported to a new location. In this area, defeat all the Taken enemies and the Keeper of Power. Once the Keeper is defeated, loot it to obtain the Taken Osseous Fragment.
Step 4 — Find the third Fragment in the Forgotten Shore.
Head to the Forgotten Shore and enter the Veles Labyrinth in the Lost sector. Explore the Labyrinth and locate another Plate. Stand on the Plate and shoot the nearby circle. Watch for the whisper text on your HUD and follow the provided directions or the direction the Plate is pointing (they are the same). Repeat the process with the next Plates. You will be teleported multiple times until the enemies spawn.
Fight the new waves of Taken and follow their spawn points deeper into the Labyrinth. Eventually, you will encounter another Keeper of Power. Defeat the Keeper of Power and loot it to obtain the second Taken Osseous Fragment.
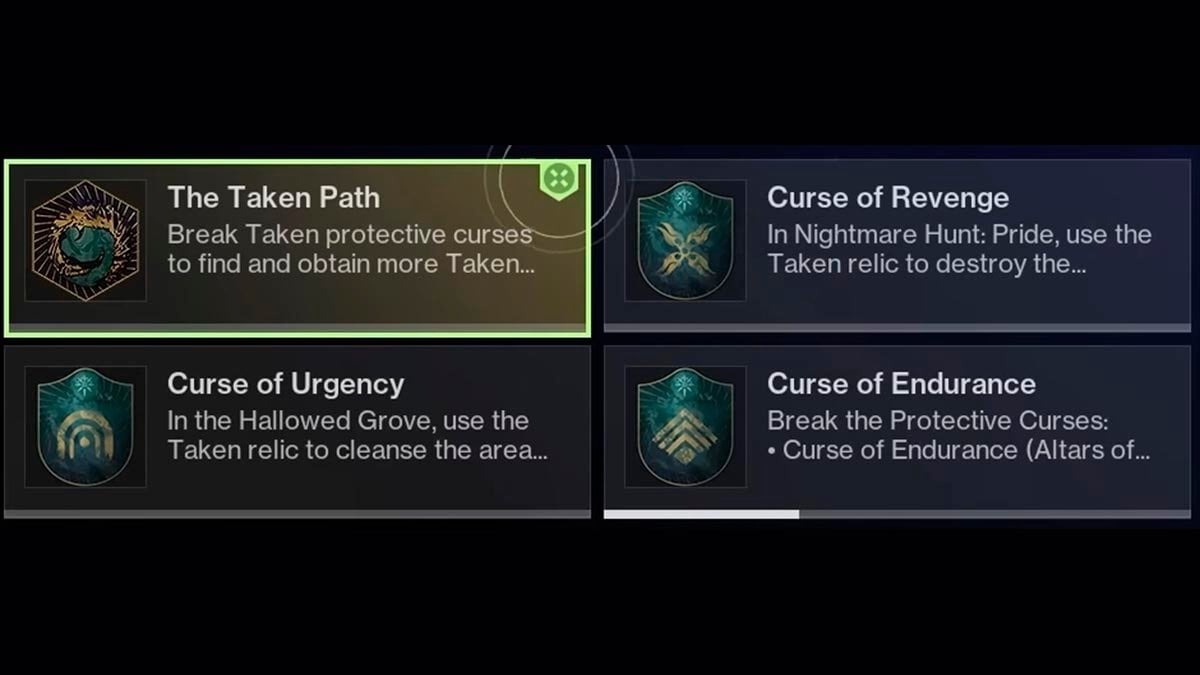
Step 5 — Go back to Shaping slab and pick new quests.
Return to the Shaping Slab quest giver and pick up 3 new quests: Curse of Endurance, Curse of Urgency, and Curse of Revenge. You can start with any of them.
Step 6 — Complete the Curse of Endurance.
Head to the Moon and make your way to the Sorrow’s Harbor location. Look for a Taken bubble in the area. Approach it and accept the Curse of Endurance quest. Engage with the nearby Taken and defeat them. Additionally, get rid of the Nightmares within the given time limit. Once completed (you will see the Empowered status), return to the location where you received the Curse and collect the second Taken Relic.
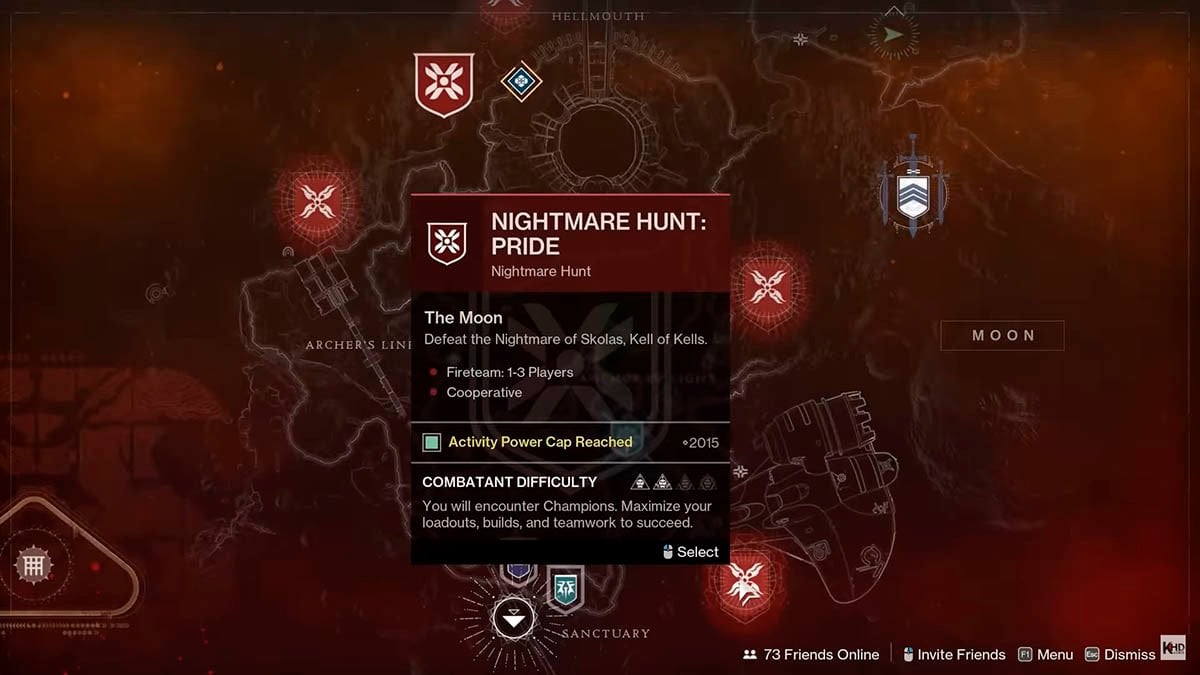
Step 7 — Complete the Curse of Revenge.
Stay to the Moon and make your way to the Nightmare Hunt: Pride. This is the fastest way to complete the quest, but you can take a slower approach by following the quest log.
Play through the Nightmare Hunt until you reach the boss fight. Don’t engage the boss immediately. Instead, look for a Taken bubble nearby. Approach it and accept the Curse of Revenge. Finish the Nightmare Hunt within the required time. You can extend the timer by landing the final hits on Taken enemies. After defeating the boss, return to the location with the Taken bubble and collect the Taken Relic.
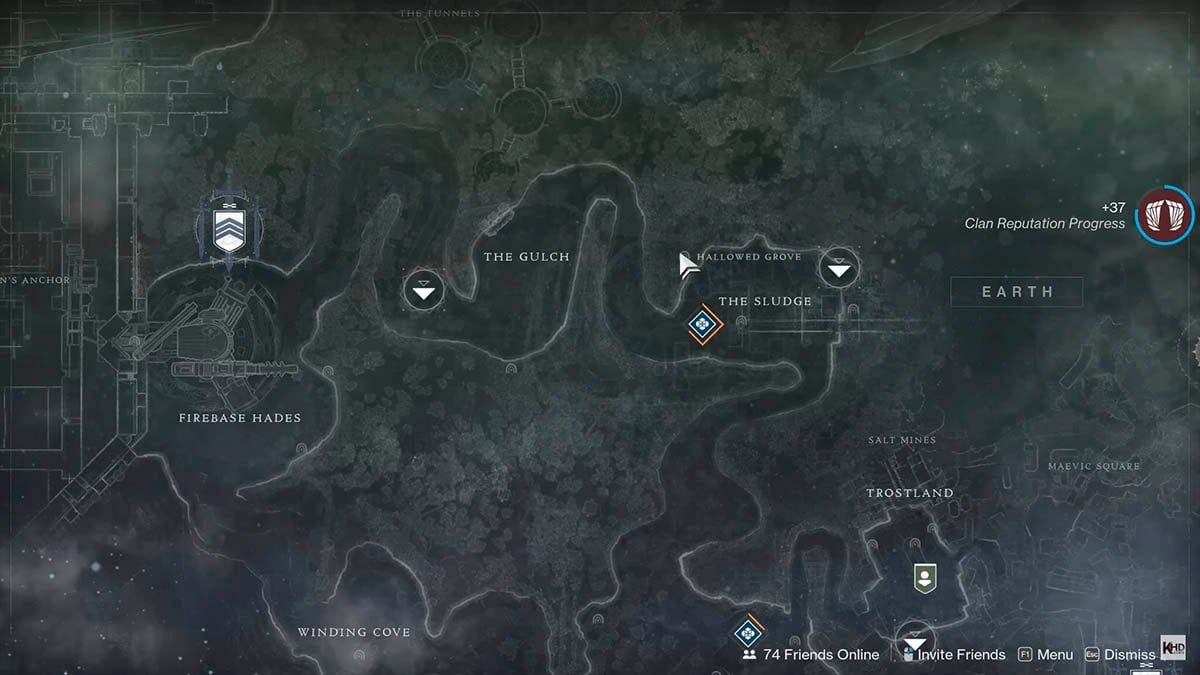
Step 8 — Complete Curse of Urgency.
Locate the Sludge area in the European Dead Zone and enter the Hallowed Grove Lost Sector. Inside, search for the Taken bubble. Approach it and accept the Curse of Urgency quest. Defeat all the Taken within the short time limit and quickly move to the next location indicated on the map. Once completed, collect the final Taken Relic.
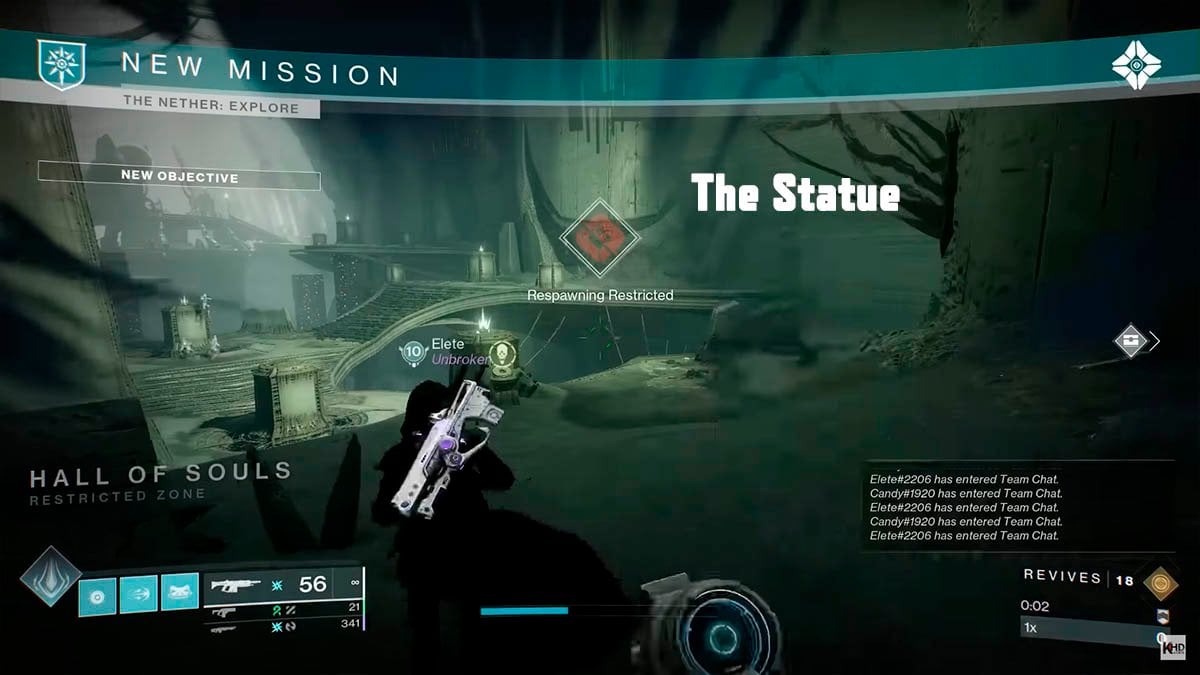
Step 9 — Go back to the Nether.
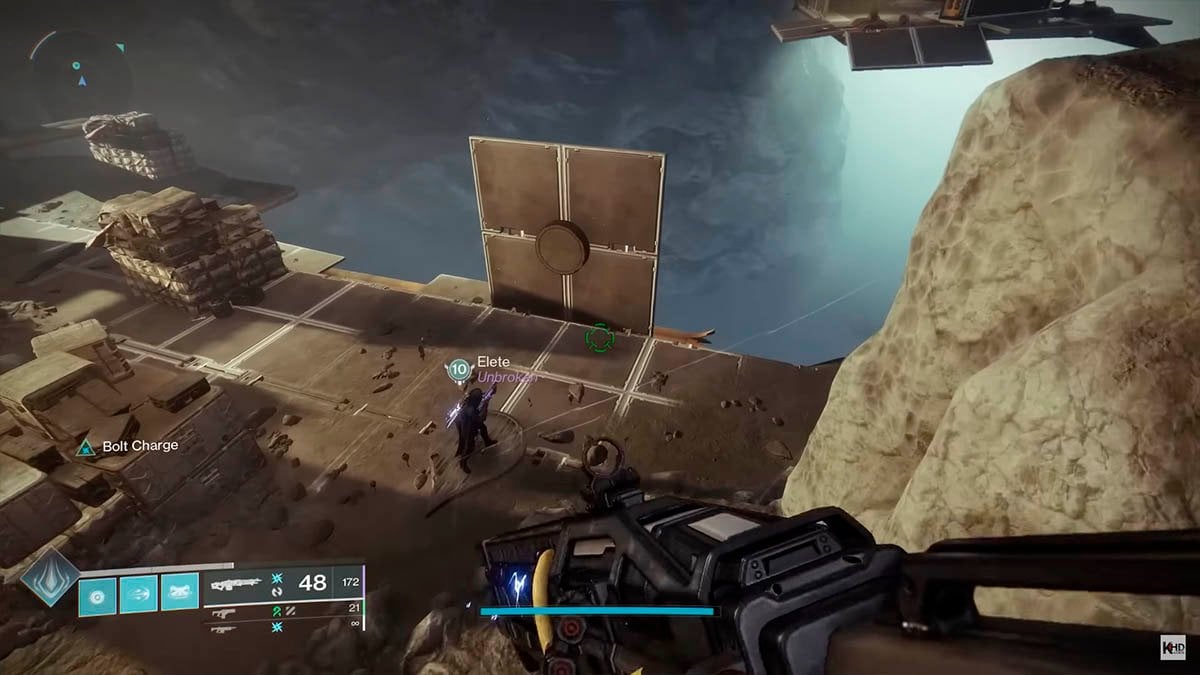
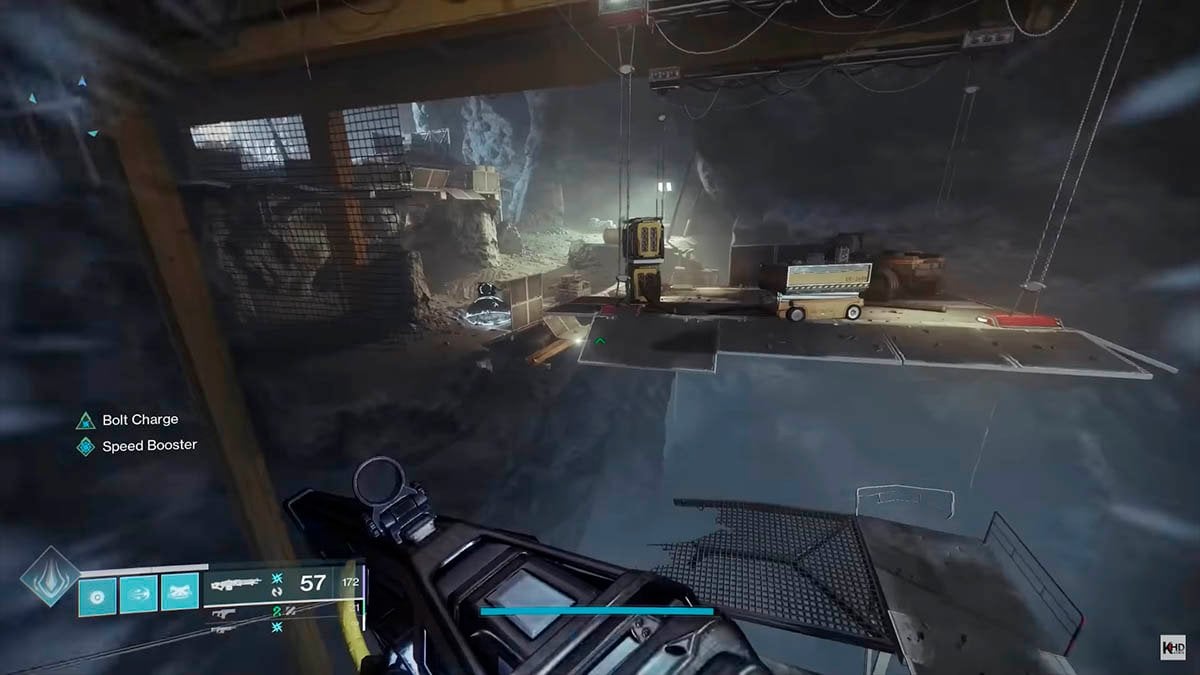
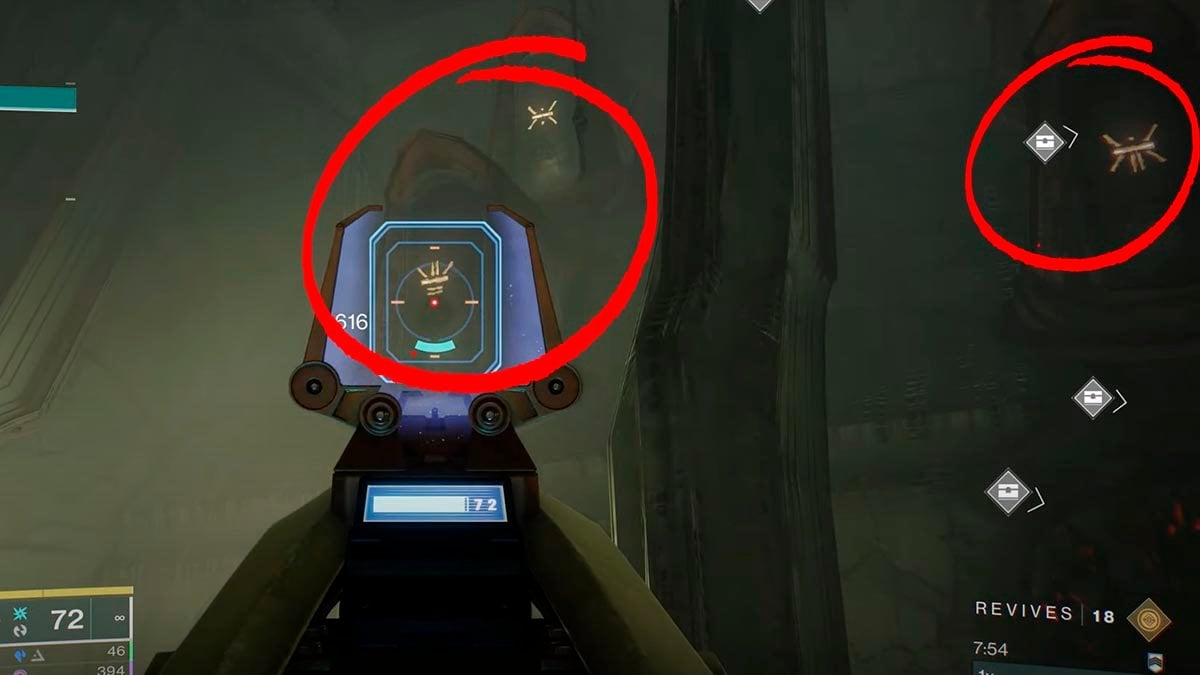
You’ll need to locate 3 out of 5 hidden Hive statues here. Activate each statue, defeat the spawned bosses nearby, and then return to the statues to collect new Taken Osseous Fragments. The statues can be tricky to find, so make sure to search carefully.
Alternatively, you can launch into the Hall of Souls three times while restarting the Nether to farm 3 quest items by just 1 statue. This method is much faster because the statue is located very close to the spawn point in the Hall of Souls.
Complete Derealize Exotic mission
You are now fully prepared for the Derealize Exotic mission, during which you will obtain the Barrow-Dyad.
Open Destinations in your directory. Click on the Last city. Here, you will find the Derealize Exotic Mission. This mission is quite extensive and challenging, so we covered it in more detail in a separate Derealize mission guide. Here is a brief summary of this mission.
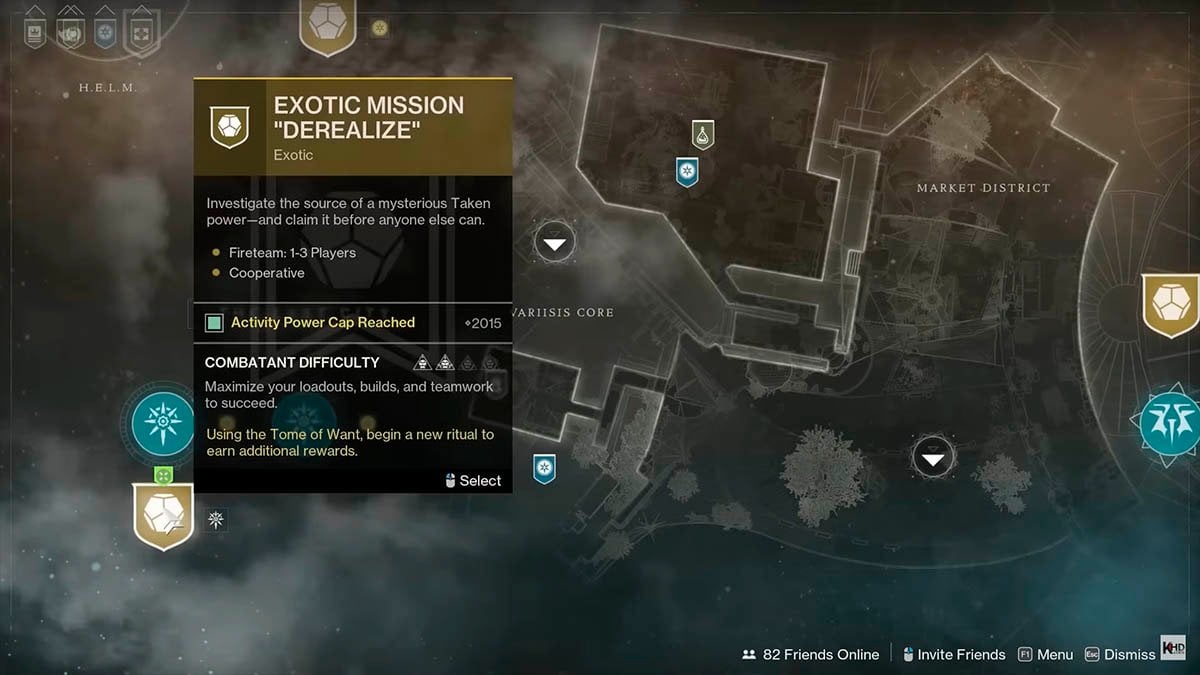
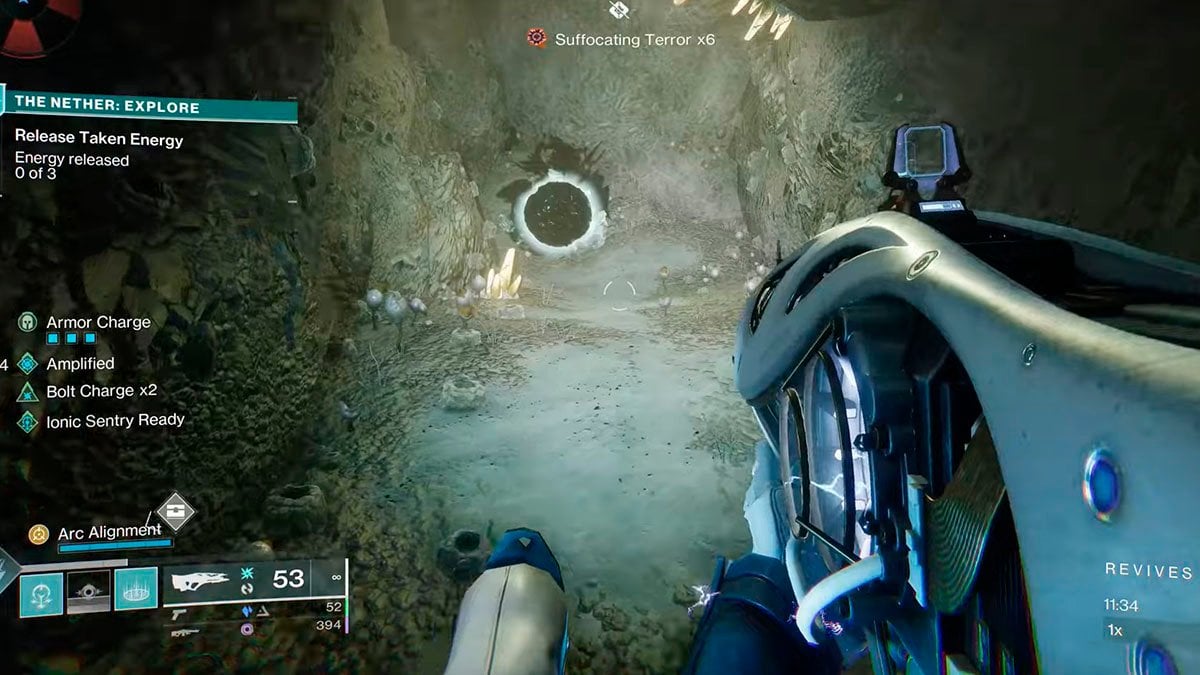
In this mission, you’ll face waves of enemies. Avoid looking directly at the giant eyes to manage the Suffocating Terror debuff. Keep an eye out for new Curses that will drop from Taken Conduits. Pick up the Curses and find the designated areas to get rid of them. You’ll need to repeat this process twice, after which the boss will appear. Follow the boss to the Taken Blight and defeat it inside.
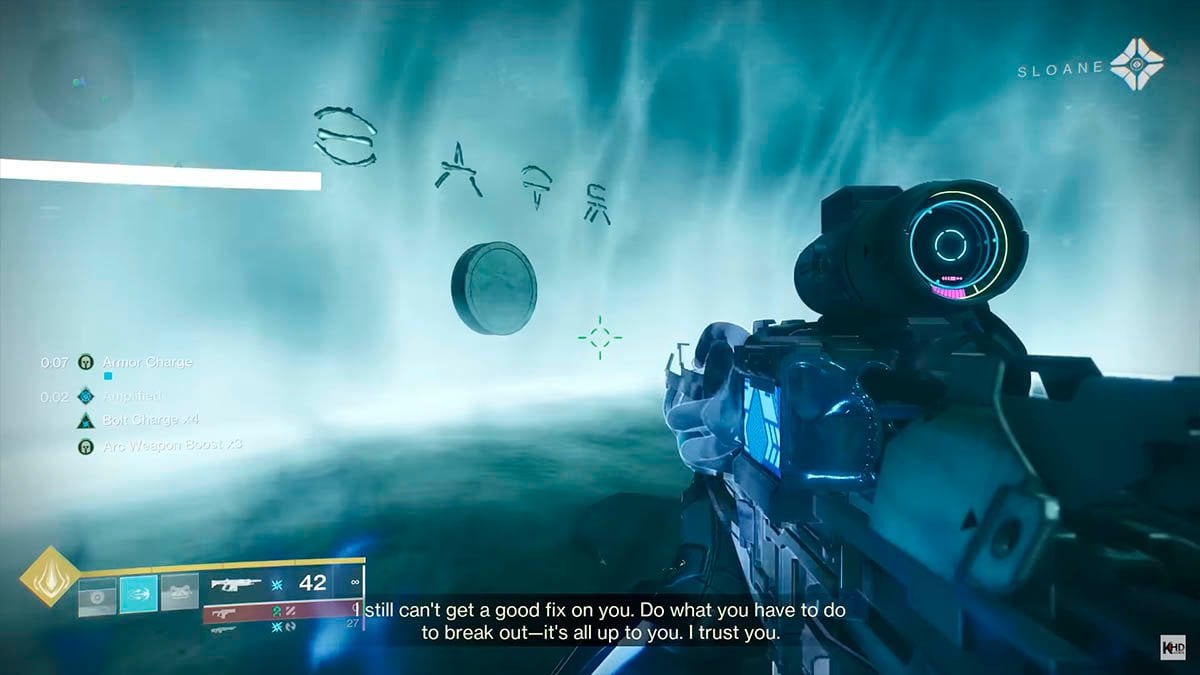
After the fight, you’ll need to escape the room by solving a puzzle. It follows the same mechanics as before but with 4 symbols. Stand on the Plates and focus on the circle. Wait for the correct symbol to appear and shoot it. You should see the correct symbols at the top of this circle, and you need to shoot them in order (left to right). Once you shoot the correct symbol, step off the Plate in the direction indicated by your Plate. If the correct symbol doesn’t appear, just wait for it and do nothing.
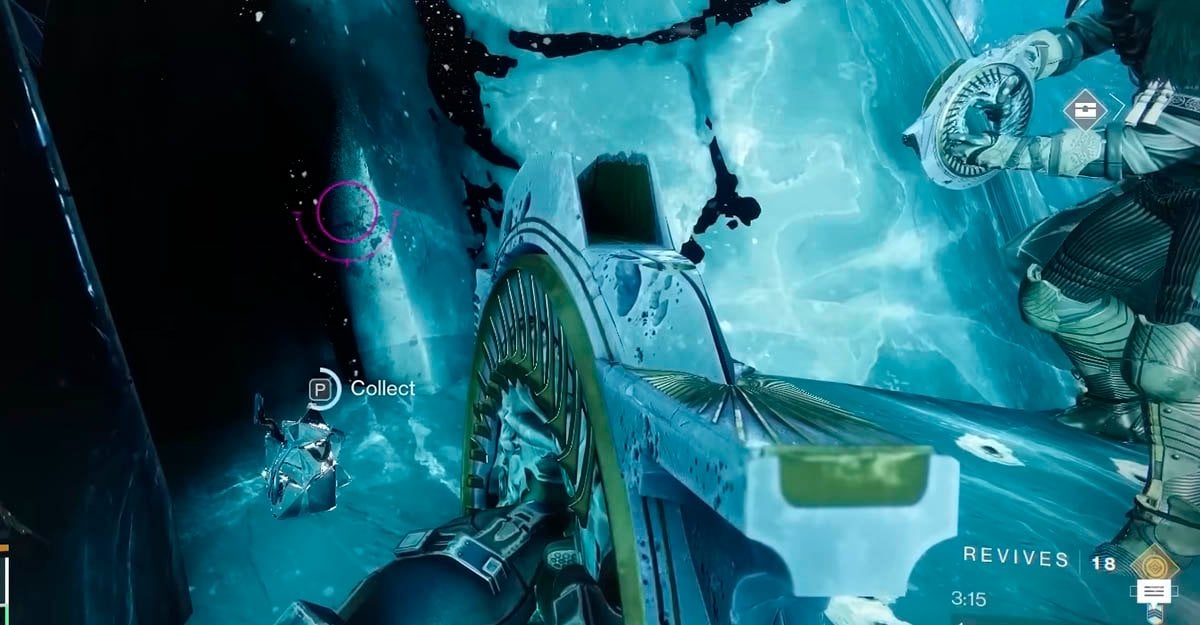
Next, navigate through the area by jumping to find the final Taken Fragment and your way to the final boss. Just before reaching the boss, you’ll find the Barrow-Dyad.
How to get Barrow-Dyad Perks
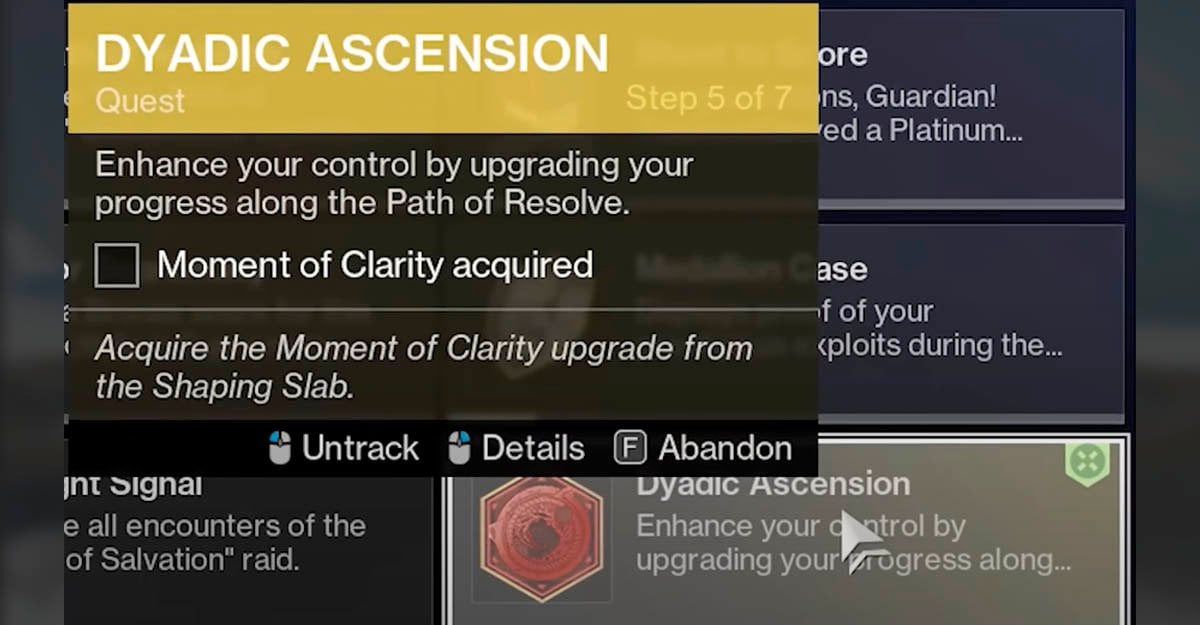
Act II introduces at least 1 major Perk for the Barrow-Dyad. Lets dive into step-by-step guide to obtain this Barrow-Dyad Perk. Make sure to obtain your Barrow-Dyad first and reach Step 5 of your Dyadic Ascension quest. This includes making all of the Act I and Act II storylines.
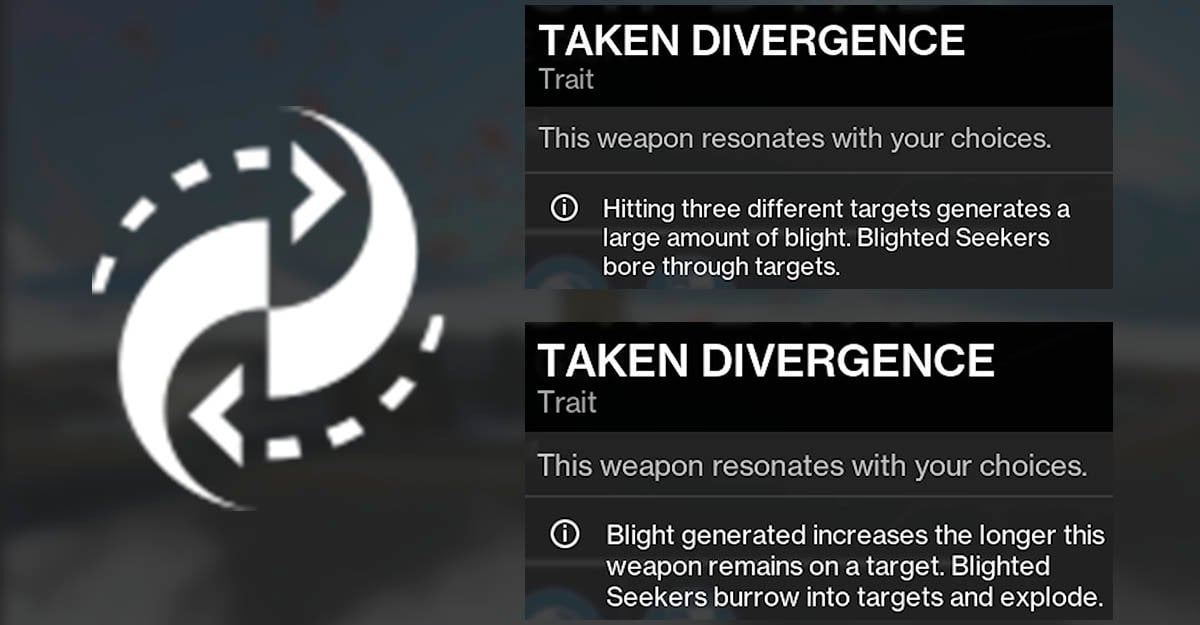
Taken Divergence trait for Barrow-Dyad
Step 1 — Launch The Nether: Explore.
Step 2 — Enter The Hall of Souls area.
Step 3 — Find Taken Worm and collect it.

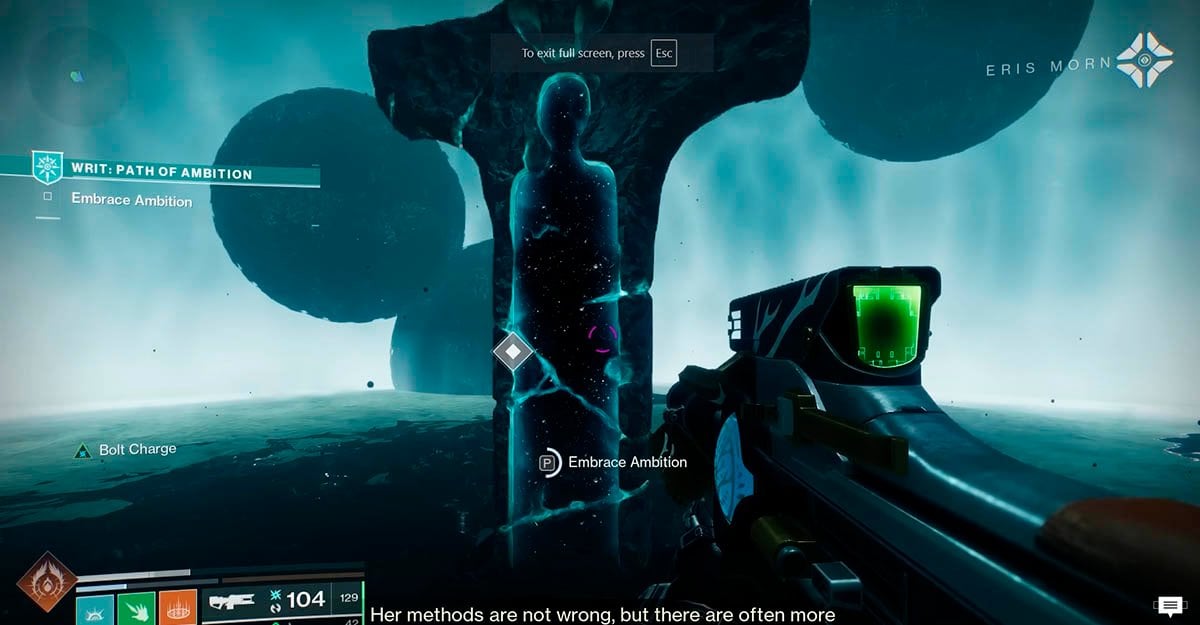
Step 4 — Find the Writ: Path of Ambition quest in your quest log, right-click on it, and launch it.
Step 5 — Follow the quest through mini-fights and jumping puzzles. This quest is identical to a section in the Derealize mission, and we have a full walkthrough in the Derealize mission guide. This time, you need to return to the final boss fight, reopen the room, and find the portal to this Slab.
If you need more assistance with this quest, check this Writ: Path of Ambition Mission video walkthrough by GuidingLight.
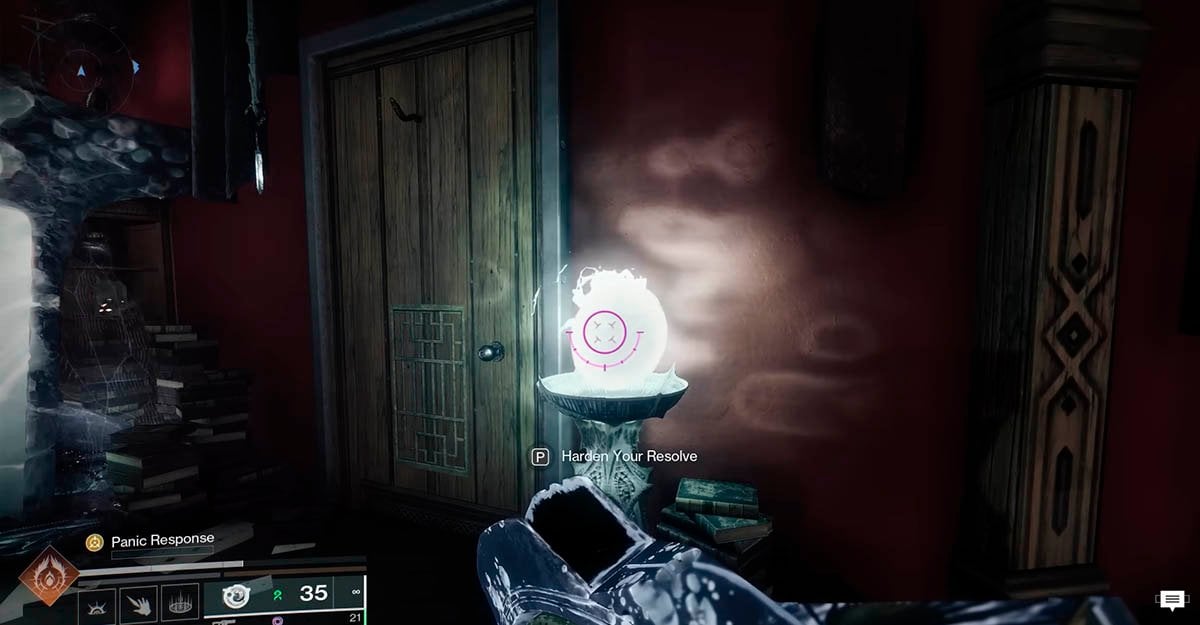
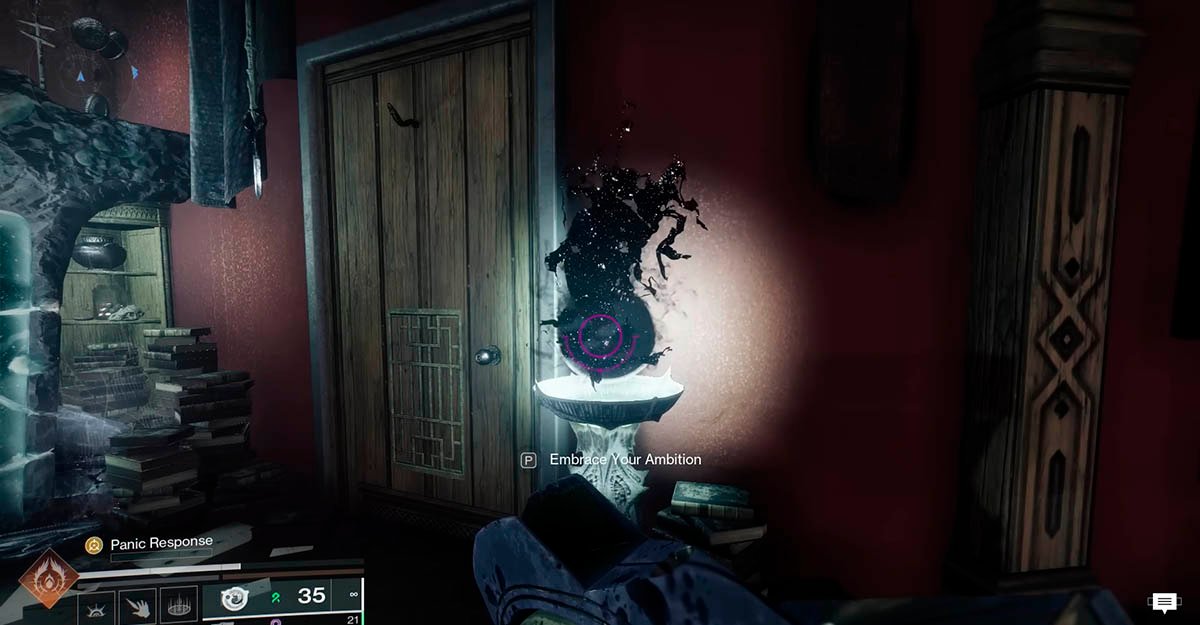
Step 6 — Make sure your Reputation Orb with Shaping Slab is set to Resolve, not Ambition. Check it in Eris Morn’s apartment. You need to have the Black Orb active.
Step 7 — Reach Reputation Rank 12 on Shaping Slab: Resolve. To do that, you need to play the Nether or Court of Blades.
Step 8 — Visit Shaping Slab and take Moment of Clarity upgrade in Rank Rewards section.
Step 9 — Play Nether Explore mode and find 6 Taken Osseous Fragments if you haven’t found them before. If you already have them, you should automatically receive the Panic Response IV Intrinsic upgrade. Otherwise, you will receive it after finding 6 Taken Osseous Fragments.
Check this Taken Osseous Fragment Locations video guide by iiizwerg if you need more assistance.
How to switch between 2 modes of Taken Divergence
To do this, visit Eris Morn’s apartment. Find the orb and switch it back and forth between black and white modes. This will also switch your Taken Divergence Perk.
How to get Barrow-Dyad Catalysts
Act II introduces at least 2 Catalysts for the Barrow-Dyad, all of them are hidden. There are 2 step-by-step guides to obtain Hatchling Refit Catalyst and High-Impact Reserves Catalyst.
Make sure to obtain your Barrow-Dyad first and reach Step 5 of your Dyadic Ascension quest. This includes making all of the Act I and Act II storylines.
High-Impact Reserves Catalyst for Barrow-Dyad
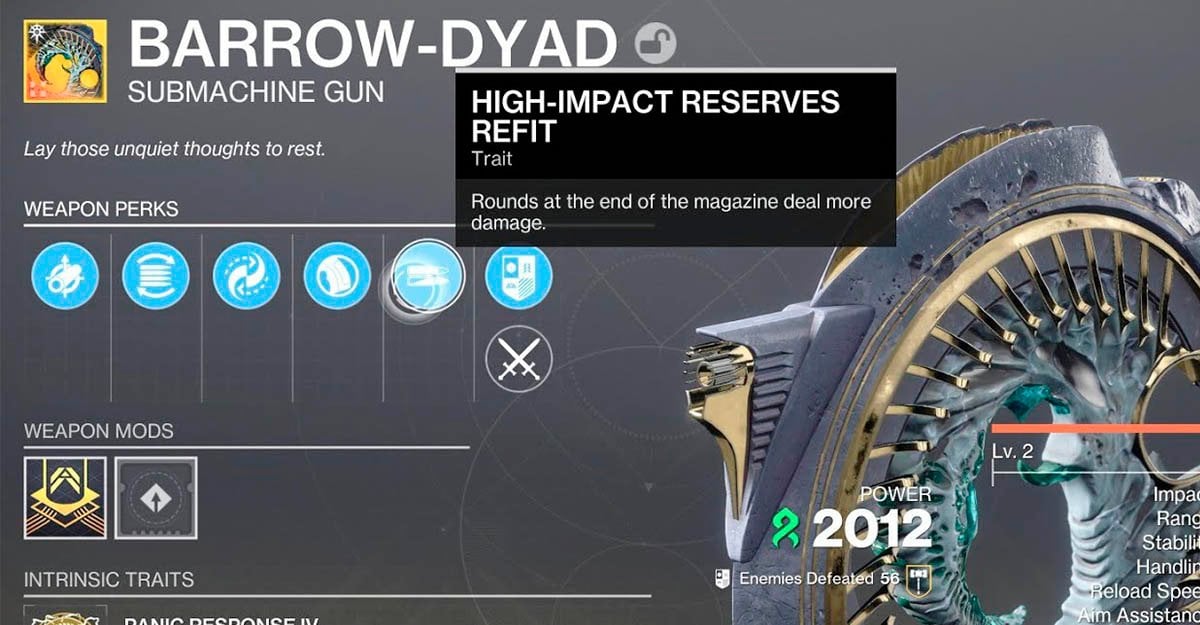
Step 1 — Equip Barrow-Dyad.
Step 2 — Finish Court of Blades on Expert difficulty.
Step 3 — Find Sharp Osseous Spine in your inventory.
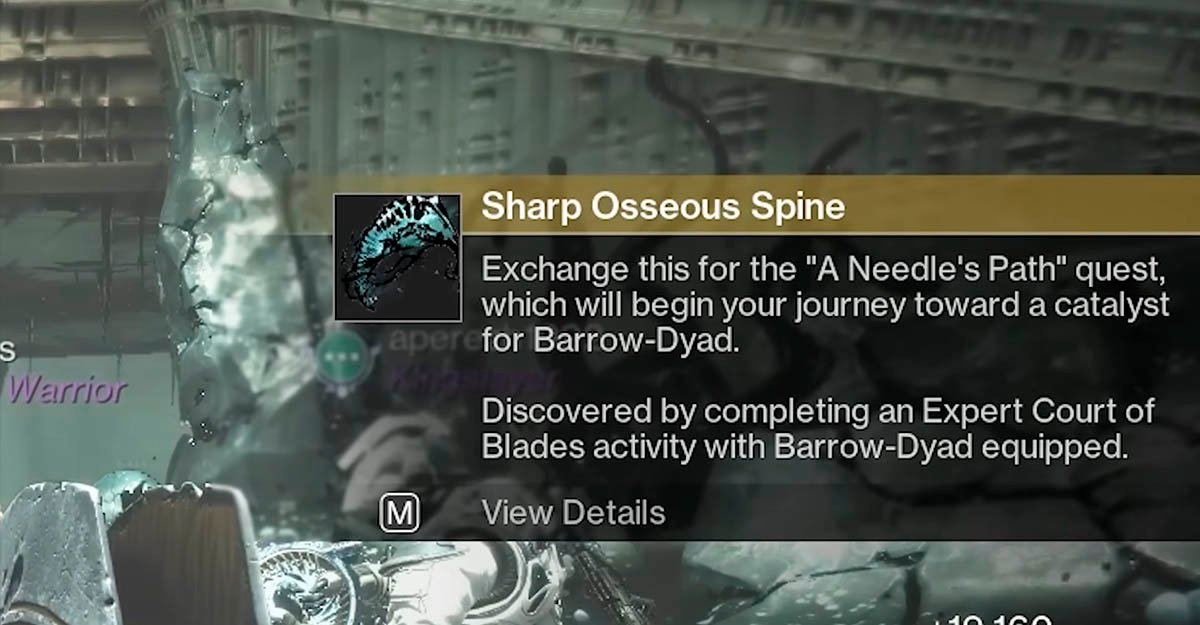
Step 4 — Talk with Shaping Slab in Eris Morn’s apartment.
Step 5 — Complete a Court of Blades on Expert difficulty, using only precision damage weapons, which include:
- Scout Rifles
- Linear Fusion Rifles
- Sniper Rifles
- Barrow-Dyad
Step 6 — go to The Enclave and re-craft Barrow-Dyad with the new High-Impact Reserves Catalyst.
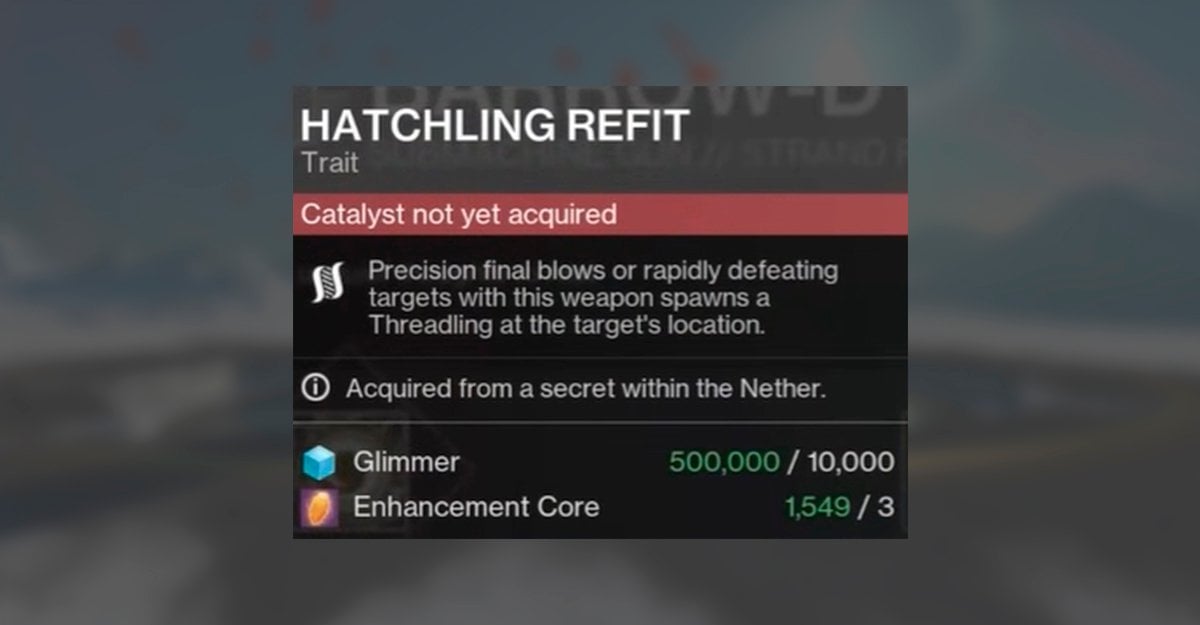
Hatchling Refit Catalyst for Barrow-Dyad
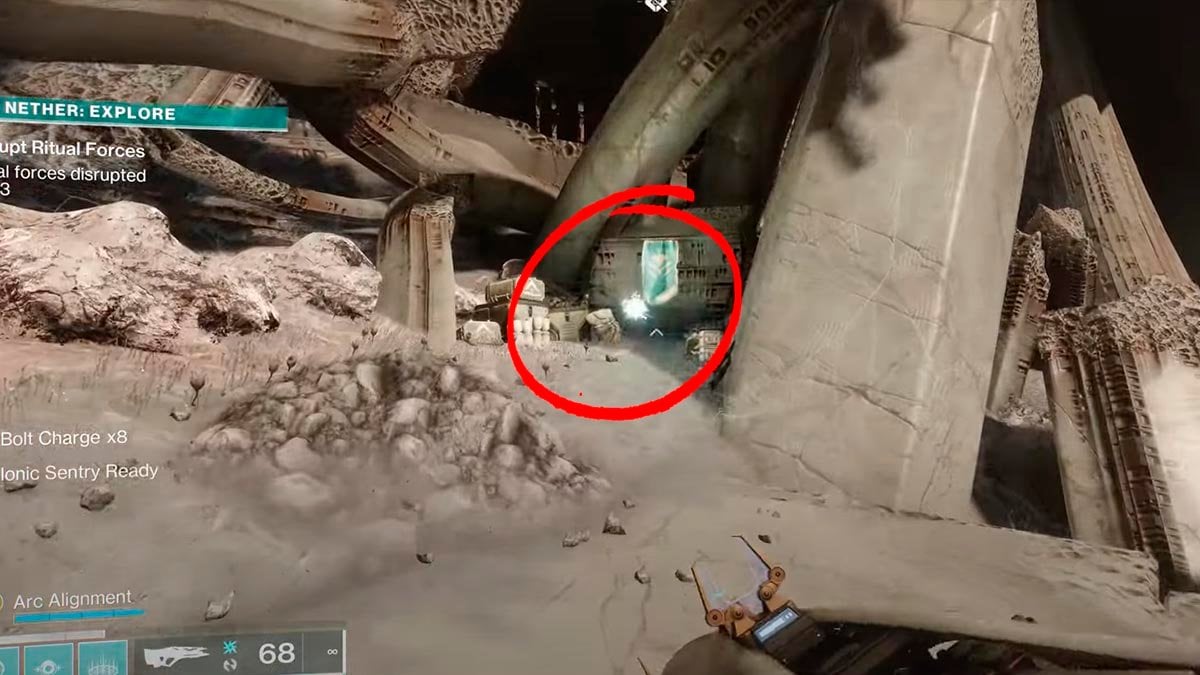
Step 1 — Complete the second step (week 2 story) of Act II storyline.
Step 2 — Launch the Nether in Explore mode.
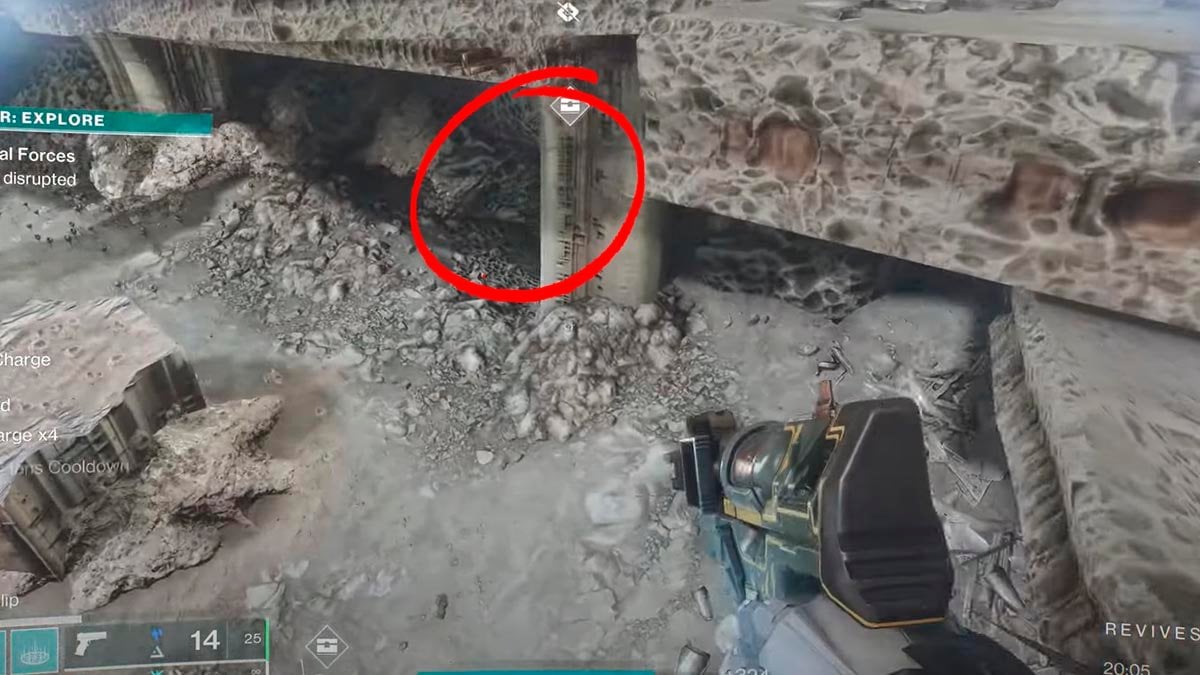
Step 3 — Go to the Trenchway in the Nether and find this location.
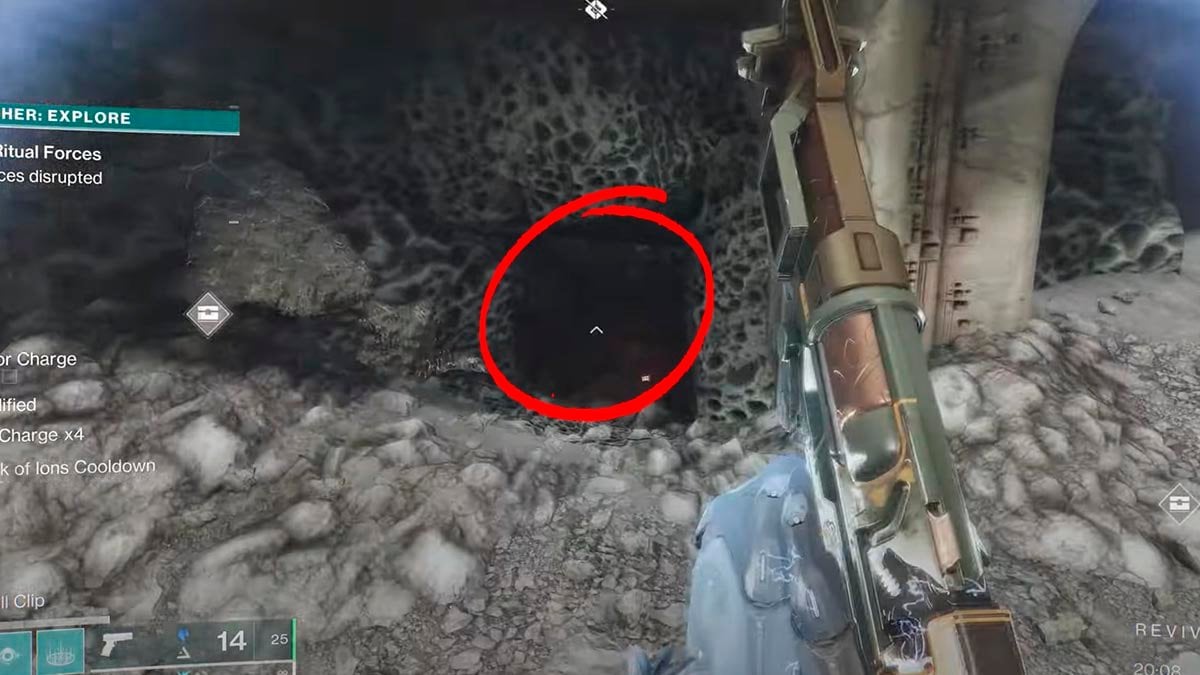
Step 4 — Use your Ghost to locate the hidden path to this cave.
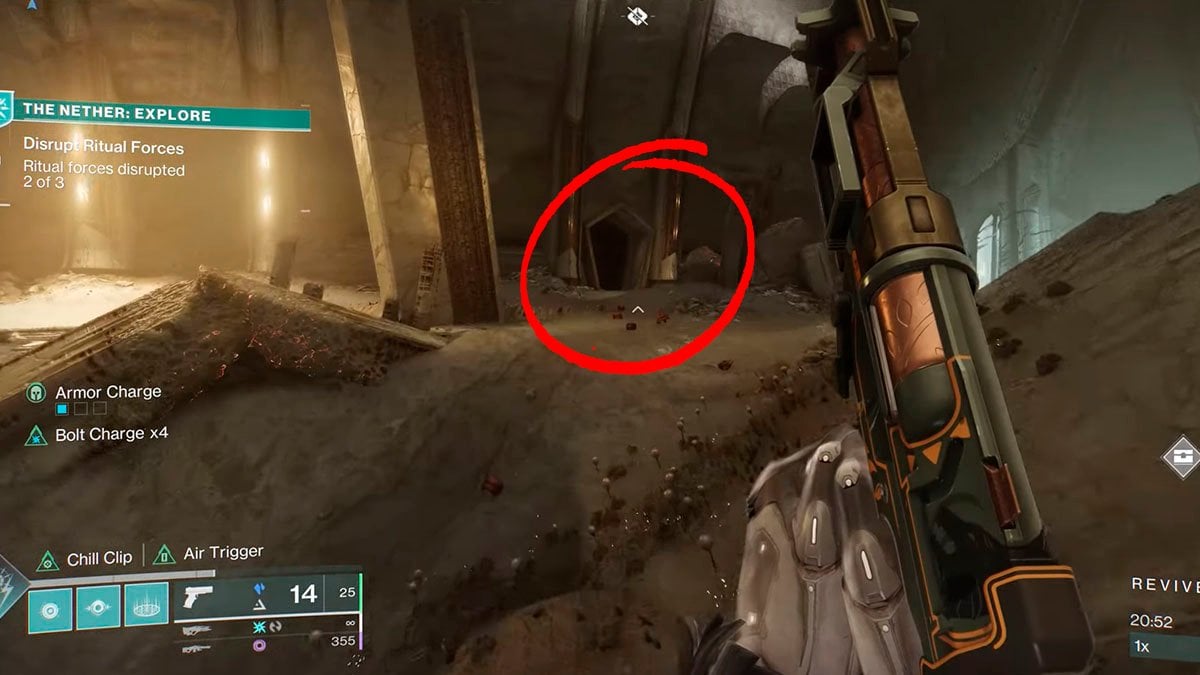
Step 5 — Explore the hidden room and locate the chest. Activate it, then step through the portal to loot the Heavy Osseous Spine.
Step 6 — Get the Hammer’s Path quest from Shaping Slab in Eris Morn’s apartment.
Step 7 — Make sure your Reputation Orb with Shaping Slab is set to Ambition, not Resolve. Check it in Eris Morn’s apartment. You need to have the White Orb active.
Step 8 — Reach Reputation Rank 12 on Shaping Slab: Ambition. For that you need to play the Nether.
Step 9 — Complete the Nether on Expert difficulty, using only Barrow-Dyad and close-range weapons, which include:
- Shotguns
- Glaives
- Swords
Step 10 — go to The Enclave and re-craft Barrow-Dyad with the new Hatchling Refit Catalyst.
One for all Catalyst for Barrow-Dyad
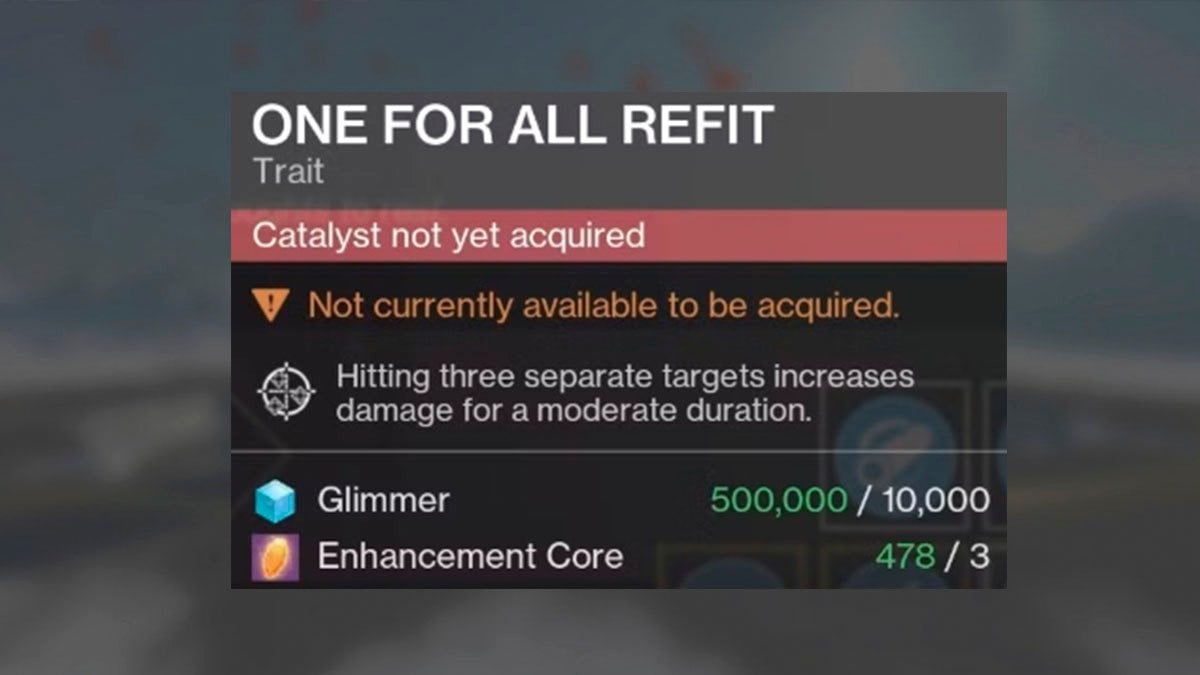
Step 1 — Complete the Sunless Cell Strike with Barrow-Dyad equipped.
You can simply swap to Barrow-Dyad at the end of the run. Alternatively, if you equip only SMGs, Auto Rifles, and Machine Guns, you can skip Step 5.
Step 2 — Look for Trembling Osseous Spine in your quest log.
Step 3 — Visit Shaping Slab in Eris Morn’s apartment.
Step 4 — Find the 10 Tithing Wormspawn in The Nether. Swap the Orb in Eris Morn’s apartment for Path of Ambition (White) and explore The Nether. This video guide will help you to locate all the worms.
Step 5 — Complete the Sunless Cell Strike with Barrow-Dyad equipped one more time.
You can just swap for Barrow-Dyad at the end of the run.
Target-Lock Catalyst for Barrow-Dyad
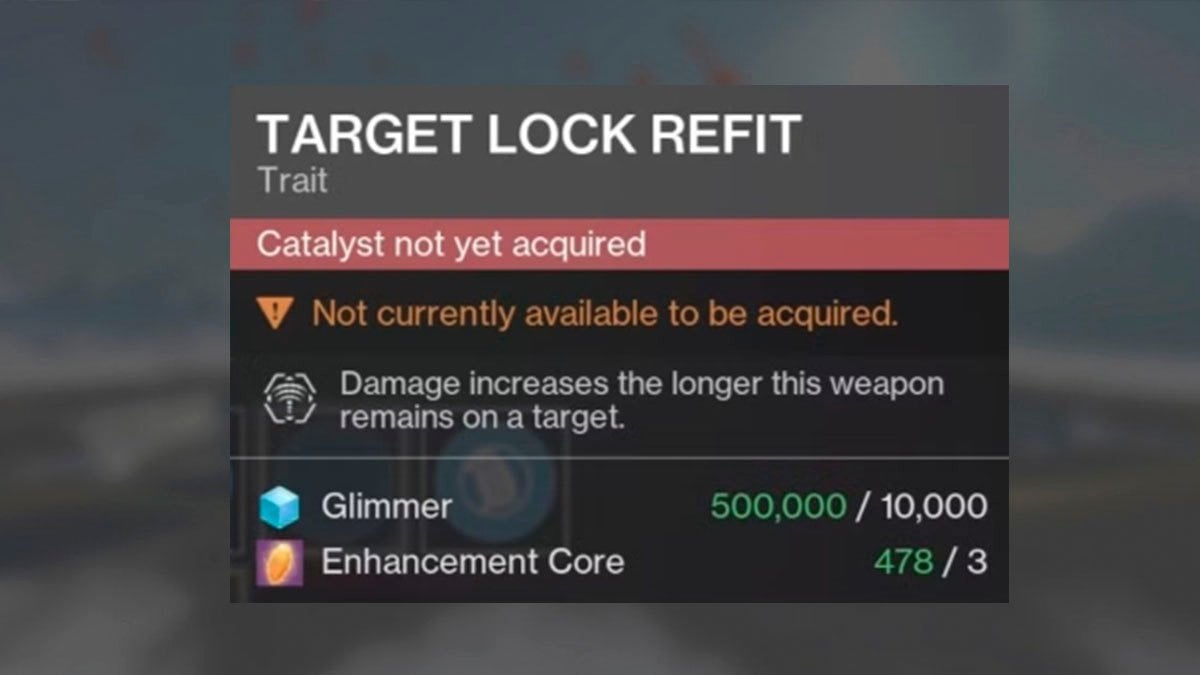
Step 1 — Complete Act III Dossier mission.
Step 2 — Launch The Nether Explore mode.
Step 3 — Go to The Founts and find these runes on the walls. Shoot it.
Step 4 — Loot the chest spawned near by.
Step 5 — Look for the pillar near the chest and shoot this button.
Step 6 — The secret door will open behind you. Follow the tunnel and shoot Taken Blight at the end of it.
Step 7 — Loot the chest near by with Coalescence of the Knife.
Step 8 — go to the Hull of Breach area and scan the surrounding area to find this ghost. Activate it.
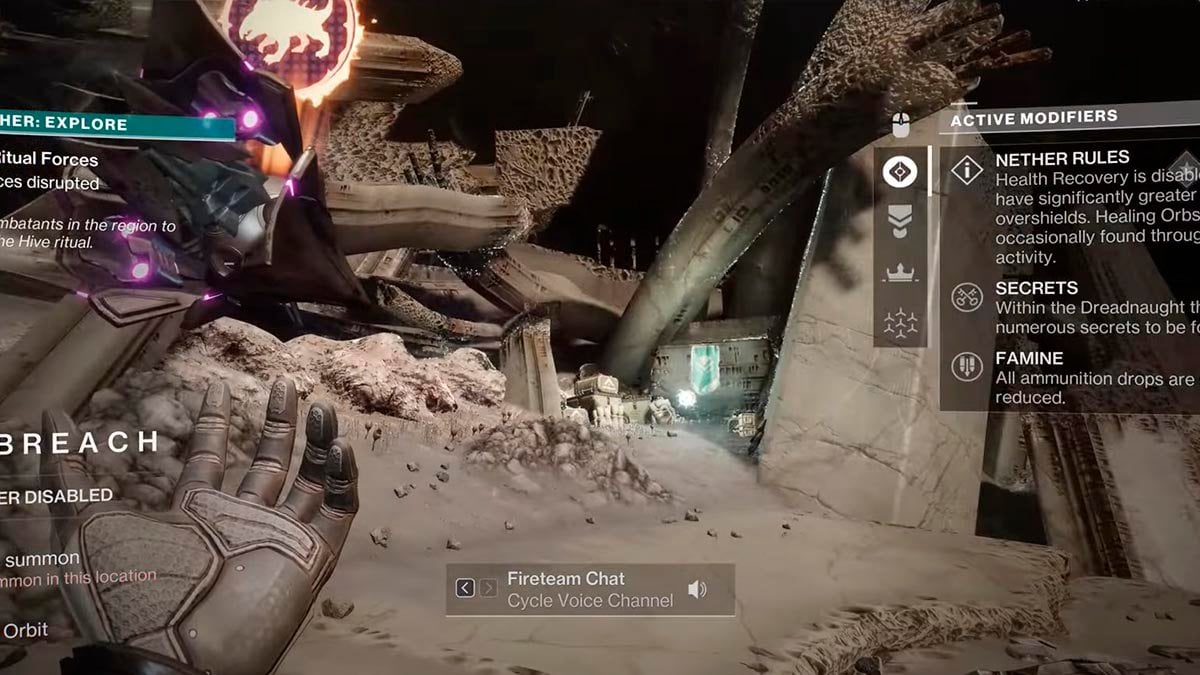
Step 9 — Find this cave near by and open the door inside with Skyburner Deployment Code (these codes can be obtained on the Dreadnaught by defeating the Ultra summoned with a Skyburners Command Beacon.)
Step 10 — Loot the chest inside with another Coalescence of the [Knife].
Step 11 — Open the portal for the Catalyst quest.
For that find this door in the Hull of Breach area. Enter it and find this place inside. Interact with this fragment.
Step 12 — Enter the portal.
Step 13 — Loot 2 chests.
Step 14 — Visit Shaping Slab in Eris Morn’s apartment.
Step 14 — Find the 10 Ravenous Wormspawn in The Nether. Swap the Orb in Eris Morn’s apartment for Path of Resolve (Black) and explore The Nether. This video guide will help you.
Step 15 — Complete the Derealize exotic mission with Barrow-Dyad equipped. Check Derealize mission guide for more info.
You can simply swap to Barrow-Dyad at the end of the run.
Conclusion
That wraps up the Barrow-Dyad guide! We’re looking forward to more Barrow-Dyad upgrades in the future, so stay tuned. There are a lot of things to do in Destiny 2 beyond obtaining the Barrow-Dyad. And that’s okay if you don’t have enough time to do it on your own. Explore the variety of Destiny 2 boosting services available to help you save time.


Comments