Marvel Rivals FPS and Ping settings guide
Learn how to improve FPS and Ping in Marvel Rivals. Here’s a full settings guide to fix your lags and freezing on PC.
Table of Contents
Key takeaways:
- Strive for high FPS and low latency by optimizing your PC and in-game settings.
- Synchronize game FPS with your monitor’s refresh rate.
- Install the game on an SSD, enable Game Mode, tweak graphics settings, and close unnecessary apps.
- Adjust in-game display settings (e.g., turning off V-Sync, lowering graphics quality and shadow details, or even reducing resolution) to balance visuals and performance.
- If optimization doesn’t help, issues might stem from weak hardware, outdated drivers, or server problems. Cloud gaming could be a last resort for smoother gameplay.
Marvel Rivals is a cool and visually impressive game, but it does have its drawbacks. Many players experience lags, low FPS, and high ping, making the game less enjoyable and sometimes even unplayable. The game’s demanding hardware requirements push many PCs to their limits. In this guide, you can find a step-by-step approach to tune your PC and Marvel Rivals settings. You should see a noticeable improvement in the game performance by the end — even if Doctor Strange opens his portal.
Related posts:
Key performance factors
Game settings and hardware configurations are often designed to prioritize visuals over performance. There’s nothing wrong with enjoying the looks. However, Marvel Rival’s competitive nature requires a focus on performance. Striking a balance is important, of course. We won’t make you play Minecraft or Counter-Strike 1.6. Marvel Rivals should still look like a modern game with flashy superheroes in it.
There are 2 most important factors to reach — high FPS and low latency. They are the key to achieving smoother gameplay and gaining a competitive edge over other players.
What is FPS, and why it is important
FPS (frames per second) is a key factor of any action game performance. It’s especially important in shooter and team-based games like Marvel Rivals. The higher your FPS, the smoother and more fluid the animations appear. However, it’s not just about aesthetics. A higher FPS significantly enhances your aiming and reaction time.
How much FPS you need is a very personal factor.
- If you are a casual player with non-gaming hardware, you can enjoy the game even with 30 FPS.
- Most gamers aim for at least 60 FPS as a bare minimum.
- Players with higher-end hardware often achieve 100-150 FPS
- If you are a competitive player, you can strive for 200-300 FPS and more.
Ultimately, your ideal FPS will depend on how you balance performance, hardware capabilities, and gaming goals.
How to check FPS in Marvel Rivals: Go to in-game settings → Display → Show FPS. (Note that FPS is a dynamic factor and will vary in different circumstances).
Check your monitor refresh rate in Hz
FPS is always limited by your screen’s refresh rate, measured in hertz (Hz). It’s easy to compare: if you have a 60Hz monitor, it can only display up to 60 FPS. So, there’s no need to accelerate your FPS beyond your monitor’s refresh rate.
To check your monitor’s refresh rate, follow these steps. Right-click on an empty area of your desktop and select Display settings. In the settings window, click on Advanced display settings. Here you should find your monitor refresh rate.
Check this monitor refresh rate guide for more info.
What is Latency, and why it is important
Latency (or ping) is the time required for data to pass from your gaming device to the game’s server. It is measured in milliseconds (ms). Ideally you want a 0ms latency, meaning your actions will be processed instantly. However, it’s unachievable. Here are more realistic ping goals:
- Optimal experience: Latency of 20ms or lower.
- Good range: Between 20-100ms.
- Acceptable for casual players: Between 100-150ms.
- Unplayable: Latency of 150ms or higher.
Latency is often limited not just by your hardware and settings but also by your region and internet connection. But you can still improve your ping by reducing the computational load that Marvel Rivals places on your system.
How to check latency in Marvel Rivals: Go to in-game settings → Display → Enable Network Stats.
Marvel Rivals PC settings
Here, we’ll explore some tips to optimize your Marvel Rivals experience outside of the game itself. These steps apply mainly to PCs running Windows.
Step 1 — Make sure Marvel Rivals installed on an SSD drive
An SSD (Solid State Drive) is a modern and much faster storage device compared to traditional HDDs. Your operating system and Marvel Rivals should be installed on an SSD for optimal performance.
To check the drives you have, open Task Manager (Ctrl+Shift+Esc) and go to the Performance tab. Look for your SSD (usually listed as Disk C).
Next, check where Marvel Rivals is installed. You can find this through Steam or Epic Games Store game settings. If the game is installed on an HDD, uninstall it and reinstall it on your SSD.
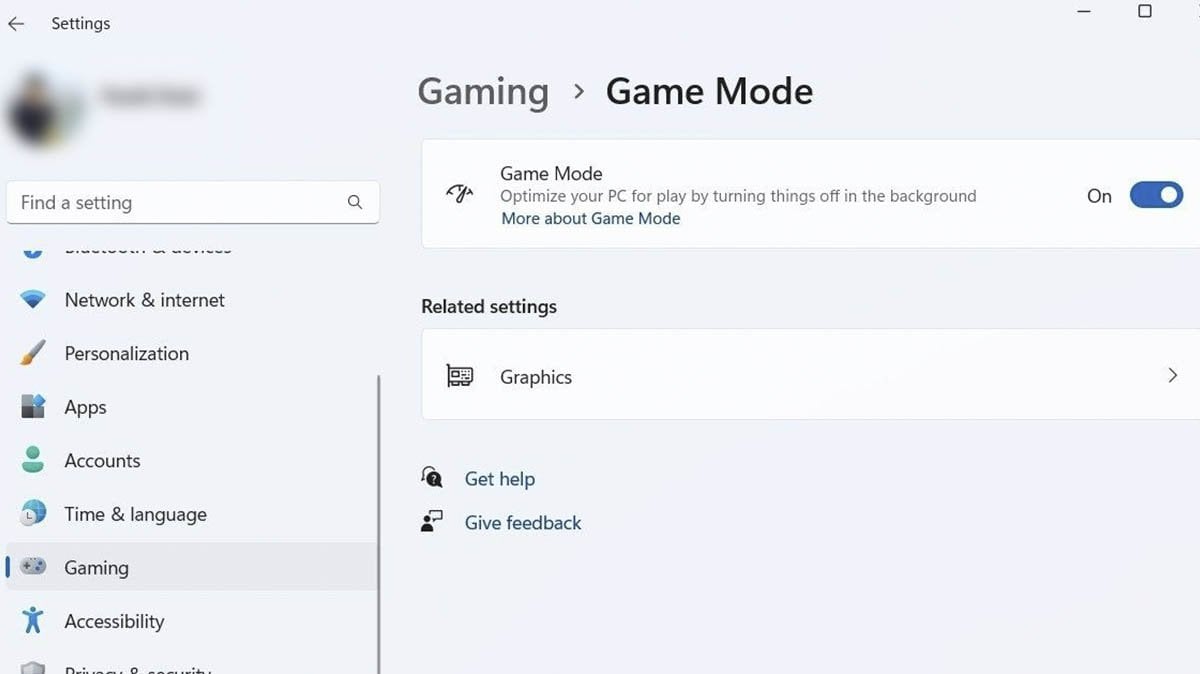
Step 2 — Turn on Game mode
Search for Game mode on your PC (press the windows button, write “Game mode” and press Enter) → Turn it on.
Step 3 — Tinker with your graphics settings
Search for Graphics settings on your PC (press the windows button, write “Graphics ” and press Enter) → Press “Change default graphic settings” → Find Default high performance GPU → Select your graphics card. Find out what graphics card you have here.
Step 4 — Enable Hardware-accelerated GPU scheduling
Search for Graphics settings on your PC (press the windows button, write “Graphics ” and press Enter) → Press “Change default graphic settings” → find “Hardware-accelerated GPU scheduling” and turn it on.
This option may not be available on all PCs. If you don’t see it, there’s no need to worry—you’re fine without it.
Step 5 — Enable optimization for windowed games
Search for Graphics settings on your PC (press the windows button, write “Graphics ” and press Enter) → Press “Change default graphic settings” → find “Optimization for windowed games” and turn it on.
Step 6 — Close all unnecessary apps
Go to the taskbar and review all open applications. Close anything that is not necessary to free some system resources.
In-game Marvel Rivals settings
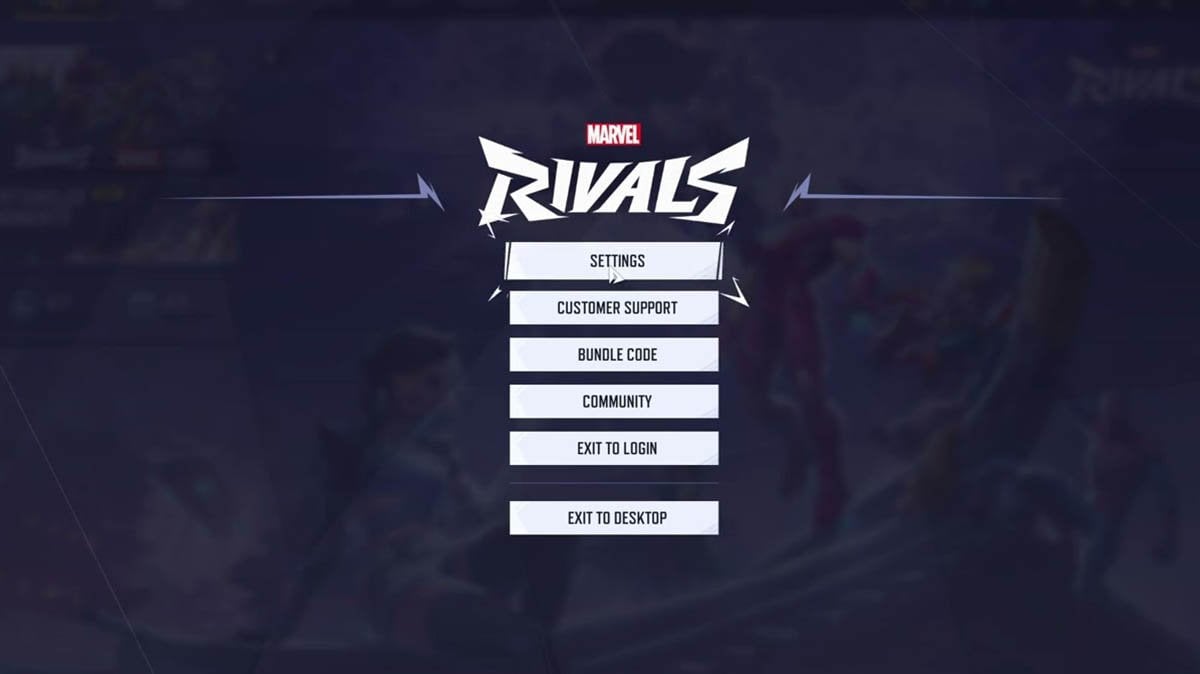
Now, it’s time to tune your in-game settings for optimal performance. Except for Step 1, all adjustments will be made within Marvel Rivals under Settings > Display.
Step 1 — Clear Local Configuration Files
Locate and press “Clear Local Configuration Files” positioned to the left of the Launch button, before starting the game.
Now, you’re ready to launch Marvel Rivals. Once the game is running, go to Settings > Display to follow with the next steps.
Step 2 — Turn off Frame generation mode
Step 3 — Turn off V-Sync
Step 4 — Set Global Illumination to SSGI – Low Quality
Step 5 — Set Reflection Quality to Screen Space Reflection
Step 6 — Set Model Detail to Low or Medium
This is simply a choice between performance and visual quality. Pick the option that works best for you.
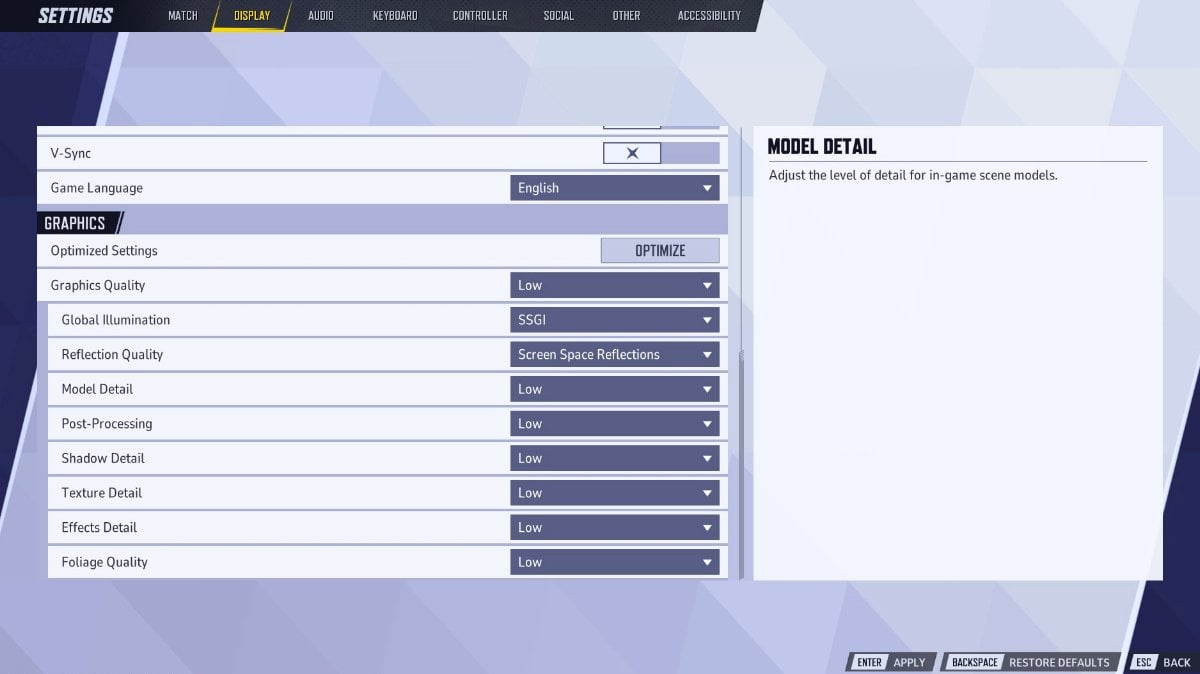
Step 7 — Set Post-Processing to Low
Step 8 — Set Shadow detail to Low
Step 9 — Set Texture Detail to Low or Medium
Step 10 — Set Effects detail to Low
Step 11 — Set Foliage Quality to Low
Step 12 — Choose the correct Anti-Aliasing and Resolution Type
This advice isn’t straightforward, as the best choice depends heavily on your hardware. Experiment with different options and monitor your FPS and Ping to find what works best for your system.
TAAU works best for some setups, while others may benefit more from DLSS or AMD FSR. If using DLSS or AMD FSR, set Super Resolution Mode to Performance or even Ultra Performance.

Step 13 — If FPS is still low for you, consider lowering resolution
Lowering the resolution can significantly improve game performance but comes at a major visual cost. Only consider this option if you have a low-end graphics card and are still experiencing serious performance issues.
Step 14 — Find Low Latency Mode and enable Nvidia Reflex, if available
Step 15 — If you still have a high ping, consider Limit FPS
This option lets you trade a small fraction of your FPS to reduce latency. Use it only if you’re satisfied with your current FPS but experiencing high ping.
First, determine your average FPS rate, then go to Display Settings and enable Limit FPS. Set the FPS cap slightly lower than your average—start by reducing it by 5-10%. If you need further improvement, try 15-20%, but never drop your max FPS below 60. After applying this change, your latency should improve.
If you need even lower latency, consider enabling Frame Generation Mode. Do it only if you are desperate for ping reduction and are already using the Limit FPS option.
If nothing helps
Every case of lag and performance issues is unique, and it’s impossible to account for every factor. If you’re still experiencing lag or poor performance, it’s time to look beyond in-game and Windows settings.
Possible problems:
- Not good enough hardware
- Outdated or conflicting drivers
- Weak internet connection
- Server issues on Marvel Rivals’ end
- A bug introduced by a recent patch or hotfix.
And, of course, sometimes lag is inevitable on the player’s side and simply a part of the gameplay for the vast majority of players. Take the Doctor Strange portal effect, for example.
If you don’t have strong enough hardware to run Marvel Rivals without lags, consider trying cloud gaming. While it’s not a perfect solution, it at least allows everyone to experience the game.
With a fine-tuned game comes great responsibility. Let our Marvel Rival boosting services help you climb the ranks and enjoy perfect gameplay conditions.


Comments