Tazavesh: Streets of Wonder M+ quick guide — The War Within Season 3
Tazavesh: Streets of Wonder M+ quick guide provides all the information needed to easily defeat the most complicated challenges of this dungeon in Patch 11.2.
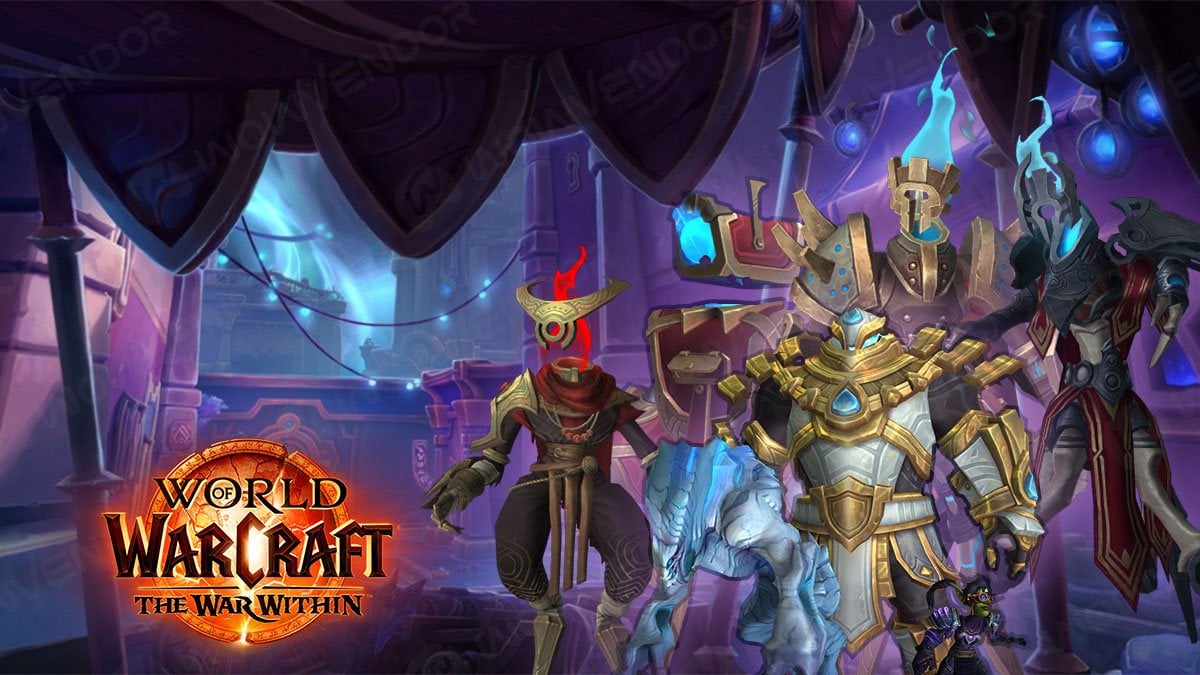
Table of Contents
Key takeaways:
- Tazavesh, the Veiled Market, a mega dungeon that originated in Shadowlands, returns with a full rework. Now, it is split into two instances, both part of The War Within Season 3 Mythic+ rotation.
- Tazavesh: Streets of Wonder consists of 5 boss encounters: Zo’phex the Sentinel, The Grand Menagerie, Mailroom Mayhem, Myza’s Oasis, and So’azmi. To access the final encounter, So’azmi, you must complete all the other boss fights.
- This quick guide focuses on tactics and mechanics for boss encounters.
New Season means new Mythic+ line-up. This is why we present you with this quick guide for Tazavesh: Streets of Wonder. For another part of Tazavesh, please check out our Tazavesh: So’leah’s Gambit M+ quick guide.
Related posts:


Please note that this is a quick guide. It primarily focuses on boss encounters and how to deal with them.
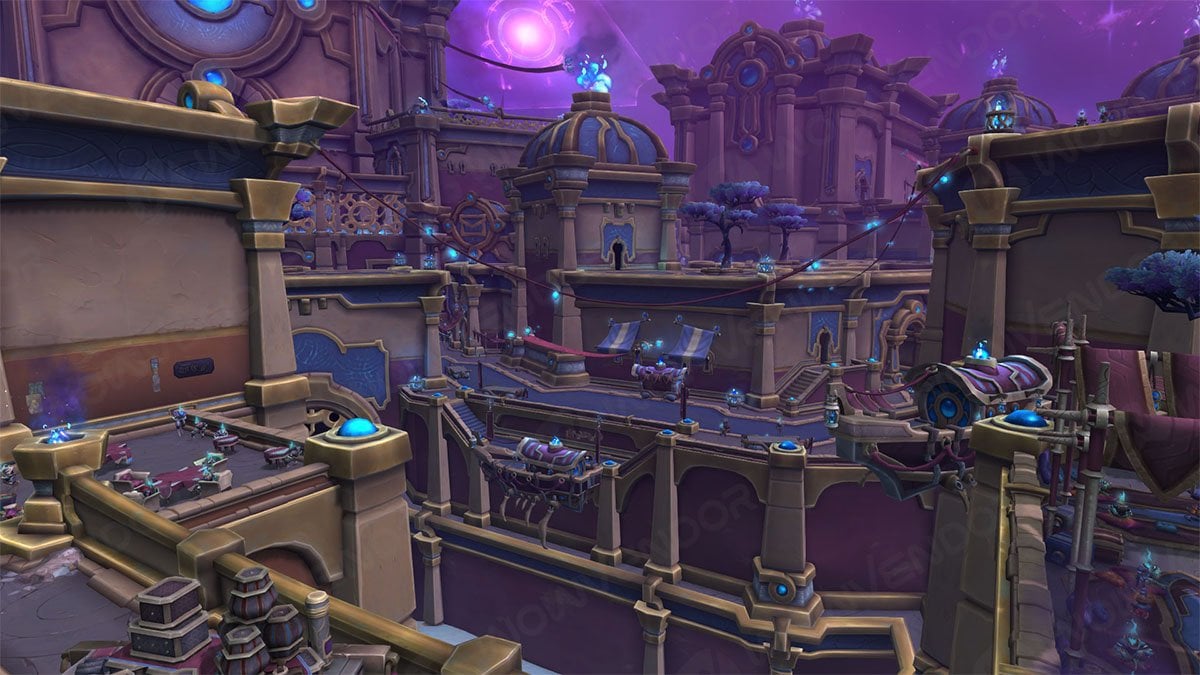
What is Tazavesh: Streets of Wonder
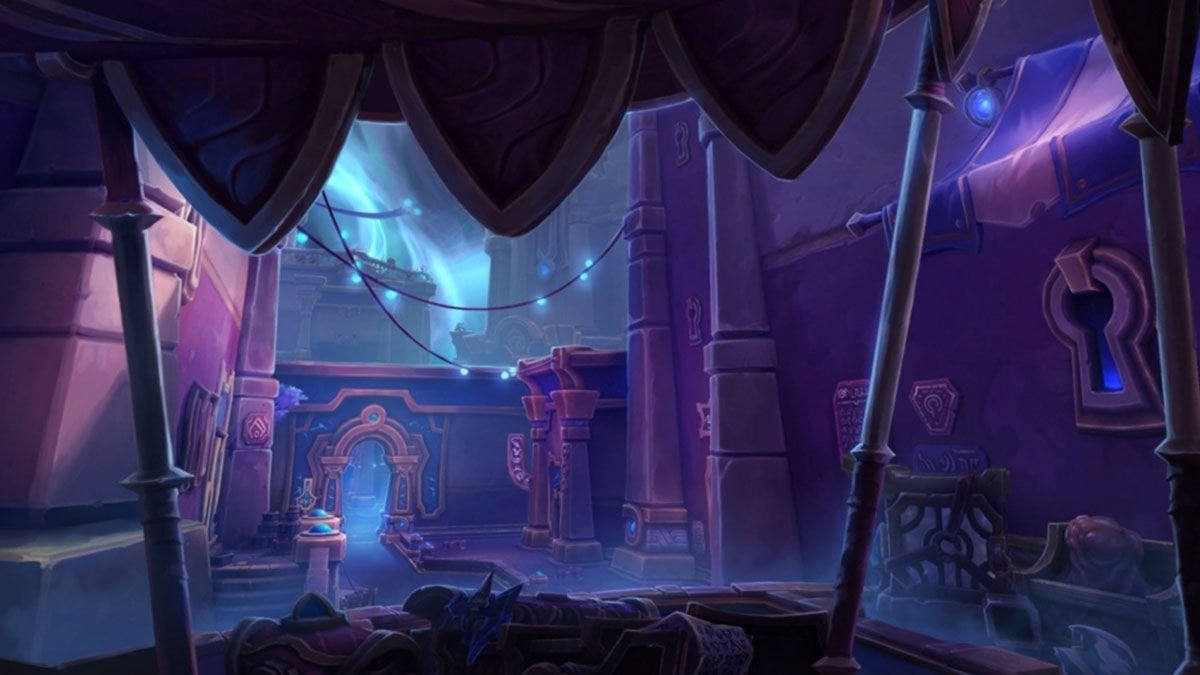
A returning dungeon from Shadowlands, Tazavesh became its own zone in Patch 11.2. Being the first part of the dungeon, it consist of 5 encounters:
- Zo’phex the Sentinel
- The Grand Menagerie
- Mailroom Mayhem/ P.O.S.T. Master
- Myza’s Oasis/ Zo’gron
- So’azmi
You can find the entrance to the dungeon version of Tazavesh in the northern part of the zone, near the flight point at coordinates:
/way 36 12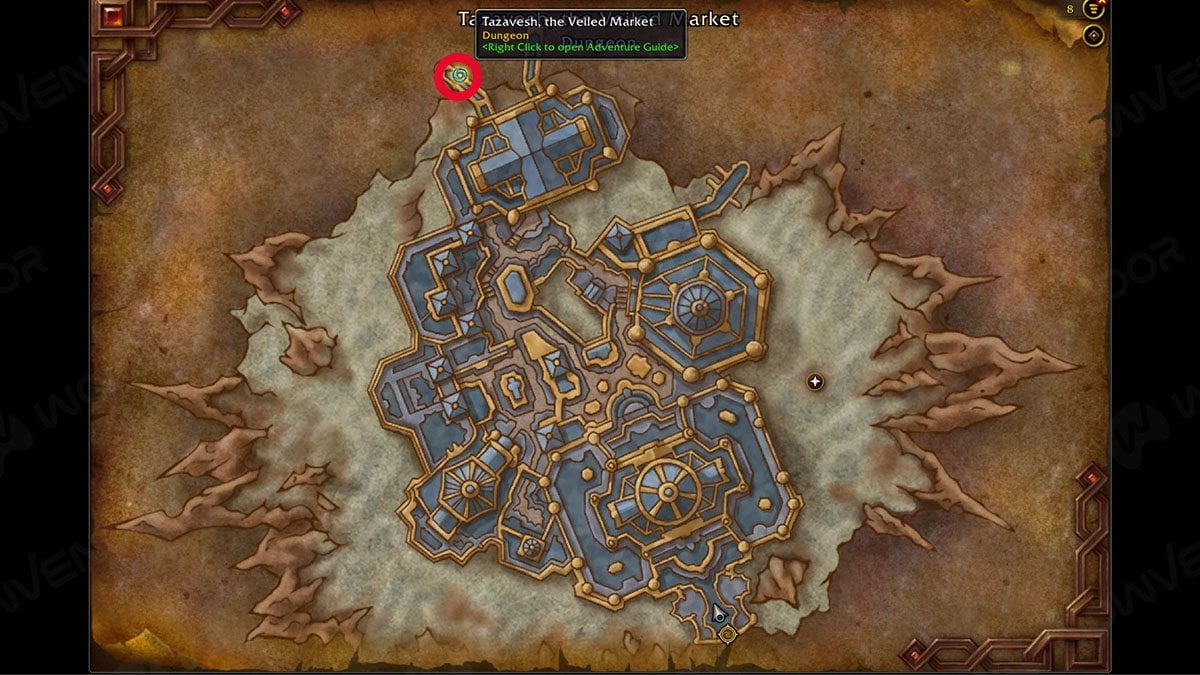
Tazavesh: Streets of Wonder Mythic+ walkthrough
In this Tazavesh: Streets of Wonder Mythic+ walkthrough you can find tactics for all boss encounters in the dungeon for Mythic plus difficulty.
Zo’phex the Sentinel M+ boss guide
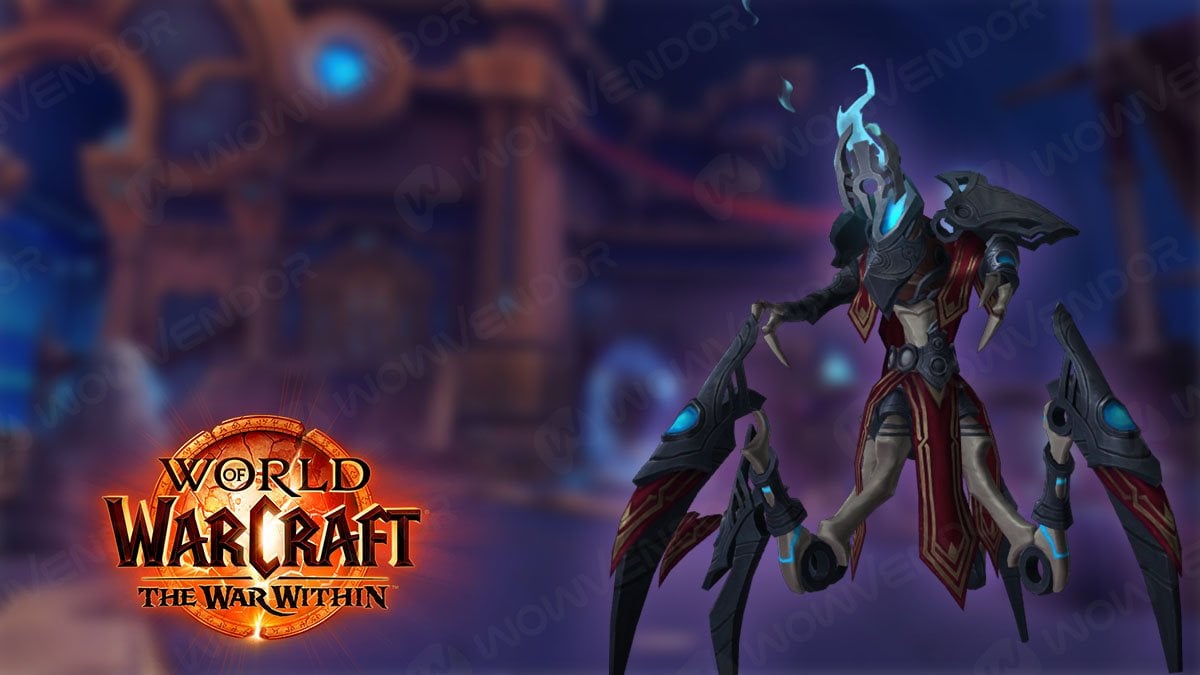
Below is Zo’phex the Sentinel M+ boss guide.
Shortly after defeating an elite enemy, Portalmancer Zo’honn, the first boss encounter, Zo’phex the Sentinel, will spawn in his place.
Here are Zo’phex’s mechanics and how to counter them:
| Ability | Description | How to counter |
|---|---|---|
| Interrogation | Used when the boss reaches 100 Energy. Targets a random player at the start, and immobilizes them with Containment Cell when the cast finishes. Afterwards, he moves toward the target while cleaving anyone in his path for lethal damage. If Zo’phex reaches the Cell, the player inside will die. The Containment Cell can be destroyed. Doing so triggers group-wide damage, Security Measure. | The marked player should run away from the boss to create enough distance. Use defensive cooldowns right before getting locked in the Containment Cell. Using abilities that grant Stun immunity, such as Icebound Fortitude, Deep Breath, etc. instantly destroy the Cell. Otherwise, the rest of the party should destroy the Containment Cell as soon as possible, avoiding getting cleaved by Zo’phex. Healers should be always ready to heal the Security Measure. |
| Armed Security | Detaches his arms to create 2 damaging zones at two random players’ locations. These zones move in short intervals. | Run out of these the moment they spawn. Don’t stand too close after, as these zones move with short dashes in random directions. |
| Fully Armed | The boss buffs his physical damage by 25%. | The Tank should use their defensive cooldowns, while healers pay extra attention to the Tank for the buff duration. |
| Impound Contraband | Confiscates weapons of 2 random players. Players affected cannot use their abilities and spells. | Players should run as fast as they can to retrieve their weapons. This allows them to use their abilities again and grants a 25% Haste buff for 12 seconds. Especially crucial for the Healer, since you cannot heal until you get your weapon back. In such a case, the Tank should use a defensive cooldown. |
| Charged Slash | A telegraphed frontal cleave. | Avoid getting hit by it. Position yourself close to the boss to have an easier time dodging. |
Here are role-specific guidelines for the Zo’phex fight.
Tank:
- Avoid getting hit by Armed Security and Charged Slash.
- Use defensive cooldowns when the boss buffs himself with Fully Armed.
- Run away from the boss if you are targeted with Interrogation, otherwise focus on the Containment Cell when it spawns.
- Quickly grab your weapon if it gets confiscated by Impound Contraband.
- Use defensive cooldown if the Healer’s weapon gets confiscated by Impound Contraband.
Healer:
- Avoid getting hit by Armed Security and Charged Slash.
- Prepare to heal the Tank when the boss buffs himself with Fully Armed.
- Run away from the boss if you are targeted with Interrogation, use defensive cooldown right before getting locked in the Containment Cell. Otherwise focus on the Containment Cell when it spawns. Be ready to heal Security Measure when the Cell is destroyed.
- Quickly grab your weapon if it gets confiscated by Impound Contraband.
DPS:
- Avoid getting hit by Armed Security and Charged Slash.
- Run away from the boss if you are targeted with Interrogation, use defensive cooldown right before getting locked in the Containment Cell. Otherwise focus on the Containment Cell when it spawns.
- Use defensive cooldown right before finishing Containment Cell. Quickly grab your weapon if it gets confiscated by Impound Contraband.
After defeating the boss, your party can go either left or right. This changes the encounter order, but you must complete them all to access the last boss. If you go left, the order is The Grand Menagerie > Mailroom Mayhem > Myza’s Oasis. Going right makes the opposite run: Myza’s Oasis > Mailroom Mayhem > The Grand Menagerie. For this guide, we will go left.
The Grand Menagerie M+ boss guide
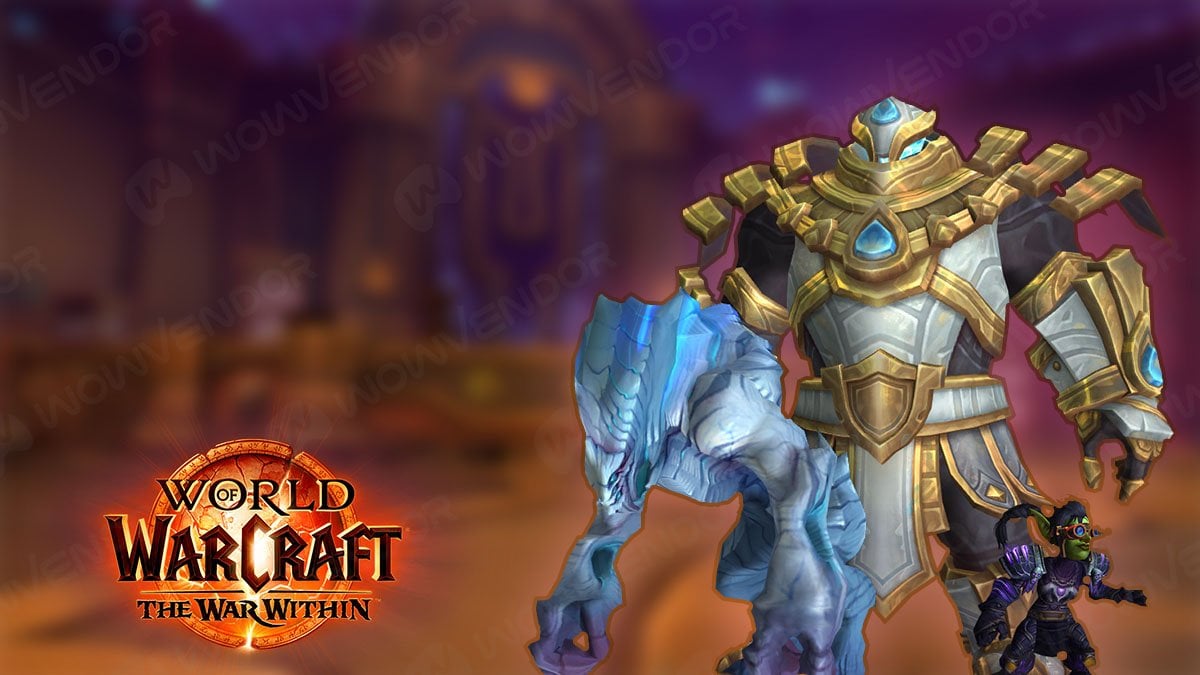
Below is The Grand Menagerie M+ boss guide.
Following the left path after the first boss eventually leads you to the Grand Menagerie encounter. This is a fight that consists of 3 different bosses: Alcruux, Achillite, and Venza Goldfuse. The moment the boss’ Health reaches 40%, another one joins the fight.
Here are Alcruux‘s mechanics and how to counter them:
| Ability | Description | How to counter |
|---|---|---|
| Gluttony | At the start of the fight, the random player is targeted with the Gluttony debuff. The area around players constantly deals damage to other players. When it expires, it transfers to the nearest player. Allows the player to consume Volatile Anima. Persists until the end of the encounter. | Players should spread out to avoid standing close to the affected player. When Achillite joins the fight, the player with Gluttony should start running into Anima orbs, since they grant a stacking damage buff. |
| Grip of Hunger | Pulls all players in and starts casting point-blank AoE. Deals lethal damage to anyone caught in AoE when cast finishes. | Run out of AoE as soon as possible. Use movement cooldowns if necessary. |
| Grand Consumption | Creates 2 sets of AoEs that explode after a short duration. There is a delay between the first and second sets. Getting hit by AoE heals Alcruux. | When the first set spawns, position yourself in the safe area, at the edge of any of the first set AoE. When the second set spawns, wait for the first set to explode, then quickly run into a new safe spot. Looking at the orbs slowly moving toward the ground, you can see the time left until the explosion. |
When Alcruux’s Health reaches 40%, Achillite starts to awaken and joins the fight shortly after. Before focusing on Achillite, finish Alcruux first to remove most of his mechanics from the fight.
Here are Achillite‘s mechanics and how to counter them:
| Ability | Description | How to counter |
|---|---|---|
| Venting Protocol | A group-wide AoE with pushback. Creates Volatile Anima all around the area. Touching Volatile Anima deals damage and applies a stacking damage debuff. If you have Gluttony, it has the opposite effect, dealing no damage and granting a stacking damage buff. Volatile Anima will spawn from Achillite’s body until the end of the encounter. | If Alcruux is still alive, players should be careful to not get knocked back into his mechanics. The Healer should be ready for group damage. The player with Gluttony debuff should collect as much Anima as possible, then unleash their strongest cooldowns into the boss. The Tank can also position the boss in one of the corners of the arena, so when the boss dies, Anima remains grouped up in one spot. |
| Flagellation Protocol | A tank buster move that deals heavy damage over 5 seconds. | The Tank should use defensive cooldowns. The Healer should focus their attention on the Tank. |
| Purification Protocol | Applies powerful DoTs to two random players. When the effect expires, it damages all players in the 10-yard area around the target. | The Healer should be ready to quickly dispel the debuff from affected players. Players should use mitigation cooldowns to avoid dying while waiting for dispel. |
When Achillite’s Health reaches 40%, Venza Goldfuse will join the fight after a short delay. With good enough damage and Volatile Anima buffs, finishing Achillite before Venza becomes targetable is possible. Either way, finish Achillite first to remove most of his mechanics from the fight.
Here are Venza‘s mechanics and how to counter them:
| Ability | Description | How to counter |
|---|---|---|
| Whirling Annihilation | Venza starts spinning, creating a deadly zone around herself while drawing players. The draw-in effect becomes stronger with each pull. | Run away from Venza, as getting into the zone will kill you. Do not underestimate the draw-in; use movement cooldowns to create as much distance as possible. |
| Chains of Damnation | Chains a random player in place, constantly dealing damage to them. Chains can be destroyed. | An affected player should run closer to the boss when the cast starts and use a defensive cooldown before the cast ends. The rest of the group should focus on the chain. |
Here are role-specific guidelines for the Grand Menagerie fight:
Tank:
- Dodge Grip of Hunger, Grand Consumption, and Whirling Annihilation.
- Avoid standing near players with Gluttony.
- If you have Gluttony, collect Anima; otherwise, dodge Anima.
- If possible, try to transfer Gluttony to DPS players by standing slightly closer to them when the effect expires.
- Use defensive cooldown to survive a tank buster, Flagellation Protocol.
- Focus down Chains of Damnation.
Healer:
- Dodge Grip of Hunger, Grand Consumption, and Whirling Annihilation.
- Avoid standing near players with Gluttony.
- If you have Gluttony, collect Anima; otherwise, dodge Anima.
- If possible, try to transfer Gluttony to DPS players by standing slightly closer to them when the effect expires.
- Prepare to heal group damage from the Venting Protocol.
- Quickly dispel the Purification Protocol from two targets.
- If you are targeted by Chains of Damnation, run closer to the boss and use a defensive cooldown. Otherwise, heal the affected target and help destroy the chain.
DPS:
- Dodge Grip of Hunger, Grand Consumption, and Whirling Annihilation.
- Avoid standing near players with Gluttony.
- If you have Gluttony, collect Anima; otherwise, dodge Anima.
- Use defensive cooldown if you are affected by Purification Protocol.
- If you are targeted by Chains of Damnation, run closer to the boss and use a defensive cooldown. Otherwise, focus on destroying the chain.
When the fight is finished, you must cross the square to enter The P.O.S.T. for the subsequent encounter.
The P.O.S.T. Master M+ boss guide
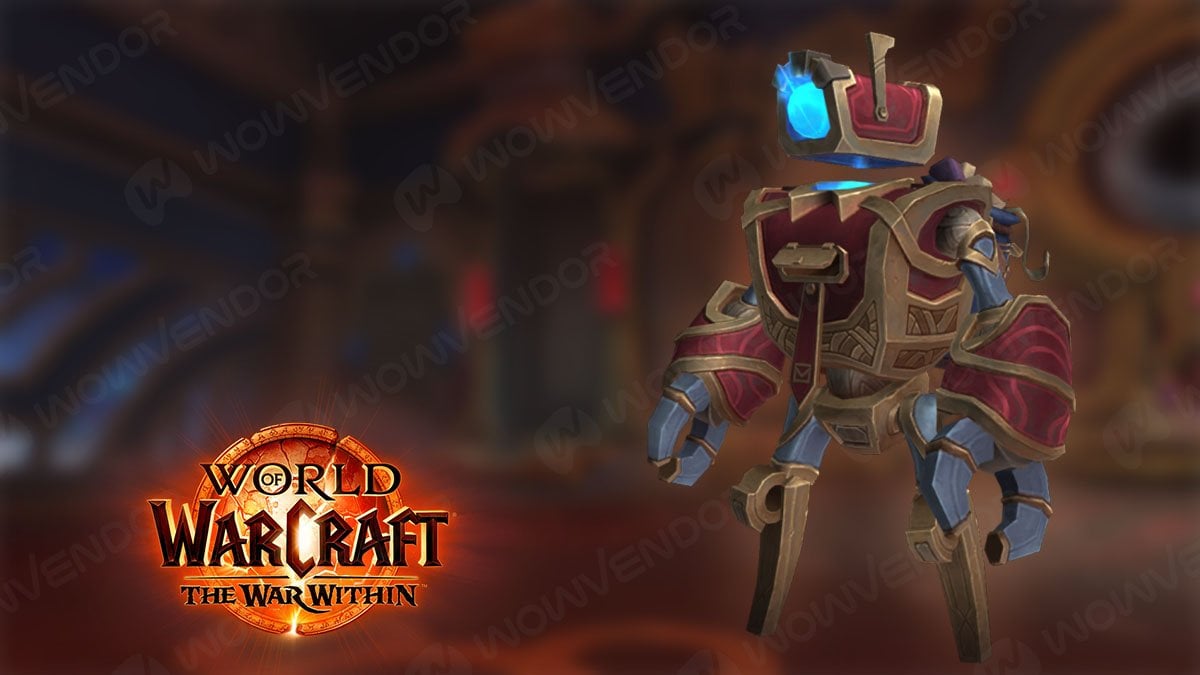
Below is the P.O.S.T. Master M+ boss guide.
Before you can fight P.O.S.T. Master, you need to clean the room of all the enemies. When it is done, you can start the encounter.
Here are P.O.S.T. Master’s mechanics and how to counter them:
| Ability | Description | How to counter |
|---|---|---|
| Unstable Goods | Used when the boss reaches 100 Energy. Arena starts to fill with mail packages with a 30-second timer. When the timer expires, the package triggers an Unstable Explosion, dealing heavy group-wide damage and applying a DoT. Players can pick up packages and throw them. | All the players should collect packages and throw them into the active Delivery Portal. There are 4 Portals around the arena. Only those that have streams of wind and goods inside are considered active. Players have one chance to throw an item, as throwing a package anywhere but into an active portal triggers the explosion early. |
| Hazardous Liquids | The central mail portal starts to rain bottles of liquid on the battlefield. Bottles apply a stacking Alchemical Residue DoT to any player standing in the AoE to catch it. If there are no players in AoE when it resolves, the liquid spills on the ground instead, creating a big slowing damaging zone. | Players should soak these AoEs to prevent the area from being filled with damaging zones. No need to soak them all, focus only on those landing close to the boss, ignoring those falling close to the edge of the room. Soaking AoEs applies a stacking DoT, so use defensive cooldowns when the number of stacks ramps up. Classes with stronger sustain and defensive options, like Paladin, Warrior, DH, etc., can afford to soak more bottles. |
| Fan Mail | Heavy-hitting group-wide attack that continuously deals damage over 5 seconds. | The heal check of the fight. Deals heavy damage on its own, and can follow right after Hazardous Liquids. Healers should use powerful healing cooldowns, while other players should use mitigation tools. |
| Money Order | Targets a random player and deals lethal damage after a short delay. The damage is split between all nearby players. | All the players should stack around the target with a marker to share the damage. |
Here are role-specific guidelines for the Mailroom Mayhem fight:
Tank:
- Throw packages in active Delivery Portals.
- Collect Hazardous Liquids bottles that fall close to the boss, and use mitigation when the number of stacks ramps up.
- Use defensive mitigation, if possible, on less durable group members when the boss casts Fan Mail. Stack on player targeted by Money Order.
Healer:
- Throw packages in active Delivery Portals.
- Collect bottles with Hazardous Liquids that fall close to the boss, use mitigation when the number of stacks ramps up, and heal ticking DoTs.
- Use powerful healing and defensive cooldowns to save the party from Fan Mail.
- Stack on the player targeted by Money Order, and heal the party after sharing the damage.
DPS:
- Throw packages in active Delivery Portals.
- Collect Hazardous Liquids bottles that fall close to the boss.
- Use mitigation when the number of stacks ramps up.
- Use defensive mitigation when the boss casts Fan Mail.
- Stack on the player targeted by Money Order.
After the encounter, you need to finish a chain of market deliveries. Doing so earns you a password to enter Myza’s Oasis for the subsequent encounter.
Myza’s Oasis M+ boss guide
Below is Myza’s Oasis M+ boss guide.
Before the encounter starts, each player should select an instrument to play. Having an instrument provides a special action that can be used to hit notes that appear on the ground. Successfully hitting a note grants a stacking Jazzy buff, increasing Haste per stack.
Reaching 12 Jazzy stacks replaces this buff with Up Tempo! providing 25% Haste, healing, and damage increase. Buff is refreshed by hitting extra notes. You should not ignore hitting notes during the fight, as this buff is helpful, and even crucial on higher key levels.
As for the instruments, they are split into two categories:
- Horn, Drum. Creates an AoE around the player, hitting all notes caught in it.
- Guitar, Sax, and Trumpet. A forward dash that hits all notes caught in its path.
There can be only one player per instrument.
Warning!
To use the instrument you need to press the Extra Abilities button. Such a button appears by default on your screen when special actions necessary for a current quest or an encounter become available. However, some addons may interfere. Please, check availability of Extra Abilities button in Edit Mode before starting your run.
The fight will finally begin when the whole group picks an instrument and practices hitting notes. It consists of two phases. In the first, players must defeat several waves of security and patrons, forcing Zo’gron to take the stage.
Here are the mechanics you encounter during Phase 1 and how to counter them:
| Ability | Description | How to counter |
|---|---|---|
| Rowdy | Used when mobs reach 100 Rage. Grants them a 100% damage buff, making their attacks lethal. Can be Soothed. | Focus on killing enemies before they reach 100 Rage. If necessary, keep an eye on their resource meter and focus on those close to 100. Otherwise, make sure you have someone with Soothe. |
| Rotten Food | Random AoE indicated by green markers. Periodically bombard the stage, dealing lethal damage to any player caught. | Dodge these. |
| Security Slam | Used by Oasis Security. A heavy-hitting tank buster. | The Tank should use a defensive cooldown. The Healer should pay extra attention to the Tank’s Health. |
| Menacing Shout | Used by Oasis Security. A group-wide AoE deals lethal damage and blocks spellcasting. Can be kicked.. | Make sure to kick this cast. Allowing it to cast more often than not means a wipe. |
| Hyperlight Bolt | Used by Disruptive Patron. Targets a random player for a burst of damage. Can be kicked. | Kick the cast to avoid getting extra damage or use personal defensive cooldowns. |
| Teleport | Used by Disruptive Patron. Teleports caster away from the group. Successful Teleport followed by Suppression. | Use hard crowd-control like stuns to interrupt Teleport and keep Disruptive Patron in place. |
| Suppression | Used by Disruptive Patron. The channel aimed at a random player, dealing damage and slowing them. | Prevent Teleport from going off, or stun/ interrupt right after. |
| Throw Drink | Used by Rowdy Patron. A single-target range attack aimed at a random player. | Heal through it. |
Here are role-specific guidelines for Myza’s Oasis Phase 1:
Tank:
- Dodge green Rotten Food AoEs.
- Press the defensive cooldown for Security Slam.
- Hit notes with the selected instrument.
- Kick Menacing Shout and Hyperlight Bolt.
- Stun Teleport.
Healer:
- Dodge green Rotten Food AoEs.
- Prepare to heal Tank after Security Slam.
- Hit notes with the selected instrument.
- Heal players hit by Hyperlight Bolt or Throw Drink.
DPS:
- Dodge green Rotten Food AoEs.
- Hit notes with the selected instrument.
- Kick Menacing Shout and Hyperlight Bolt.
- Stun Teleport.
- If there is no Soothe in the party, focus on enemies close to 100 Rage.
After defeating two waves of adds, Zo’gron takes the stage, and Phase 2 starts.
Zo’gron uses upgraded versions of moves used by the adds in Phase 1.
Here are Zo’gron‘s mechanics and how to counter them:
| Ability | Description | How to counter |
|---|---|---|
| Final Warning | Creates a powerful damage-absorption barrier and starts a slow cast. When the cast finishes, Zo’gron wipes the whole group. Can be kicked, but only when the damage-absorption barrier is depleted. | DPS check of the fight. Players must burn through the barrier before kicking the cast. Leave powerful damage buffs and burst buttons for this moment. Hitting notes to keep Up Tempo! helps significantly. |
| Suppression Spark | Pulls all the players in, creates a slowing field under himself, and applies an exploding AoE to all the players. | After getting pulled in, all players should spread away from the boss in different directions to prevent AoE overlapping. Use movement cooldowns if necessary. |
| Crowd Control | Blocks all attacks and spells in front of himself. After 5 seconds, it releases a strong cleave in his facing direction. | The moment the cast starts, you should reposition yourself behind the boss. |
| Security Slam | An even more potent tank buster than the one used by Oasis Security. | The Tank should use a stronger defensive cooldown, while the Healer pays extra attention to them. |
| Menacing Shout | An even stronger silencing group-wide AoE than the one used by Oasis Security. | Interrupt the cast. |
| Rotten Food | Random AoE indicated by green markers. Periodically bombard the stage, dealing lethal damage to any player caught. | Dodge these. |
Here are role-specific guidelines for Myza’s Oasis Phase 2:
Tank:
- Dodge green Rotten Food AoEs.
- Burn through the barrier and interrupt the Final Warning.
- Spread out for Suppression Spark.
- Run behind the boss for Crowd Control.
- Press the strong defensive cooldown for Security Slam.
- Hit notes with the selected instrument.
- Kick Menacing Shout.
Healer:
- Dodge green Rotten Food AoEs.
- Burn through the barrier to allow others to interrupt the Final Warning.
- Spread out for Suppression Spark, and heal the group after AoEs go off.
- Run behind the boss for Crowd Control.
- If possible, apply external single-target mitigation to the Tank for Security Slam and heal them afterward.
- Hit notes with the selected instrument.
DPS:
- Dodge green Rotten Food AoEs.
- Burn through the barrier and interrupt the Final Warning.
- Spread out for Suppression Spark, use personal mitigation if possible.
- Run behind the boss for Crowd Control.
- Hit notes with the selected instrument.
- Kick Menacing Shout.
After dealing with all 3 encounters in any order, you can return to the square between The P.O.S.T. and The Grand Menagerie to proceed to the final encounter.
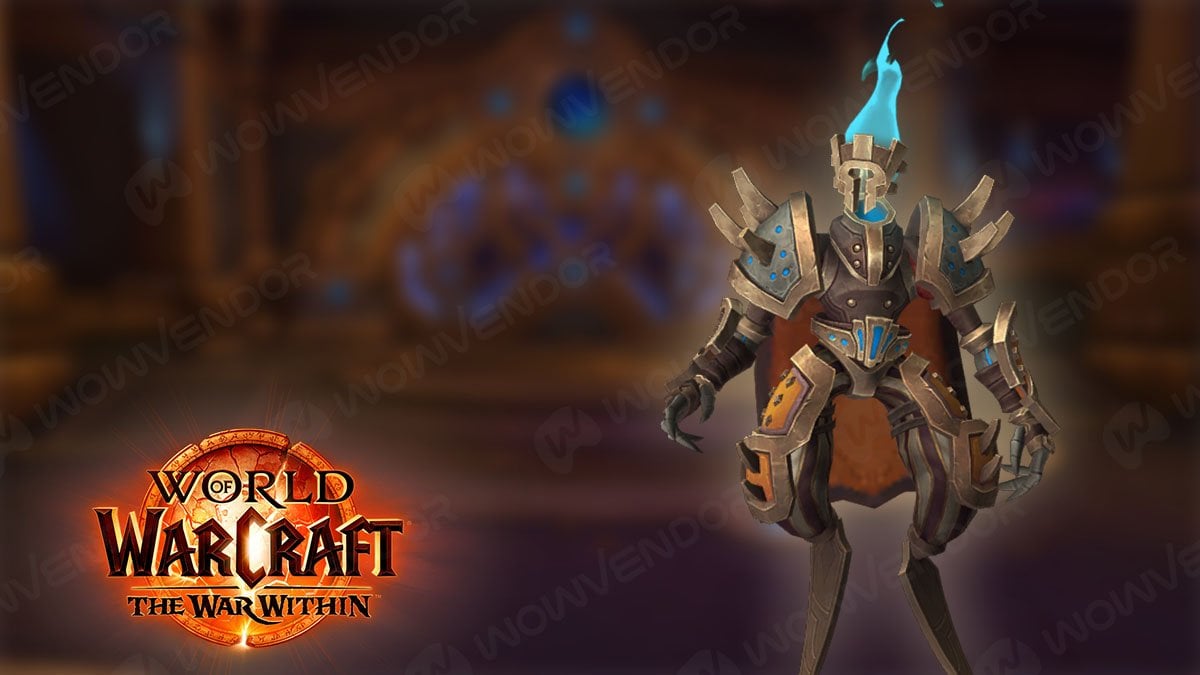
So’azmi M+ boss guide

Below is the So’azmi M+ boss guide.
So’azmi is the last encounter in the dungeon. Finishing it completes your run.
Here are So’azmi’s mechanics and how to counter them:
| Ability | Description | How to counter |
|---|---|---|
| Shuri | Throughout the fight, So’azmi will spawn a ring of energy that slowly expands outwards. Touching the ring deals lethal damage. | Players should use Relocators created by So’azmi to teleport inside the Shuri circle and avoid touching it. |
| Deploy Relocators | So’azmi creates 3 pairs of relocators around the battlefield. Each pair has its own shape. The shapes are Circle, Square, and Triangle. Walking into Relocator teleports you to another of the pair. | Players should use these Relocators to solve So’azmi mechanics that require moving through the battlefield. For example, walking into Square Relocator teleports you to another Square Relocator. Use them to avoid Shuri and to interrupt Double Technique. |
| Divide | Used at 70% and 40% of the boss’s Health. Splits the arena in half and quarters respectively with barriers. Players can neither pass nor target through these barriers. | The Divide makes it harder to move around, leaving Relocators as the only option. As the area divides, you must plan your path, which may require using several Relocators quickly. |
| Phase Slash | Targets 3 random players, dealing high damage and leaving a DoT. | The Healer should prepare to top the group’s Health. Players affected should use defensive cooldowns and self-healing. |
| Double Technique | So’azmi teleports and starts a cast. If the cast is finished, it applies a lethal DoT to ensure no one survives. It can be interrupted but requires two kicks to be used. | The cast needs to be interrupted; otherwise, you will wipe. Just as with Shuri, use Relocators to quickly reach So’azmi. Since the cast requires 2 interrupts, at least two players with kicks should get the boss before the cast finishes. |
Here are role-specific guidelines for So’azmi’s fight:
Tank:
- Teleport inside Shuri‘s ring by using the corresponding Relocator.
- Use self-healing and defensive cooldowns when targeted by Phase Slash.
- When the boss starts casting Double Technique, quickly reach him with Relocators and interrupt the cast.
Healer:
- Teleport inside Shuri‘s ring by using the corresponding Relocator.
- Heal the party members affected by Phase Slash.
- When the boss starts casting Double Technique, prepare to follow the group through Relocators, as you cannot target through barriers.
DPS:
- Teleport inside Shuri‘s ring by using the corresponding Relocator.
- Use self-healing and defensive cooldowns when targeted by Phase Slash.
- When the boss starts casting Double Technique, quickly reach him with Relocators and interrupt the cast.
- Stay in the same half/ quadrant of the area as the boss, since you cannot target through the barrier.
Tazavesh: Streets of Wonder loot table
Tazavesh: Streets of Wonder loot table consists of gear with item level range from 684 to 701, depending on the key level.
One of the noticeable Trinkets you can get from The Mailroom Mayhem encounter is Ticking Sack of Terror. It is a good choice of the passive Trinket for melee classes that value Mastery secondary stat.
Healers may consider getting a First Class Healing Distributor. It is a good early option that provides extra AoE healing and Haste.
And this is it for our Tazavesh: Streets of Wonder Mythic plus guide! Hope it helped to learn how to breeze through all the encounters. And if you have troubles, our Mythic Plus boost is always there to help you. Good luck learning the secrets of Worldsoul!


Comments