Dimensius, the All-Devouring: Normal/ Heroic raid guide — The War Within Patch 11.2
This Dimensius raid guide includes all the information you need to defeat Dimensius the All-Devouring in Patch 11.2 ot The War Within.
Table of Contents
Key takeaways:
- Dimensius the All Devouring is a final encounter of the Manaforge Omega raid, introduced in Patch 11.2, Ghosts of K’aresh.
- The fight requires a lot of positioning and coordination to deal with his mechanics successfully.
- This boss is available on all 4 difficulties: LFR, Normal, Heroic, and Mythic.
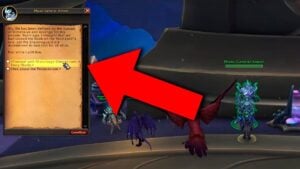
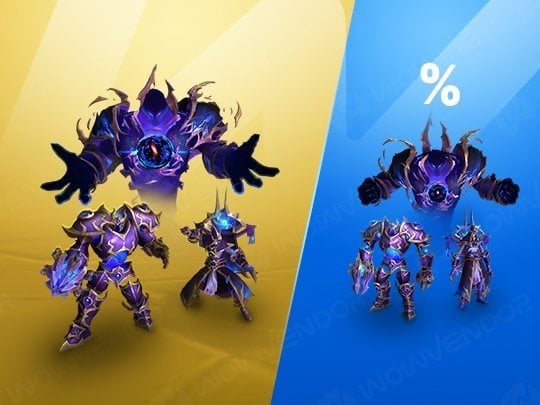
- Completing this fight grants a chance to get an omni-token that can be exchanged for a piece of the Raid Tier set. Depending on the difficulty cleared, the resulting gear can be on Veteran (iLv 668–691), Champion (iLv 681–704), Hero (iLv 694–710), or Mythic (iLv 707–723) track.
New Season means new challenges, and the Manaforge Omega raid brings many of them. The peak encounter of them all is Dimensius the All-Devouring. Our guide includes all the necessary information to complete this challenge and receive rewards.
Related posts:
Please note that this guide focuses on Normal and Heroic difficulties of the encounter. You can also use the Normal difficulty guide as a reference for LFG difficulty.
Who is Dimensius the All-Devouring?
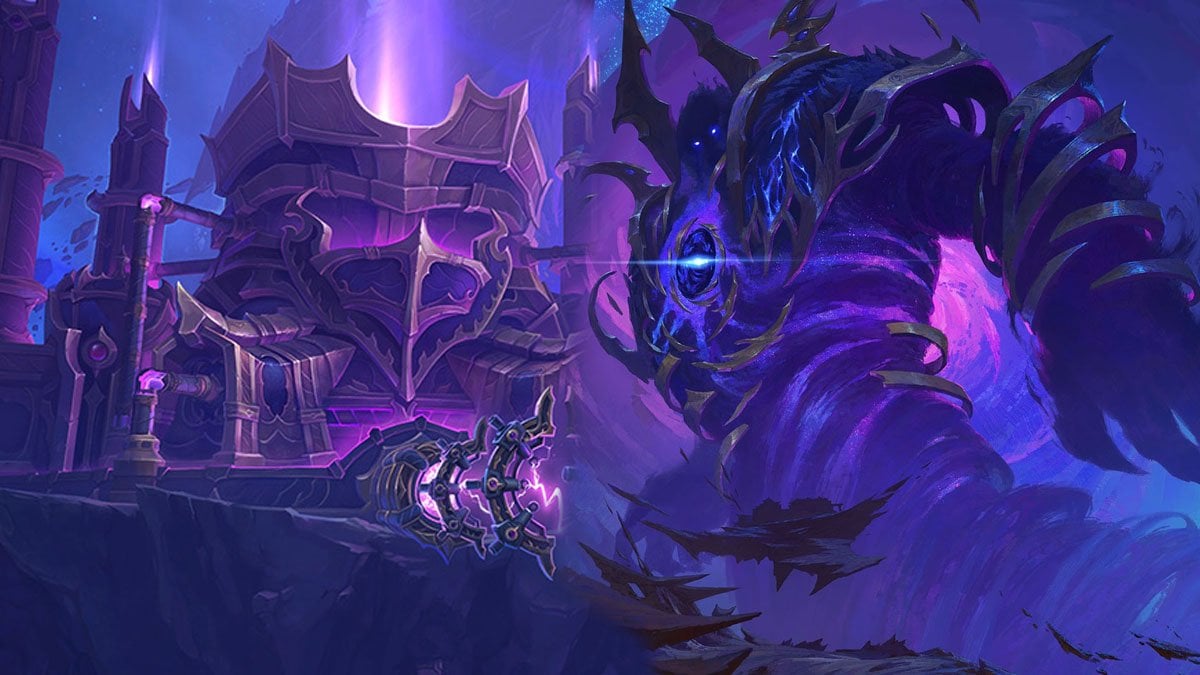
Dimensius the All-Devouring is a final encounter in the newly introduced Manaforge Omega raid. As the last boss, it is the most challenging and has corresponding rewards.
The fight has the next 4 difficulties:
- LFG. Available through the Raid Finder. Easiest of them all, as it was designed for a group of random players gathered via automatic queue. Rewards Veteran (iLv 668–691) gear track equipment.
- Normal. Baseline difficulty is aimed at random players gathered via the Looking for Group system. Rewards Champion (iLv 681–704) gear track equipment.
- Heroic. Harder difficulty than Normal includes additional mechanics. Aimed at coordinated groups or experienced players. Rewards players with items on Hero (iLv 694–710) gear track.
- Mythic. The hardest difficulty requires top performance and coordination. Rewards player with the best loot on Myth (iLv 707–723) gear track.
As mentioned before, the boss is inside the Manaforge Omega raid. It is the last out of 8 encounters. Aside from LFG, where you can queue directly for the wing with Dimensisus, you need to defeat all preceding mandatory bosses on other difficulties. The alternative is to join a run that has already done that and awaits right before the Dimensius encounter.
The entrance to the Manaforge Omega is located in the northern reaches of K’aresh. Below are the coordinates for the entrance:
/way 41.8 21.0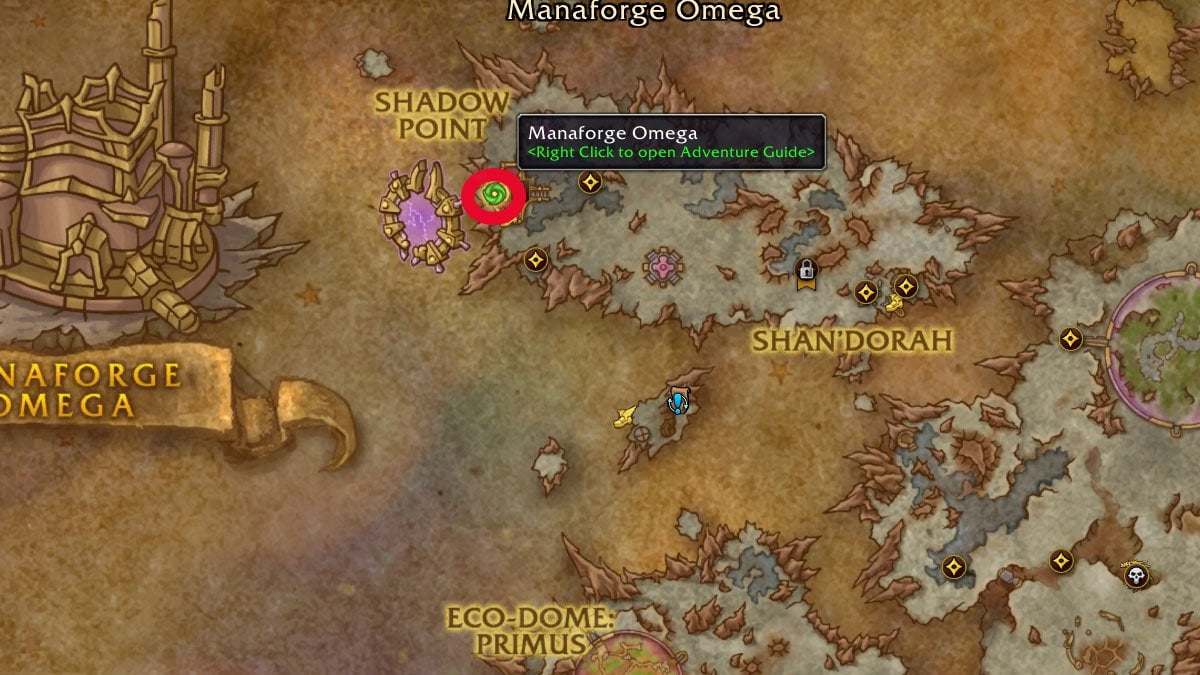
Dimensius the All-Devouring boss guide

Below is the Dimensius the All-Devouring boss guide. In it, we will cover strategies necessary to defeat Dimensius in Normal and Heroic Manaforge Omega raids.
Warning
Raid encounters usually retain most, if not all, of their skill set from previous difficulty. Unless stated otherwise, remember that abilities from Normal are still used in Heroic.
Dimensius Normal guide
Before starting the fight, the raid should split into two groups. Each group deals with mechanics and adds on their side of the platform during Phase 1.
It is also advised to designate 8 players, 4 per group, to gather Excess Mass. These players will use the Excess Mass left by the adds during Phase 1 to solve some mechanics.
Before starting the fight, make sure you are using Skyriding flight mode. Intermission requires you to fly on your mount while being on a timer. It is possible to reach your target using normal flight mode. Still, it is slower, cutting it dangerously close to not making it in time.
Tanks should decide if they are going to swap after tank-busters, Massive Smash and Cosmic Collapse, during Phases 1 and 3. The debuff applied by these attacks increases the damage from the next tank-buster. Depenidng on the Main Tank’s gear, the damage may prove too much even with defensive cooldowns.
The fight starts when a player teleports onto the arena, so every raid member should press the teleporter at the same time to arrive on time.
Phase 1
During Phase 1, Dimensisus creates Living Mass adds. These adds should be killed roughly at the same time. You have an 8-second window after one add’s Health reaches 0 to finish others. Failing to do so heals the add to 100%. When Living Mass add dies, it leaves behind an Excess Mass orb that players can use to solve various mechanics.
Below are Dimensius’ abilities during Phase 1 and how to counter them:
| Ability | Description | How to counter |
|---|---|---|
| Oblivion | When any player enters Dimensius’s body, they instantly die. | During the fight, the boss will often try to suck your character in. Avoid touching the boss’s body. |
| Devour | Used at the start of the battle and every time Energy reaches 100. Draws in all the players inside the body to instantly kill them. It can only be avoided by standing inside the Collective Gravity zone. Deals heavy raid-wide damage over its duration. | Each time the boss casts this attack, two players with an Excess Mass orb should stack together to create a Collective Gravity zone. The rest of the players should get inside the zone to avoid being devoured. For the first Devour, stack in the center of the platform; for the rest, each group should create a safe zone on their half of the platform. The attack deals heavy damage, so Healers are advised to use healing cooldowns. |
| Fists of the Voidlord | The boss’s auto-attack. Deals Shadow damage, cleaving around the target, and pulls the current target in melee range in case he can’t reach it. | Current MT should stay in boss melee range, but away from his group to avoid hitting them with splash damage. |
| Cosmic Radiation | Every 2 seconds, the boss pulses with raid-wide damage. | Unavoidable damage that ensures Healers have their hands busy. |
| Massive Smash | A powerful tank-buster AoE, aimed at the main Tank. When resolved, it spawns Living Mass adds, applies a 100% physical vulnerability debuff to the Tank, deals raid-wide damage, and knocks back all the players. | The current MT should be positioned in the center of the arena, as the knockback will happen from their position. Use defensive cooldowns. The raid should come closer to the Tank to avoid getting kicked out of the arena with knockback. After an attack happens, another Tank should consider a swap with MT. Each group should focus on their adds. |
| Dark Matter | Targets every player with a small personal AoE. | Spread out to prevent overlapping. You can place them at the edge of the platform. It is not crucial to do this on Normal, as long as players don’t get hit with 2 at once. |
| Shattered Space | Creates two AoEs on both sides of the platform. After a short delay, these AoEs resolve, dealing raid-wide damage and leaving Antimatter AoEs. | All players should avoid getting hit by AoE (you will probably still be fighting adds), but stand close to it to solve Antimatter immediately. Healers are ready for the spike of damage. |
| Antimatter | Two AoEs with an orb in the center left by Shattered Space. After 10 seconds, AoE explodes, dealing lethal raid-wide damage. Every 5 seconds, it deals damage to players standing inside of it, reducing final explosion damage by an equal amount. After the final explosion, several small Spatial Fragment AoEs rain on the platform. | After Shattered Space resolves, each group should walk inside their Antimatter AoE to soak it. Doing so will reduce the damage of the final explosion, allowing the raid to survive. Healers should be ready, as the whole raid will get extra damage. Avoid getting hit by smaller AoEs. |
| Reverse Gravity | A player from each group is targeted by the damaging AoE. Players are lifted in the air when it resolves and pulled towards the boss. Gravity can be restored to normal by placing an Excess Mass orb underneath the player. | Targeted players should go to the back of the platform to create maximum distance between them and the boss. Earlier designated players with Excess Mass should stand underneath these players in a small AoE to return affected players to the ground. |
The timeline for Phase 1 is:
- 2 Living Mass adds spawn
- Devour
- Massive Smash
- 4 Living Mass adds spawn
- Dark Matter
- Shattered Space
- Antimatter
- Reverse Gravity
- Massive Smash
- 4 Living Mass adds spawn
- Dark Matter
- Shattered Space
- Antimatter
- Reverse Gravity
- Devour
Then the rotation is repeated until Dimensius’s Health reaches 0 or the raid dies.
Below are the role-specific guidelines for Phase 1.
Tank:
- If you are the main Tank, stand close to the boss, but away from the group, to avoid hitting players with splash damage.
- Focus down, Living Mass adds, finishing them off roughly simultaneously.
- Stack with the rest of the group inside the Collective Gravity zone during Devour.
- If you are the main Tank, stand at the center of the platform during Massive Smash. Use defensive cooldowns.
- If you are not MT, avoid getting knocked back from the platform by standing closer to the Massive Smash AoE.
- If you are an off Tank, be ready to make the tank swap after Massive Smash if needed.
- Spread your Dark Matter AoE, leave them at the arena’s edge.
- Avoid getting hit by Shattered Space and Spatial Fragment.
- If you are not MT, soak Antimatter with your group.
- If you are targeted by Reverse Gravity, run to the back of the platform.
Healer:
- Pay attention to the raid’s Health, since the boss constantly pulses with raid-wide damage.
- Prepare to heal heavy raid-wide damage during Devour. Use of healing cooldowns is advised.
- If you’re a designated Excess Mass player, stack with other such players in the center of the arena for the first Devour to create a Collective Gravity zone. For consecutive Devours, stack them on your side of the platform.
- Stack with the rest of the group inside the Collective Gravity zone during Devour.
- Pay attention to MT’s Health during Massive Smash.
- Avoid getting knocked back from the platform by standing closer to the Massive Smash AoE.
- Top the raid’s Health after Massive Smash to prepare everyone for Dark Matter.
- Spread your Dark Matter AoE, leave them at the arena’s edge.
- Prepare to heal a spike of damage when Shattered Space resolves.
- Avoid getting hit by Shattered Space and Spatial Fragment.
- Soak Antimatter with your group. Prepare to heal damage to players inside.
- Top the Health of players affected by Reverse Gravity.
- If you are targeted by Reverse Gravity, run to the back of the platform.
- If you’re a designated Excess Mass player, stand underneath players affected by Reverse Gravity as they are pulled towards the boss.
DPS:
- Focus down Living Mass adds, finishing them off roughly simultaneously.
- If you’re a designated Excess Mass player, stack with other such players in the center of the arena for the first Devour to create a Collective Gravity zone. For consecutive Devours, stack them on your side of the platform.
- Stack with the rest of the group inside the Collective Gravity zone during Devour.
- Avoid getting knocked back from the platform by standing closer to the Massive Smash AoE.
- Spread your Dark Matter AoE, leave them at the arena’s edge.
- Avoid getting hit by Shattered Space and Spatial Fragment.
- Soak Antimatter with your group.
- If you are targeted by Reverse Gravity, run to the back of the platform.
- If you’re a designated Excess Mass player, stand underneath players affected by Reverse Gravity as they are pulled towards the boss.
When the boss’s Health reaches 0, all players will become immobilized and sucked inside Dimenisus. Intermission starts.
Intermission
The power of Soaring Reshii allows your character to navigate this space unharmed and use flying mounts. Mount up and quickly soar through the area, following the path indicated by Umbral Gates and arrows. Flying through the gates is crucial, as it renews your Soaring Reshii buff. If buff runs out, you will instantly die.
As you fly through space, avoid all environmental hazards, including flying fragments of the Broken World, Black Holes, and Dimensius’s massive death beam, Astrophysical Jet.
Players who are good at Skyriding can fly off path to find hidden Stellar Cores. Flying through them sends a Shooting Star at the add, dealing 7% of total Health damage.
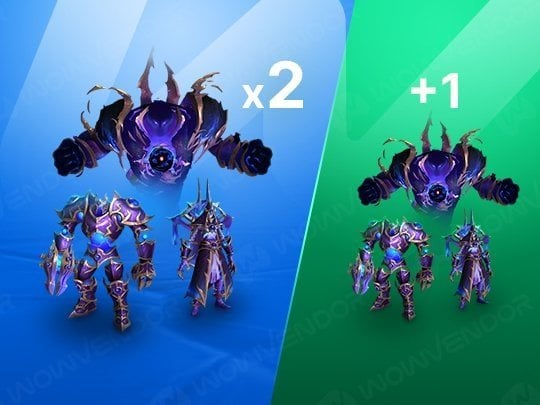
You aim to reach the platform and defeat one of the Voidlords. Then repeat the flight segment and get another one.
Phase 2
This Phase requires you to defeat two Voidlords on their platforms. While not pulled, they are casting Eclipse. If the cast finishes, it instantly wipes the raid.
While Voidlords have their own abilities, Dimensisus will help them with his own attacks.
Here are the abilities used by Dimensius in Phase 2 and how to counter them:
| Ability | Description | How to counter |
|---|---|---|
| Extinction | Dimensius throws a meteorite at the platform, dealing lethal damage and stunning players. The side affected by the impact indicated by the hand Dimensius rises to throw the meteor. | This AoE covers most of the platform leaving but a small safe zone at the edge of the arena. Use gaps between Voidwarden adds to run to the safe spot. |
| Gamma Burst | Dimensius emits a stream of energy that deals raid-wide damage and constantly pushes back players. | Position yourself so that ability pushes you towards a gap between Voidwarden adds. Use movement cooldowns to ensure you are not pushed away from the platform. Healers should be ready to heal the high damage over the Gamma Burst duration. |
As was mentioned, both Voidlords have similar sets of abilities. Here are the mechanics of Artoshion and Pargoth and how to counter them:
| Ability | Description | How to counter |
|---|---|---|
| Eclipse | Used at 100 Energy. Causes an instant wipe. | Turns the whole Phase into a DPS check. You must pull Voidlords before they finish this cast naturally and defeat them before they reach 100 Energy. |
| Mass Ejection | Used by Artoshion. A linear AoE that deals heavy damage and pushes targets hit backwards. | The MT should turn the boss away from the group to bait this cast outside the platform. |
| Stardust Nova | Used by Pargoth. A point-blank AoE deals heavy damage to players caught in it. | Dodge this AoE. |
| Touch of Oblivion | Voidlord’s melee attacks against the current target apply a stack of the DoT. At 15 stacks, the affected player instantly dies to Oblivion. | MT should use defensive cooldowns as the number of stacks gets higher. Tanks should perform the tank swap before the stack count reaches 15. |
| Conqueror’s Cross | Creates a set of Voidwarden adds in a cross-shaped fashion. These adds don’t attack anyone, but create a damaging zone underneath that pushes back anyone who enters it. Killing an add heals nearby adds to 100% Health and grants them 99% damage reduction. | Voidlords will constantly use this move to prevent the raid from dodging Dimensius’ attacks. Players should focus on one add to create a gap in the cross that allows them to safely dodge Dimensius’ attacks. Considering Dimensius is the true north: For Extinction — make the gap in the vertical line. For Gamma Burst — make the gap in the horizontal line. |
Dimensius casts for this Phase alternate, meaning there will never be 2 Extinction casts in a row. With that knowledge, you can remember what adds you need to kill to create the necessary gap.
Here are the role-specific guidelines for Phase 2.
Tank:
- Follow the path indicated by gates and arrows to quickly reach the platform with a Voidlord. If you know the positions of Stellar Cores, gather them on your way to the platform.
- If you are MT, keep Voidlords preferably at the edge. When tanking Artoshion, make sure he is turned away from the group to bait Mass Ejection outwards.
- Dodge Mass Ejection and Stardust Nova.
- If you are MT, use defensive cooldowns as the number of Touch of Oblivion stacks rises. Perform the tank swap before the number of stacks reaches 15.
- If you are OT, tank swap with MT before their amount of Touch of Oblivion stacks reaches 15.
- Defeat a Voidwarden add in a vertical line to create a gap for Extinction.
- Defeat a Voidwarden add in a horizontal line to create a gap for Gamma Burst.
- Dodge Extinction by running to the edge of the side opposite to the risen Dimensius’s arm.
- During Gamma Burst, position yourself so you are pushed back towards the gap between Voidwarden adds. Use movement cooldowns to avoid getting kicked off the platform.
Healer:
- Follow the path indicated by gates and arrows to quickly reach the platform with a Voidlord. If you know the positions of Stellar Cores, gather them on your way to the platform.
- Keep attention to MT as their Touch of Oblivion stacks rise.
- Dodge Mass Ejection and Stardust Nova.
- Defeat a Voidwarden add in a vertical line to create a gap for Extinction.
- Defeat a Voidwarden add in a horizontal line to create a gap for Gamma Burst.
- Dodge Extinction by running to the edge of the side opposite to the risen Dimensius’s arm.
- During Gamma Burst, position yourself so you are pushed back towards the gap between Voidwarden adds. Use movement cooldowns to avoid getting kicked off the platform.
- During the Gamma Burst heal constant raid-wide damage.
DPS:
- Follow the path indicated by gates and arrows to quickly reach the platform with a Voidlord. If you know the positions of Stellar Cores, gather them on your way to the platform.
- Dodge Mass Ejection and Stardust Nova.
- Defeat a Voidwarden add in a vertical line to create a gap for Extinction.
- Defeat a Voidwarden add in a horizontal line to create a gap for Gamma Burst.
- Dodge Extinction by running to the edge of the side opposite to the risen Dimensius’s arm.
- During Gamma Burst, position yourself so you are pushed back towards the gap between Voidwarden adds. Use movement cooldowns to avoid getting kicked off the platform.
Do not use your damage cooldowns unless you are out of time to defeat the second Voidlord before he reaches 100 Energy. Save them for the next Phase. Defeating both Voidlords will suck players inside Dimensius and start the final Phase.
Phase 3
The Phase starts with Dimensius being Destabilized for 15 seconds. He doesn’t use any of his abilities during this time, while taking 50% increased damage. This is a perfect place to use your Bloodlust and other powerful cooldowns to deal as much damage as possible.
When Destabilized ends, Dimensius will start using his attacks again, beginning with Extinguish the Stars. His moveset is similar to Phase 1, minus all the Excess Mass mechanics.
Here are Dimensius’ abilities for Phase 3 and how to counter them:
| Ability | Description | How to counter |
|---|---|---|
| Oblivion | When any player enters Dimensius’s body, they instantly die. | During the fight, the boss will often try to suck your character in. Avoid getting into contact with the boss’s body. |
| Accretion Disk | The damaging area around the arena. Touching it deals heavy damage and pushes players back towards Dimensus. Each time Devour is used, the size of the Accretion Disk increases. | Each Devour cast will increase its size, leaving less area for players to do other mechanics. So as the fight progresses, movement becomes harder. |
| Fists of the Voidlord | The boss’s auto-attack. Deals Shadow damage, cleaving around the target, and pulls the current target in melee range in case he can’t reach it. Splash damage now also pushes back players. | Current MT should stay in boss melee range, but away from his group to avoid hitting them with splash damage. Players should also keep in mind tank positioning when moving around. |
| Cosmic Radiation | Every 2 seconds, the boss pulses with raid-wide damage. Every Devour cast increases the damage it deals by 100%. | Unavoidable damage that ensures Healers have their hands busy. |
| Devour | Cast at 100 Energy. Attempts to suck in all the players, instantly killing them. Deals heavy damage over duration. The only way to survive the draw in effect is to stand inside the Gravity Well, created by Voidstars. Each cast increases the size of the Accretion Disk and the damage dealt by Cosmic Radiation. | 8 Voidstars are circling around the boss, creating a Gravity Well underneath. You must quickly enter the nearby Voidstart and follow it for the Devour duration. Devour deals heavy damage. Standing in a Gravity Well also damages players. Healers are advised to use healing cooldowns. |
| Extinguish the Stars | Used once at the start of Phase 3. Rain downs 8 Voidstars, dealing raid-wide damage on impact. When all 8 fall, they orbit around the boss, creating a Gravity Well underneath. Gravity Well deals damage and slows down players inside every second. Standing inside the Gravity Well prevents getting sucked in by Devour. | Healers should be ready to heal through all 8 damage spikes, while the rest of the players avoid getting hit by the direct impact of Voidstar. The amount of Voidstars will diminish over the Phase, so keep in mind where the closest Voidstar is to avoid Devour. |
| Darkened Sky | A set of meteors falling one by one. Meteors deal lethal damage in the area of direct impact and send out Shadowquake on landing. Shadowquake deals damage to players as it passes through them and applies a debuff for 3 seconds, increasing the damage of the next Shadowquake by 300%. | The key to surviving this is ensuring the debuff runs out before you are hit by the next Shadowquake wave. Position yourself close to the first meteor, so you are instantly struck by the first Shadowquake. Move towards the second wave, but make sure your debuff runs out before touching it. This should give you enough time before the third wave reaches you. Mages can blink through waves, avoiding damage altogether. |
| Supernova | Dimensius targets a random Voidstar, and after 5 seconds, the star explodes, dealing raid-wide proximity damage. After that, the affected Voidstar is replaced with Black Hole that instantly kills any player on contact. | Players should find the affected Voidstar, indicated by swirls of darkness around it, and run away. Healers should be ready for a spike of raid-wide damage. |
| Cosmic Collapse | A powerful tank-buster AoE that deals heavy damage. Applies the stacking Cosmic Fragility debuff that increases the incoming Physical damage by 150%. | MT should use a defensive cooldown to survive the attack. Consider Tank swapping before the next Cosmic Collapse. |
| Voidgrasp | A DoT that applies 30% slow for 8 seconds. | Players should use personal mitigation, while healers should pay extra attention to affected players. |
The timeline for Phase 3 is:
After that, all the attacks are used in a random order. Of course, Dimensius cannot use two of the same abilities in a row.
Here are the role-specific guidelines for Phase 3.
Tank:
- If you are the main Tank, stand close to the boss, but away from the group, to avoid hitting players with splash damage.
- Stand inside Voidstar’s Gravity Well to avoid getting sucked in by Devour.
- Make sure you don’t have a debuff before getting in contact with Shadowquake.
- Move away from the Voidstar affected by the Supernova.
- Use defensive cooldowns for Cosmic Collapse.
- If you are an off Tank, be ready to make the tank swap after Cosmic Collapse if needed.
Healer:
- Pay attention to the raid’s Health, since the boss constantly pulses with raid-wide damage.
- Heal 8 spikes of raid-wide damage during Extinguish the Stars.
- Prepare to heal heavy raid-wide damage during Devour. Use of healing cooldowns is advised.
- Stand inside Voidstar’s Gravity Well to avoid getting sucked in by Devour.
- Make sure you don’t have a debuff before getting in contact with Shadowquake.
- Heal the raid between taking Shadowquake waves.
- Move away from the Voidstar affected by the Supernova.
- Heal the raid after the Supernova explosion.
- Keep attention to the MT’s Health during Cosmic Collapse.
- Heal the player affected by Voidgrasp.
DPS:
- Stand inside Voidstar’s Gravity Well to avoid getting sucked in by Devour.
- Make sure you don’t have a debuff before getting in contact with Shadowquake.
- Move away from the Voidstar affected by the Supernova.
- Use defensive cooldowns if affected by Voidgrasp.
You must defeat the boss before you run out of Voidstars to dodge the Devour.
Dimensius Heroic guide
As was mentioned above, Dimensius retains all his abilities from Normal mode. Aside from increased damage and total Health, some of his attacks were upgraded in the Heroic raid. Let’s see the changes Phase by Phase.
Phase 1
- Dark Matter. Now, it also leaves a damaging puddle after AoEs resolve. This is why placing these at the platform’s edge is advised. That way, you leave as much space as possible for other maneuvers.
Phase 2
- Mass Ejection and Stardust Nova. Unique attacks corresponding to Artoshion and Pargoth. Now they leave a damaging zone after the initial AoE resolves. This is why tanks should hold these bosses at the arena’s edge. In case of a Mass Ejection, aiming it outwards is crucial.
- Conqueror’s Cross. Now, it also summons Nullbinder adds. These cast Null Binding, dealing damage and slowing players. Classes like Death Knights should use their pull abilities to get these adds closer to a boss, so they can be quickly cleaved. Otherwise, ranged players should quickly focus on far-away adds, while melees focus on those nearby.
Phase 3
- Cosmic Collapse. Now, when AoE resolves, it also pulls all the players towards the affected Tank. The path is indicated by the tether between the player and the Tank. Make sure there are no Black Holes or Dimensius on your path. After the pull, move away quickly, as Dimensius’s auto-attacks push everyone away from MT.
Dimensius loot table and rewards
Below is the Dimensius loot table.
| Item | Type |
|---|---|
| Hungering Void Curio | Tier Set omni-token |
| Singularity Cincture | Cloth Waist |
| Stellar Navigation Slacks | Cloth Legs |
| Time-Compressed Wristguards | Leather Wrists |
| Winged Gamma Handlers | Leather Hands |
| Claws of Failed Resistance | Mail Shoulders |
| Greaves of Shattered Space | Mail Feet |
| Artoshion’s Abyssal Stare | Plate Helm |
| Ultradense Fission Girdle | Plate Belt |
| Band of Shattered Soul | Crit/ Haste Ring |
| All-Devouring Nucleus | Versatility Trinket |
| Screams of a Forgotten Sky | Crit Trinket |
| Ergospheric Cudgel | One-handed Mace |
| Supermassive Starcrusher | Two-handed Mace |
| Cosmic Hearthstone | Toy |
The item level of rewards depends on the difficulty cleared:
- LFG. Veteran gear track, iLv 668–691.
- Normal. Champion gear track, iLv iLv 681–704.
- Heroic. Hero gear track, iLv 694–710.
- Mythic. Myth gear track, iLv 707–723.
This is it for our Dimensius Normal/ Heroic raid guide. We hope you learned everything about his mechanics and are now ready for an epic battle ahead. We wish you luck with your drops! And if you have troubles, our Dimensius boost is always there to help you. Good raiding!


Comments