Elden Ring Nightreign Expeditions guide: How to beat all ER bosses
All Elden Ring Nightreign Expeditions with detailed boss strategies, walkthroughs, tips, and tricks to help you clear every run with ease.
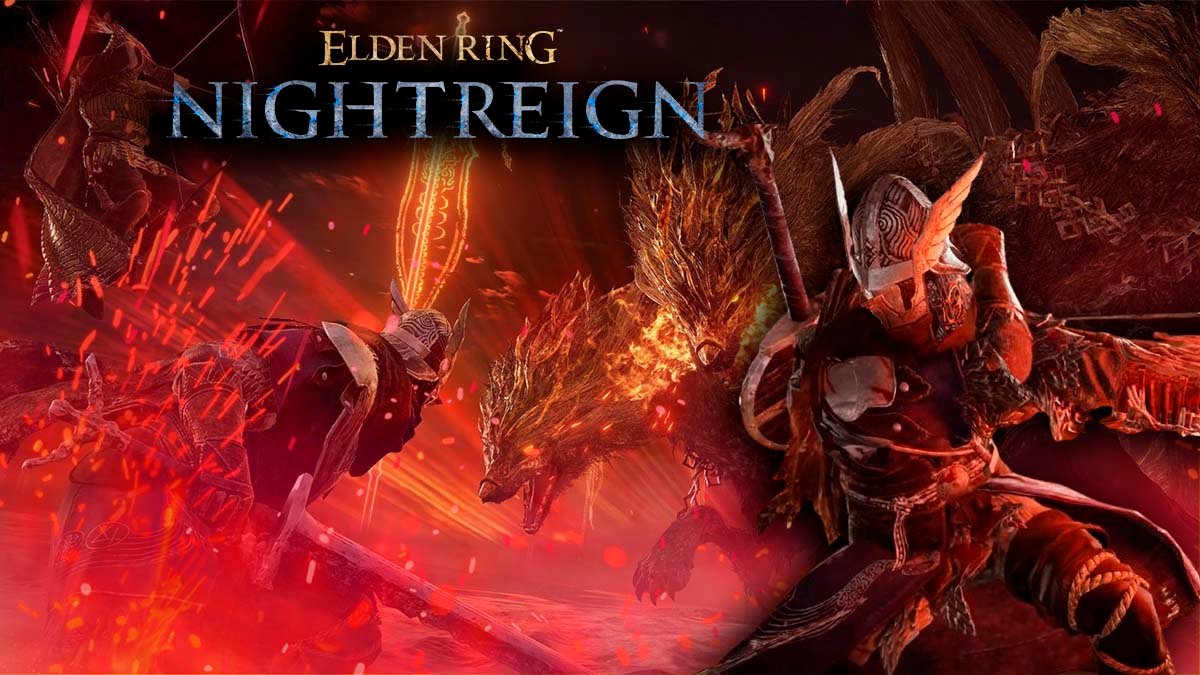
Table of Contents
- What is Elden Ring Nightreign Expedition
- All Elden Ring Nightreign Expeditions and bosses listed
- Elden Ring Nightreign Expedition guide
- Tricephalos Expedition guide
- Darkdrift Knight Expedition guide
- Gaping Jaw Expedition guide
- Sentient Pest Expedition guide
- Equilibrious Beast Expedition guide
- Fissure in the Fog Expedition guide
- Augur Expedition guide
- Night Aspect Expedition guide
- Conclusion
Key takeaways:
- Nightreign Expeditions are challenging co-op missions in Elden Ring featuring escalating difficulty, unique mechanics, and boss fights against powerful Nightlords.
- Each Expedition requires specific elemental strategies and team roles to counter distinct boss mechanics, making preparation and coordination essential.
- Completing any four of the eight available Expeditions unlocks the final and hardest challenge, the Night Aspect Expedition against Heolstor.
- Successfully finishing Expeditions grants powerful Relics, Murk currency, and cosmetic rewards to enhance future runs and character progression.
Elden Ring’s Nightreign update introduces a series of challenging Expeditions that put your skills, strategy, and patience to the test. Expeditions offer intense combat, complex layouts, and high-stakes rewards. In this guide, we’ll break down every Expedition in ER Nightreign. If you’re looking to conquer each run without unnecessary setbacks, these tips and tricks will give you the upper hand.
What is Elden Ring Nightreign Expedition

Elden Ring: Nightreign Expeditions are short, replayable missions in the co-op game Elden Ring: Nightreign. Set in a random world called Limveld, players (Nightfarers) must survive for three in-game days. Each day brings harder enemies and more danger, ending with a big boss fight against a powerful Nightlord.
Each run lasts around 15–20 minutes per day. On the first two days, you fight enemies, collect gear, and grow stronger. On the third day, you face the final boss. If you win, you earn Relics that increase your stats in future runs. Everything else resets, making each Expedition a fresh and challenging experience.
All Elden Ring Nightreign Expeditions and bosses listed
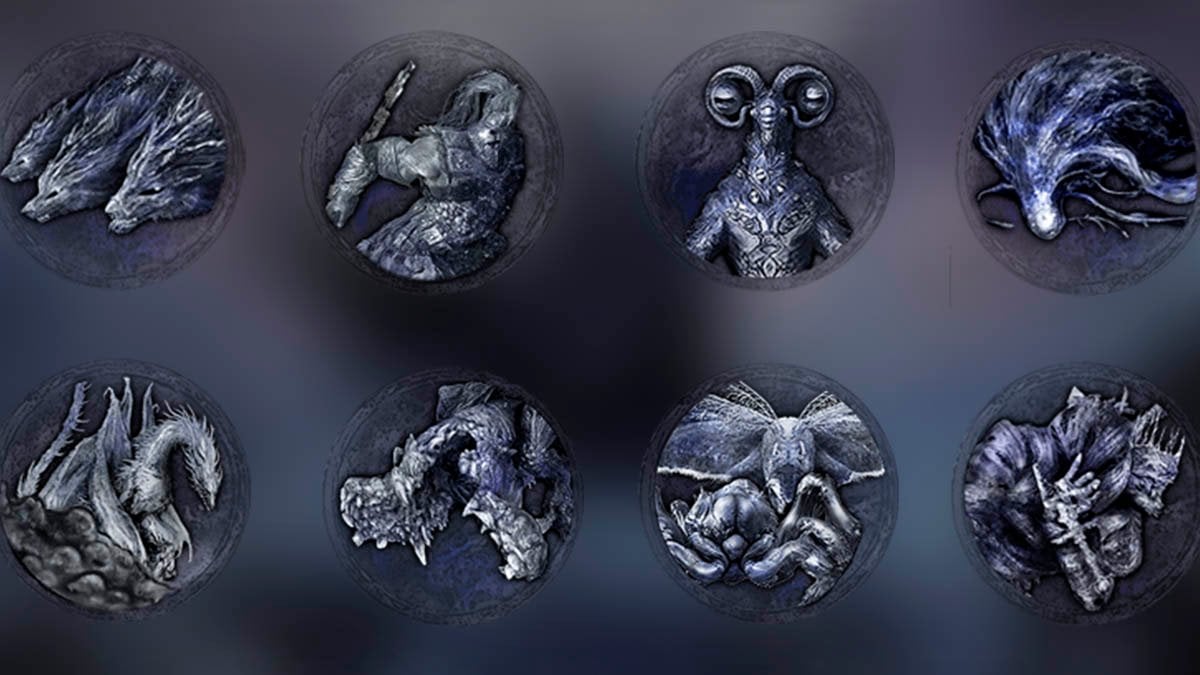
There are 8 Expeditions in Elden Ring: Nightreign. Here’s a breakdown of each one, including the Nightlord you’ll face and their elemental weakness.
| Expedition | Nightlord | Nightlord’s weakness |
|---|---|---|
| Tricephalos (initial) | Gladius Beast of Night | Holy |
| Darkdrift Knight | Fulghor Champion of Nightglow | Lightning |
| Gaping Jaw | Adel Baron of Night | Poison |
| Sentient Pest | Gnoster Wisdom of Night | Fire |
| Equilibrious Beast | Libra Creature of Night | Madness |
| Fissure in the Fog | Caligo Miasma of Night | Fire |
| Augur | Maris Fathom of Night | Lightning |
| Night Aspect (final) | Heolstor the Nightlord | Holy |
Finishing the Tricephalos expedition unlocks six more expeditions, which you can complete in any order. Once you defeat any four Nightlords, the final Expedition, Night Aspect, becomes available.
Elden Ring Nightreign Expedition guide
Here are all the Elden Ring Nightreign Expedition guides, complete with map specifics, walkthroughs, tips, tricks, and all the key details you need.
Tricephalos Expedition guide
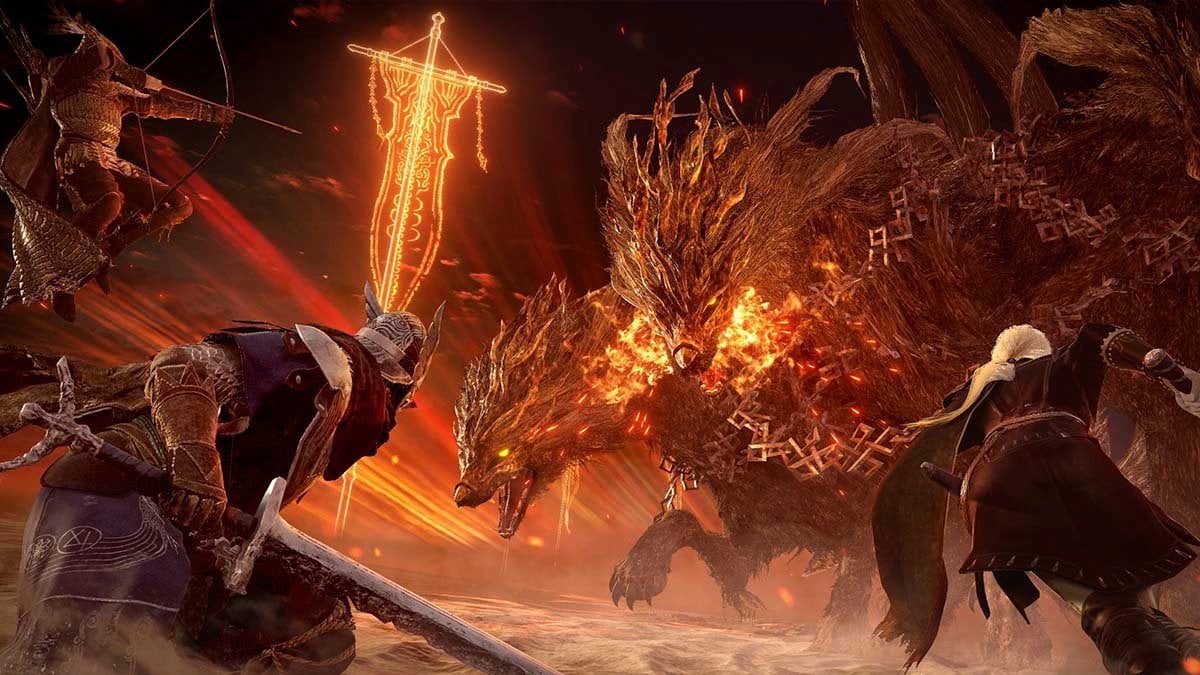
Tricephalos Expedition will lead you to the Gladius Beast of Night final boss. It’s a huge three-headed wolf with a fiery sword whip. He’s fast, aggressive, and splits into three wolves during the fight, making him a serious challenge even for experienced players.
Best Tricephalos Expedition team setup:
- Guardian to tank and revive.
- Ironeye or Wylder for ranged support.
- Duchess for crowd control during the split phase (her ultimate confuses the wolves).
Possible bosses in Tricephalos Expedition:
- Night 1:
- Demi-Human Queen & Demi Human Swordsmaster
- Bell Bearing Hunter
- Night 2:
- Fell Omen
- Tree Sentinel
- Royal Cavalrymen
First days preparations in Tricephalos Expedition
- Gladius is weak to Holy damage: bring Holy weapons, Holy Grease, or any relics that boost Holy effects.
- Use a strong shield for defense in phase two when he splits into three wolves.
- Recommended Level: Around 11–12
- Buffs to bring: Fire resistance gear, Poise buffs, healing items like Boiled Prawns or Exalted Flesh.
Gladius boss fight strategy
Whether you’re ready or not, the Gladius boss fight is coming. Here’s what to expect from the boss and how to counter each move.
Phase 1:
- Gladius starts alone in the center of the arena.
- His main attacks include:
- Fire breath – dodge sideways.
- Sword slam – move out of the direct path.
- 360 sword spin – dodge twice or stay very close under him.
- Lunging bites – block or roll into him, then counterattack.
- Sword fire wave – dodge at the last second or run wide.
Tip: Let Guardian keep aggro while others hit from the sides. Avoid long combos: Gladius moves fast. Stick to quick jump attacks to build stagger.
Phase 2:
- Gladius glows red and splits into three wolves: one still uses the sword.
- Use this phase to heal, revive, or reposition.
- Solo tip: Keep all wolves in front of you and play defensively.
- Team tip: Watch for the red target marker, that player will be focused. Others should take this chance to deal damage.
Best tactic: Pick off one wolf at a time. Holy attacks can stagger wolves easily, giving free damage.
Tricephalos Expedition walkthrough
Check out this Elden Ring Nightreign Tricephalos Expedition walkthrough to learn more about the Expedition and the last boss Gladius fight.
Tricephalos Expedition rewards
Here’s what you’ll receive for fully completing the Tricephalos Expedition:
- Trace of Night
- Night of the Beast Relic
- Murk currency
Darkdrift Knight Expedition guide

Darkdrift Knight Expedition final boss Fulghor is one of the hardest bosses in ER Nightreign, Fulghor is fast, aggressive, and constantly moving. Here’s how to prepare and beat him.
Best team-ups for Darkdrift Knight Expedition:
- Wylder: Fast and mobile, great ultimate to stagger Fulghor.
- Ironeye: Ranged damage dealer with Marking skill to boost team DPS.
- Raider: Great for counterattacks with Retaliate, especially during Fulghor’s charge-up moves.
- Avoid Revenant: Her summons are too slow and die fast.
Possible bosses in Darkdrift Knight Expedition:
- Night 1:
- Wormface
- Gaping Dragon
- Centipede Demon
- Night 2:
- Nameless King
- Outland Commander
First days preparations in Darkdrift Knight Expedition
- Bring Lightning Damage: Fulghor is weak to lightning. Use lightning weapons, grease, or spells to deal extra damage and stagger him.
- Stack Holy Resistance: Most of his big attacks deal holy damage. Bring relics or talismans that reduce it.
- Recommended Level: At least Level 14–15. Upgrade flasks and pick up runes before the fight.
- Poison/Rot Help: If he’s moving too much, damage-over-time effects like poison or scarlet rot work great.
Fulghor boss fight strategy
Ready or not, you’ll face Fulghor in battle. Here’s what he does and how you can counter every move.
Phase 1:
- Spear Swings & Thrusts: Dodge forward, not back.
- Ground Slam & Shockwaves: Watch his jumps and legs, roll as he lands.
- Holy Spear Slam: He charges up, then slams the ground. Interrupt it with lightning or time your dodge at the last second.
- Stampede Charge: Fulghor dashes across the arena, leaving holy trails. Sprint perpendicular to him and avoid glowing fissures.
- Wind Spear Throws: He’ll throw three wind-spears. Roll into the wind stream, get behind him.
Phase 2:
At half health, Fulghor grows a twisted claw-arm and gains new AoE attacks.
- Claw Sweeps & Slam: Dodge into the swings. Try to get behind him.
- Erratic Spin & Ground Slam: Avoid the flailing arm, then punish during his recovery.
- Magic Explosions: After certain combos, the ground erupts. Look for safe zones or gaps between the spells.
Final tips:
- Don’t get greedy. Attack in small bursts, then focus on dodging.
- Time ultimates wisely. Use them during charge-up phases or after he misses.
- Use revive skills. Guardian and Ironeye can save the fight if someone goes down.
Darkdrift Knight Expedition walkthrough
Check out this Elden Ring Nightreign Darkdrift Knight Expedition walkthrough to learn more about the Expedition and the last boss Fulghor fight.
Darkdrift Knight Expedition rewards
Here’s what you’ll receive for fully completing the Darkdrift Knight Expedition:
- Trace of Night
- Night of the Champion Relic
- Murk & Random Relics
Gaping Jaw Expedition guide

Gaping Jaw Expedition will culminate with Adel boss fight. Adel is a fast, aggressive boss with brutal bite attacks and dangerous lightning strikes in phase two. This fight requires patience, awareness, and smart team play.
Best team comp to use for Gaping Jaw Expedition
- Ironeye or Recluse for ranged poison stacking.
- Wylder for quick movement and interrupts.
- Guardian or Executor for tanking and revives.
Possible bosses in Gaping Jaw Expedition:
- Night 1:
- Duke’s Dear Freja
- Gaping Dragon
- Wormface
- Valiant Gargoyle
- Night 2:
- Ancient Dragon
- Outland Commander
- Golden Hippopotamus and Crucible Knight
First days preparations in Gaping Jaw Expedition
- Bring Poison: Adel is weakest to Poison. Poison causes him to vomit, stunning him briefly. Use this time to heal or deal damage, but avoid standing in the poison pool.
- Status builds matter: If you can’t find Poison gear, Sleep and Frostbite also help. Frostbite adds bonus damage, Sleep creates safe openings.
- Stack defense: Bring Holy and Lightning resistance if possible, his second phase hits hard.
Adel boss fight strategy
Adel is coming, prepared or not. Here’s what the boss will throw at you and how to deal with it.
Phase 1:
- Crushing Maw / Purple Grab: Dodge into the charge just before impact. Grab deals massive Blood Loss.
- Shattering Slam: Causes damaging fissures, roll at the moment he lands.
- Roaring Tantrum: Stuns but does no damage, use this moment to reposition or prepare for his follow-up charge.
- Safe Zones: Attack from behind, under his tail. Avoid staying in front: most attacks are frontal.
Phase 2:
At 50–60% HP, Adel glows purple and explodes in lightning. Back away fast.
- Diving Storm: Adel leaps, slams, and blasts lightning. Dodge into the slam or jump over the blast.
- Lightning Ground Slam: Glowing lines appear, get off them before they explode.
- Triple Slam Combo: Three back-to-back shockwaves. Don’t attack, just dodge or keep distance.
Pro tip
Poison can still interrupt attacks in phase two. Keep pressure with status effects. Use consumables (Poison Pots, Sleep Pots) now.
Team tips:
- Never get greedy. Only attack after safe dodges. One hit is better than taking damage.
- If you’re targeted, don’t attack. Focus on dodging to survive.
- Don’t revive multiple downed allies unless you’re Revenant or Guardian.
- Spread out. Boss can grab two players at once if they’re close.
Gaping Jaw Expedition walkthrough
Check out this Elden Ring Nightreign Gaping Jaw Expedition walkthrough to learn more about the Expedition and the last boss Adel fight.
Gaping Jaw Expedition rewards
Here’s what you’ll receive for fully completing the Gaping Jaw Expedition
- Trace of Night
- Night of the Baron Relic
- Murk & Random Relics
Sentient Pest Expedition guide

Sentient Pest Expedition will culminate with Gnoster. Gnoster is a two-part boss: a giant scorpion-like beetle and a flying moth. They attack together in Phase 1 and merge in Phase 2. Fire damage is key, and smart team roles will make this fight far easier.
Best team composition for Sentient Pest Expedition:
- Ironeye: Best for sniping the moth with ranged attacks. His Marking skill boosts party damage.
- Wylder: Great mobility, good for melee damage, especially with fire relics.
- Duchess: Can use ranged or melee and her Restage skill adds bonus damage.
- Raider: Strong melee tank to keep the beetle busy while others attack the moth.
Possible bosses in Sentient Pest Expedition:
- Night 1:
- Centipede Demon
- Battlefield Commander
- Smelter Demon
- Night 2:
- Royal Cavalrymen
- Draconic Tree Sentinel
- Dragonkin Soldier
First days preparations in Sentient Pest Expedition
- Use Fire damage: Gnoster is highly weak to fire. Bring a fire-infused weapon, Fire Grease, or a fire relic like Night of the Beast from Gladius.
- Bring Poison resistance & Magic defense: Gnoster uses both poison clouds and magic bolts. Equip talismans or boluses to reduce damage and cure poison.
- Recommended level: At least Level 12. Upgrade your weapon to Epic rarity and boost flask charges.
Gnoster boss fight strategy
You can’t avoid the Gnoster fight. Here’s what the boss does and how to survive it.
Phase 1:
- Split roles: One or two players focus the moth; another tanks the beetle.
- Focus the moth: It takes far more damage than the beetle. If the beetle locks up (white glow), it’s immune to damage, hit the moth instead.
- Avoid Poison: The moth drops poison clouds. Move out fast or you’ll get infected.
- Watch for Parasites: If poisoned, a parasite may appear on your neck. Another player must use fire to burn it off.
Phase 2:
At 60% HP, the moth rides the beetle. Attacks become stronger and more chaotic.
- Lightning pillars: Avoid glowing ground spots: they explode after a delay.
- Combined charge: Gnoster roars, then rushes players while firing magic. Dodge sideways and keep moving.
- Melee should stay mobile: If you can’t hit the moth easily, dodge and strike the scorpion’s sides.
- Save your ultimates for Phase 2, when both bugs are together, it’s easier to land big hits and stuns.
Sentient Pest Expedition walkthrough
Check out this Elden Ring Nightreign Sentient Pest Expedition walkthrough to learn more about the Expedition and the last boss Gnoster fight.
Sentient Pest Expedition rewards
Here’s what you’ll receive for fully completing the Sentient Pest Expedition:
- Trace of Night
- Wisdom of Night Relic
- Extra Murk and Relics
Equilibrious Beast Expedition guide

Equilibrious Beast Expedition will lead you to facing Libra. Libra is a goat-headed Nightlord boss known for his AoE madness attacks, deadly meditation shield, and punishing debuffs. He’s one of the trickiest bosses unless you know how to counter his mechanics properly.
Best team composition for Equilibrious Beast Expedition:
- Ironeye — Can break Libra’s meditation with ranged attacks or ult. Great support marks.
- Wylder — High stagger damage, fire relic synergy, breaks bubble with ult.
- Raider — Melee tank who can break Libra’s shield multiple times with enhanced skill + ult.
- Recluse — Madness/frenzy caster, healing ult helps team.
Possible bosses in Equilibrious Beast Expedition:
- Night 1:
- Centipede Demon
- Tibia Mariner
- Those Who Live in Death
- Battlefield Commander
- Royal Revenant
- Night 2:
- Golden Hippopotamus and Crucible Knight
- Godskin Duo
- Death Rite Bird
First days preparations in Equilibrious Beast Expedition
- Bring Madness spells or weapons: Libra is weak to madness, even though he uses it. Madness damage interrupts his shield phase and forces him into melee.
- Can’t find Madness? Use Fire or Holy: Fire damage works well and is easier to find. Equip relics or enchantments that add fire to your main weapon.
- Boost Madness resistance: Equip madness-negation gear. Pick up the crystals that Libra spawns, they reduce madness buildup mid-fight.
- Be at least level 12: Libra hits hard and fast. Upgrade flask charges and gear before the fight.
- Libra offers trades. Upon entering Libra’s arena, you’ll be met with an unusual calm. Rather than attacking immediately, Libra allows you to initiate a conversation, and offers trades (like extra lives or bonus levels) but with huge drawbacks (e.g., lowered max health). Most are risky. Skip unless you’re confident.
- You’ll know the Equilibrious Beast Raid has begun when its face flashes on the screen and a message saying “a demon has cast its curse” appears in the top-right corner. The screen will also darken significantly.
- A red dot marks the Equilibrious Beast’s location on your mini-map. Go there quickly and pay 15,000 Runes to lift the curse for your whole team. Don’t attack it, otherwise, you’ll be forced into a boss fight instead.
Libra boss fight strategy
The battle with Libra is waiting for you at the end of the Equilibrious Beast Expedition. Learn every boss moves and how to counter them.
Libra’s signature move – Meditation Bubble:
- Libra shields itself and charges a buff.
- Interrupt boss’s meditation: Break the sigils around him (they glow yellow) or use Wylder, Ironeye, or Raider ultimates.
- If you fail, Libra gains a huge defense buff.
Madness effects:
- Madness can either be your best weapon or your death.
- Dealing madness damage can send Libra into Frenzy Mode, where he uses weaker melee attacks instead of AoE spells.
Stay close or in a medium range
- Most attacks are long-range AoE or glyph-based.
- Stay mid-range or close to dodge glyphs and reposition fast.
Key Libra attacks to watch for:
| Attack | Description | Counter |
|---|---|---|
| Shotgun Glyph | Rotating sigil fires madness bolts. | Dodge opposite rotation. |
| Madness Rain | Falling AoE madness projectiles. | Watch the sky and sprint. |
| Ground Geysers | Exploding glyphs. | Keep moving. Don’t stop after one. |
| Fog Slam | Builds madness quickly but spawns crystals. | Pick up crystals to survive. |
| Frenzy Mode | Triggered by madness damage. | Prepare for melee spam. Easier to manage. |
Equilibrious Beast walkthrough
Check out this Elden Ring Nightreign Equilibrious Beast Expedition walkthrough to learn more about the Expedition and the last boss Libra fight.
Equilibrious Beast Expedition rewards
Here’s what you’ll receive for fully completing the Equilibrious Beast Expedition:
- Trace of Night
- Wisdom of Night Relic
- True Arbiter Trophy
- Power buff: Increases damage based on held Runes
Fissure in the Fog Expedition guide
Fissure in the Fog Expedition will culminate with Caligo boss fight. Here are all the important details to know before the start.
Best team composition for Fissure in the Fog Expedition:
- Ironeye – Great ranged damage and debuffing.
- Wylder – Can apply fire to skills and close distance fast.
- Recluse – Ideal for fire magic and team healing.
- Raider – Strong stagger damage for big openings.
- Duchess – Can repeat fire damage and status effects.
Possible bosses in Fissure in the Fog Expedition:
- Night 1:
- Smelter Demon
- Duke’s Dear Freja
- Night 2:
- Royal Cavalrymen
- Draconic Tree Sentinel
- Godskin Duo
First days preparations in Fissure in the Fog Expedition
- Bring Fire damage: Caligo is weak to fire. Use fire weapons, fire spells, or relics that apply fire. Even cheap fire gear works well here.
- Boost Frost resistance: Pick up Thawfrost Boluses or talismans like the Stalwart Horn Charm.
- Mountaintop event bonus: If active, completing this event gives you frost resistance and a dragon damage buff.
- Reach at least level 10: Farm Runes and upgrade flasks before attempting the fight.
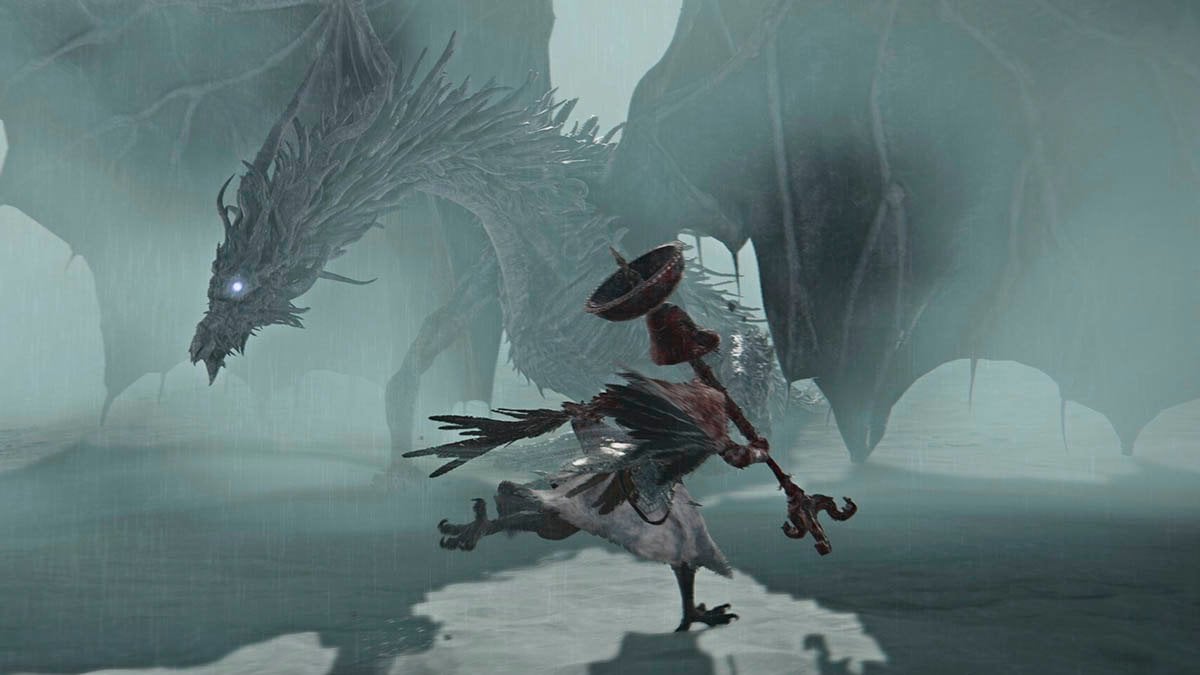
Caligo boss fight strategy
Caligo is a giant frost dragon. You’ll face him on Day 3 of the Fissure in the Fog expedition. He’s slow but deadly, using AoE frost attacks, ice bombs, and huge breath weapons.
Caligo boss fight strategy:
- Stay near the head: Avoid standing directly under him. Staying near the head lets you dodge attacks and land hits more easily.
- Use ranged attacks: Keep your distance during phase two. Too many AoEs make melee risky.
- Always move: Caligo moves slow but hits big. Dodge and reposition constantly.
Caligo boss dangerous abilities:
- Claw Swipes – Two-hit combo. Roll back twice with a delay.
- Tail Whip/Slam – Dodges require good timing. Watch his tail movements closely.
- Ice Breath – Side-step or sprint away. Causes frostbite buildup.
- Fog Arena Attack – Run behind pillars or away, depending on wind or sound cues.
- Ice Bombs – Keep dodging, don’t stay still.
- Ultimate Attack (Phase 2) – He flies and drops ice shards. Sprint and dodge to avoid.
Fissure in the Fog Expedition walkthrough
Check out this Elden Ring Nightreign Fissure in the Fog Expedition walkthrough to learn more about the Expedition and the last boss Caligo fight.
Fissure in the Fog Expedition rewards
Here’s what you’ll receive for fully completing the Fissure in the Fog Expedition:
- Trace of Night
- Night of the Miasma Boss Relic
- Murk + Randomized Relics
Augur Expedition guide

Augur Expedition will bring you to the Maris boss fight. Here is all you need to know about this Expedition.
Best team composition for Augur Expedition:
- Ironeye: Best pick for solo or ranged play. Can interrupt sleep aura and mark Maris to boost team damage.
- Recluse: High-damage spells, good healing ultimate, strong at range.
- Duchess: Can repeat lightning damage, inflict status, and fight at range.
- Optional: Wylder, Raider, and Executor with greatbows if no ranged option is available.
Possible bosses in Augur Expedition:
- Night 1:
- Grafted Monarch
- Gaping Dragon
- Wormface
- Smelter Demon
- Night 2:
- Godskin Duo
- Full-Grown Fallingstar Beast
First days preparations in Augur Expedition
- Bring Lightning damage: Maris is weak to lightning. Any weapon or spell with this element deals bonus damage. Look for relics that grant a lightning weapon early in the run.
- Use ranged weapons: Maris spends most of the fight flying. Bows, greatbows, and magic are ideal. Melee characters should carry a ranged backup weapon.
- Stack sleep resistance: Equip talismans like the Clarifying Horn Charm. Buffs that raise resistances help too. Magic negation is also helpful.
- Be level 10+ and flask up: Boost your stats and upgrade flasks before facing Maris. This fight is long, more healing = more chances to win.
Maris boss fight strategy
Maris is a floating sea creature boss you face on Day 3 of the Augur Expedition. Constantly airborne, Maris uses sleep-inducing magic, jellyfish minions, and huge area attacks to wear you down. If you’re not prepared to deal with its sleep aura, this boss will wipe your group fast.
Maris boss strategy:
- Stay mobile: The arena fills with jellyfish and tentacles: keep moving to avoid traps.
- Use ultimates wisely: Save them to interrupt Maris’ sleep aura. It’s the most dangerous move.
- Kill summons when needed: Jellyfish explode and cause sleep, but killing them also damages Maris slightly. Focus on them if melee.
- Look for openings: When Maris dives or lands, attack its head or sides. Don’t overcommit, get in and out quickly.
Key Maris boss attacks:
- Jellyfish Swarm: Slow-moving bombs. Kite them or kill them to avoid sleep buildup.
- Sleep Aura: When Maris lies down, it channels sleep across the arena. Use your ultimate or deal enough damage to stagger it.
- Tentacle Field: Stationary traps that lash out if you get close. Avoid or clear just enough space.
- Spin & Rush Attacks: Maris spins or charges. Dodge away or sprint to the side.
- Water Wave: A wide-range wave that bounces, roll through it just before it hits.
- Teardrop Bombs (Phase 2): Two glowing bombs fall from the sky: destroy them before they land or risk a team wipe.
Augur Expedition walkthrough
Check out this Elden Ring Nightreign Augur Expedition walkthrough to learn more about the Expedition and the last boss Maris fight.
Augur Expedition rewards
Here’s what you’ll receive for fully completing the Augur Expedition:
- Trace of Night
- Night of the Fathom Boss Relic
- Murk and Random Relics
Night Aspect Expedition guide

The Night Aspect Expedition unlocks only after completing four other Expeditions. It serves as the final and toughest challenge in the game.
Best team composition for Night Aspect Expedition:
- One Tank / Stagger Specialist
- Raider excels at staggering bosses with heavy attacks and absorbing hits.
- Executor is fast, evasive, and can retaliate with high burst damage when boss is recovering.
- Two Ranged DPS:
- Ironeye is top-tier for marking Heolstor, increasing team-wide damage.
- Recluse provides ranged spell pressure and team healing with her ultimate.
- Revenant deals high Holy damage, perfect against Shape of Night and Heolstor. Fragile, so protect her.
- One Utility / Hybrid:
- Duchess can replay recent damage and double status effects like Scarlet Rot or Bleed.
- Wylder, if using a bow or fire build, helps pressure the boss during movement phases.
Possible bosses in Night Aspect Expedition:
- Night 1:
- Smelter Demon
- Centipede Demon
- Demi-Human Queen & Demi Human Swordsmaster
- Valiant Gargoyle
- Night’s Cavalry
- Night 2:
- Great Wyrm
- Fell Omen
- Nox Dragonkin Soldier
- Ancient Dragon
- Dancer of the Boreal Valley
- Full-Grown Fallingstar Beast
First days preparations in Night Aspect Expedition
Weapon & Elemental choice
- Equip Holy-affinity weapons if possible. Even low-tier Holy weapons will deal bonus damage throughout both boss phases.
- Don’t rely on poison or frost. Heolstor resists both in Phase 2.
- Melee classes should bring a ranged fallback: a Greatbow, throwable relics, or incantations to stay active when Heolstor is airborne.
Talismans & buffs
- Equip Holy Scorpion Charm for bonus Holy damage.
- Use Stalwart Horn Charm to resist Sleep or Madness effects during Phase 2.
- Add Green Turtle Talisman for stamina regen, helps with dodging the relentless second phase.
Consumables checklist
- Warming Stones (3–4) – Use instead of flasks in Phase 1.
- Grease (Holy, Fire, or Rot) – Adds extra damage and status options.
- Throwables (Firepots, Lightning Bombs) – Can interrupt casting or finish a stagger phase.
- Crimson Flasks – Ideally 6–8 charges by Day 3. Explore side areas to upgrade.
Level recommendation
- Be at least level 13 with +4 weapons or higher before starting Day 3.
- Focus on Vigor (to survive AoE) and Mind or Endurance (depending on role).
- Use Evergoals, mini-bosses, and side dungeons to farm runes and extra flask charges.
Assign roles before the boss fight:
- Who interrupts Heolstor’s ult (Ironeye, Wylder)?
- Who staggers the boss during fire slam (Raider)?
- Who provides healing (Recluse, Duchess)?
- Spread out in Phase 2 to avoid AoEs.
Heolstor boss fight strategy
Prepare for Heolstor, the peak of Expedition difficulty. Here’s how to survive his full moveset.
Phase 1
- Starts slow, with single-sword attacks.
- At 70% health, he pulls out a massive greatsword and adds dagger swings.
- Avoid heavy flask use here: use Warming Stones to heal instead.
Attack patterns to watch:
- Horizontal slash → thrust combo – Block then roll.
- Fake fall lunge – Roll backwards to counterattack.
- Roar + dash combo – Roll through or block; don’t get caught mid-animation.
Pro tips:
- Let the tank draw aggro.
- Ranged teammates stay at a distance and chip away.
- Try Scarlet Rot if available, DoT works well.
Phase 2
- After Shape of Night falls, arena darkens. Heolstor appears with two health bars and elemental swords.
- First half: Moonlight greatsword with magic and shockwaves.
- Second half (after 60%): He swaps to a flaming greatsword, causing eruptions and fissures.
Attacks to Expect:
- Magic Slam + Shockwave – Dodge the slam, then stay alert for follow-up explosion.
- Crescent Arcs – Dodge sideways or get behind him.
- Darkness Barrage – Arena turns dark; projectiles fly, run away or pop an Ultimate to interrupt.
- Sky Rend (Flame Phase) – He flies, splits sky, slams down with fiery eruptions. RUN to arena edge.
- Fiery Combos – Slashes now cause flame geysers and fissures.
Final Phase combos:
- Elemental Flurry – Fast five-hit combo with slashes, magic, and AoE. Block or dodge carefully.
- Fissure Trails – Fire, lightning, or poison trails erupt under your feet. Watch the ground.
Heolstor combat strategy:
- Stay spread out – Heolstor uses AoE often.
- Stagger window – Use heavy attacks or Retaliate to break stance.
- Don’t panic – Most attacks have long windups; stay calm and dodge at the right moment.
- Shield up – Watch for elemental damage or Sleep buildup, switch tactics if needed.
Night Aspect Expedition walkthrough
Check out this Elden Ring Nightreign Night Aspect Expedition walkthrough to learn more about the Expedition and the last boss Heolstor fight.
Night Aspect Expedition rewards
Here’s what you’ll receive for fully completing the Night Aspect Expedition:
- Primordial Nightlord’s Rune
- Nightlord Boss Relic, large Murk bonus, and random Relics.
- New cosmetics unlocked in the Changing Room (first clear only).
Conclusion
That’s everything we wanted to share about the Elden Ring Nightreign Expeditions. We hope this guide proves helpful in your journey. If you ever need support during your Nightreign Expedition runs, consider using our Elden Ring Nightreign boost service.


Comments