
Black Ops 6 The Tomb Easter Egg guide: step-by-step
Unlock hidden secrets with our Black Ops 6 The Tomb Easter egg guide. Complete all the puzzles and trials, and defeat the boss on this new Zombies map!

Table of Contents
Welcome to our complete guide for unlocking the Easter egg in Black Ops 6: The Tomb, the newest map in the Call of Duty Zombies series. Whether you’re playing solo or in co-op mode, we’ve got all the details you need to complete this Easter egg on your first attempt. From recommended loadouts to the steps needed to finish the puzzle, we’ll break down everything you need to know.
If you are interested in other Black Ops 6 Zombies maps, you can check our guide for Citadelle des Morts which will help you find the Citadelle des Morts easter egg.
Black Ops 6 The Tomb best loadout
For the best chance at completing the Easter egg, we recommend using an Assault Rifle (AR) like Krig C with a drum magazine, as it will be extremely useful during the boss fight. If you prefer, a Light Machine Gun (LMG) like the XMG can also be a good alternative for sustained fire. For more details about the weapons and some alternatives, check out our top 10 best Black Ops 6 Zombies weapons guide.
For Gobblegums, Perkaholic is highly recommended to maximize your perks. If you have a Wonder Bar Gobblegum, it will allow you to spin the mystery box and get a guaranteed wonder weapon, possibly the Ice Staff, saving you time from building it manually. However, this guide assumes you do not have a Wonder Bar, as not everyone has access to it.
For your field upgrade, Ether Shroud is the best choice, with the following augments:
- Group Shroud: Nearby players will also be cloaked when you use it.
- Extra Charge: Increases your max charges by one, allowing you to use it twice instead of once.
These loadout choices will ensure you have the best survivability and efficiency when tackling the Easter egg. As for Perks, check out our list of the best Perk Augments in Black Ops 6 Zombies.
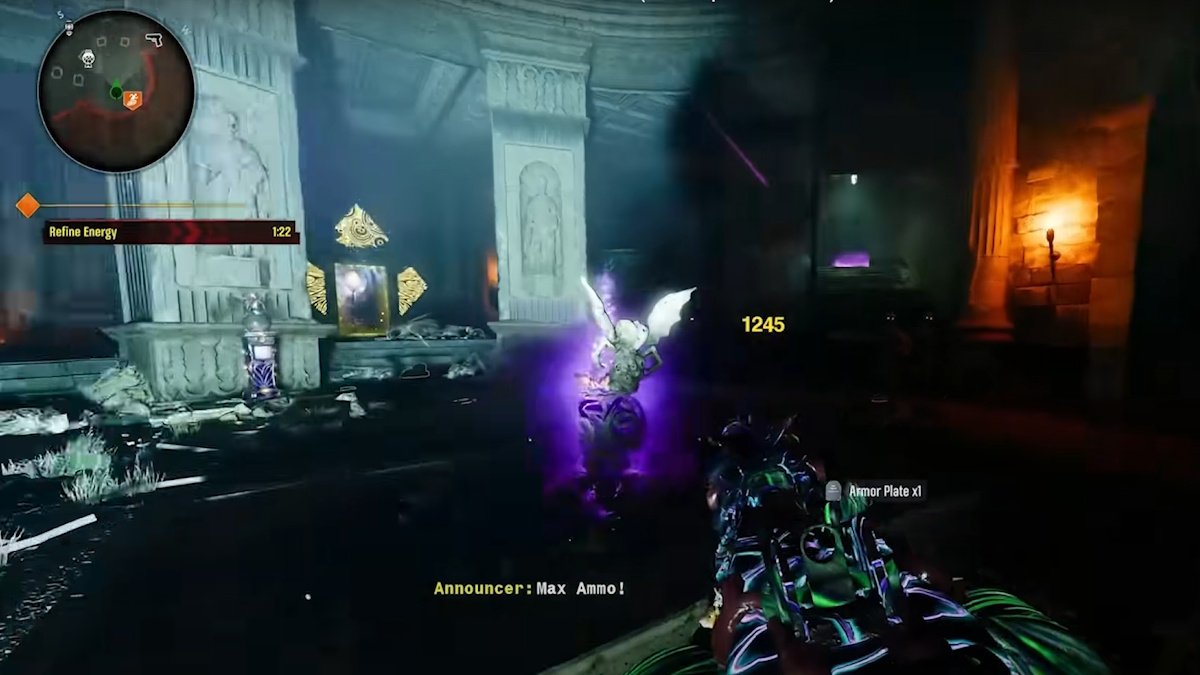
As you start, like in other Black Ops Zombies maps, you will need to open up all the parts of the map by buying entrances and get to the Pack-A-Punch Machine using the route described below. Your first objective is to get through the early rounds to build up points. You can do this in a few ways, such as using the Rampage Inducer in the spawn room to speed up zombie spawns. However, this is optional, as the points you earn will remain the same regardless.
Black Ops 6 The Tomb Pack-A-Punch Machine
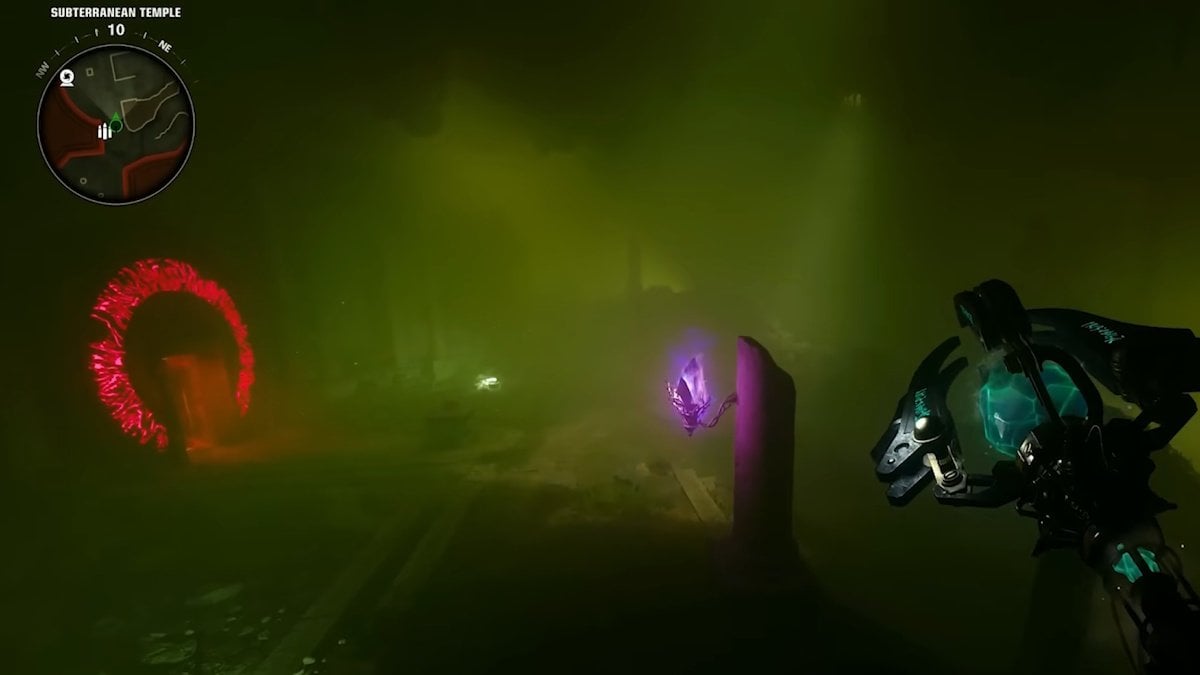
At Round 5 or 6, you will face your first bug round. Push through this round, and then start moving through the map, opening doors to progress. You’ll need to unlock a few areas to reach the Subterranean Temple. Once there, interact with the table marker to place the amulet from Citadel des Mors on it.
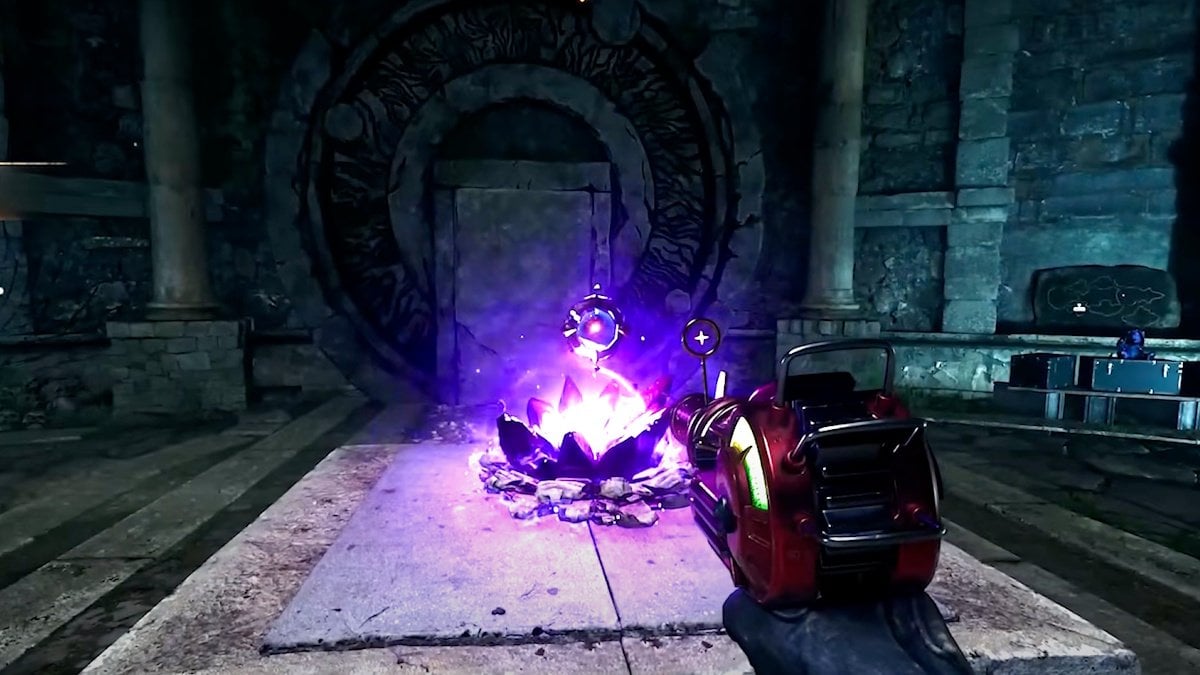
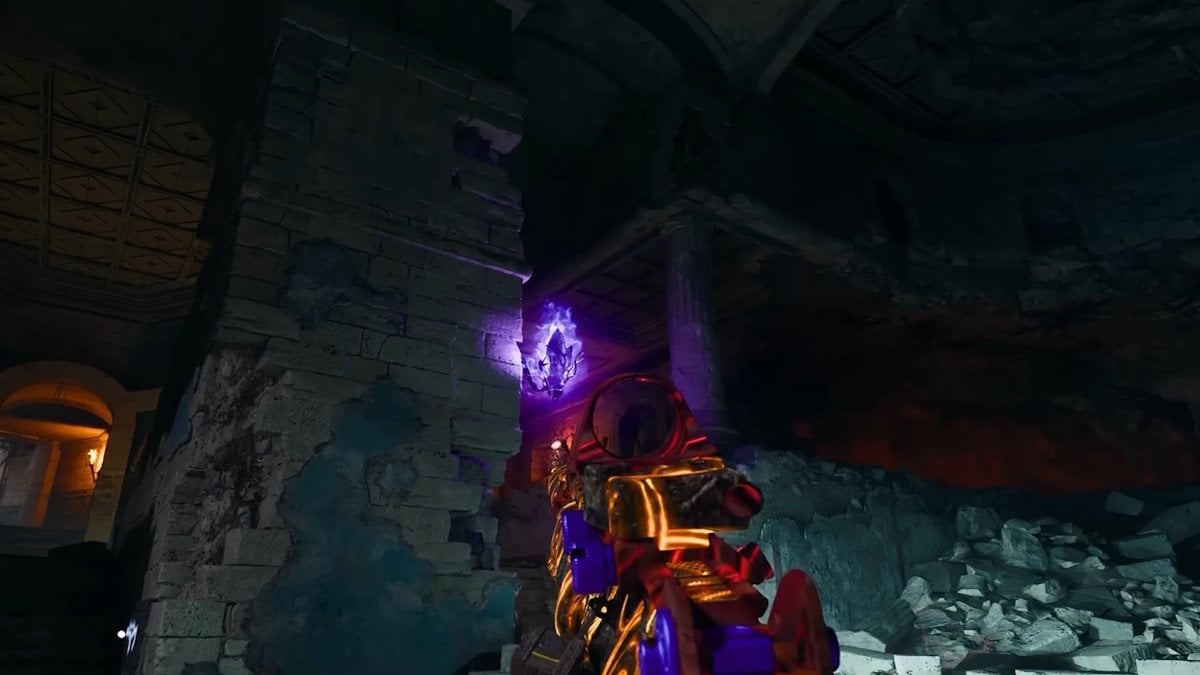
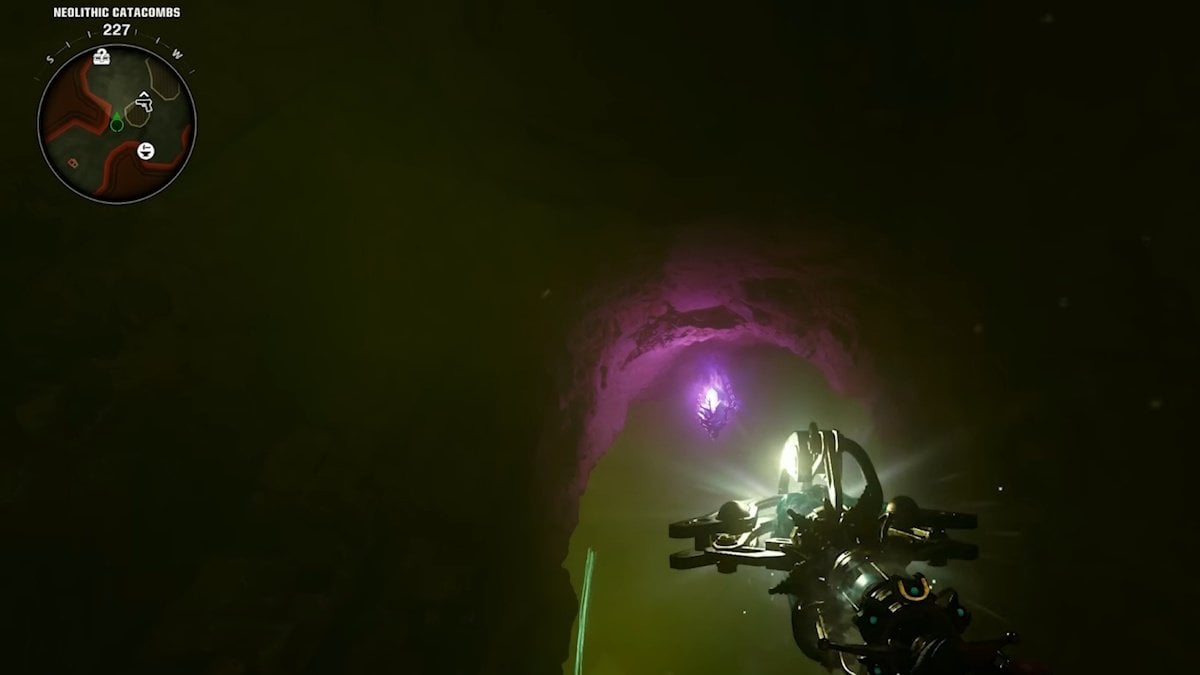
Doing so will open a red portal and activate several purple crystals around the map, which will be on fire. These crystals will be used to build the Ice Staff.
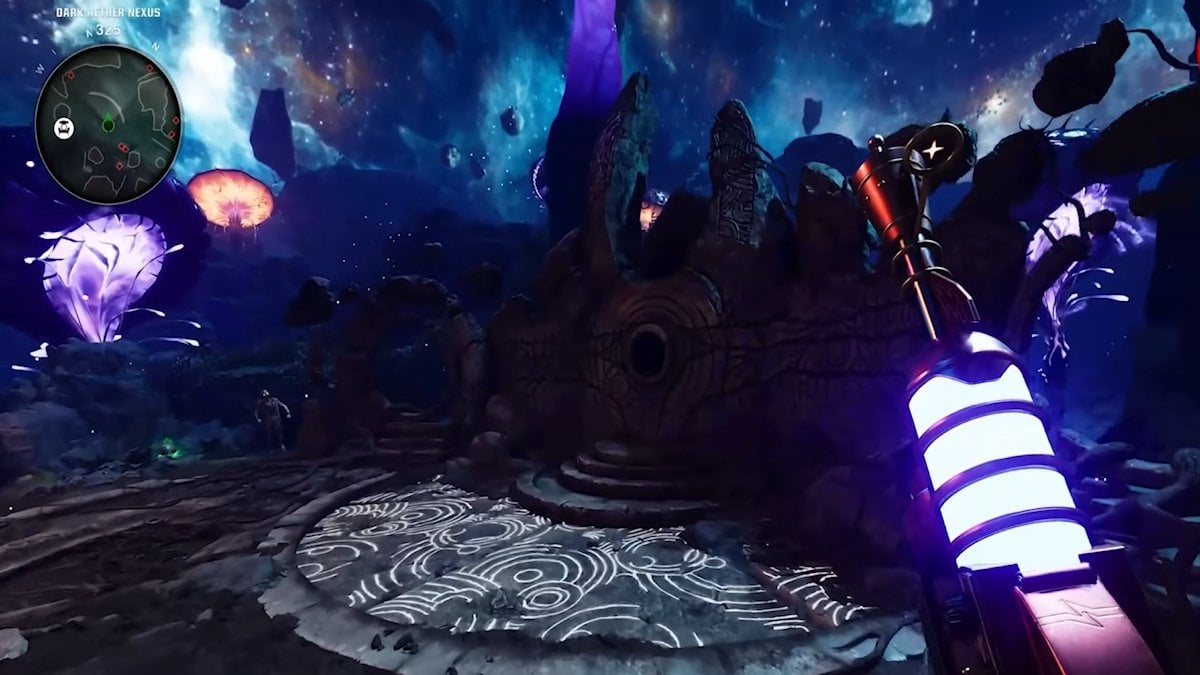
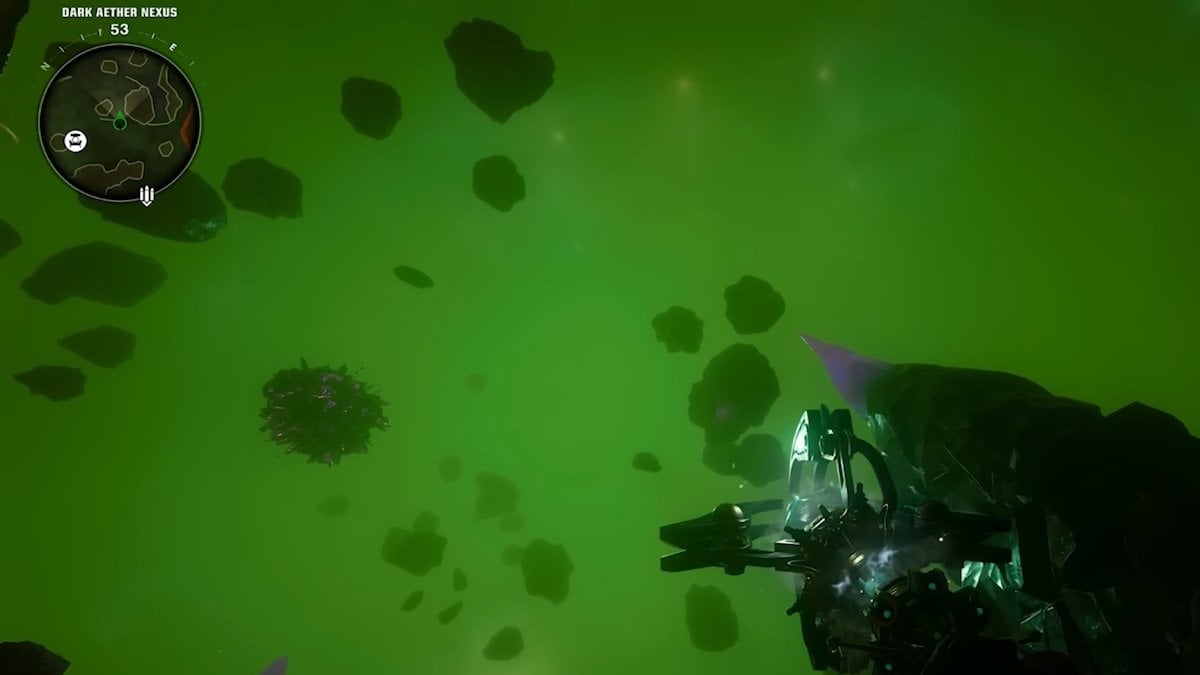
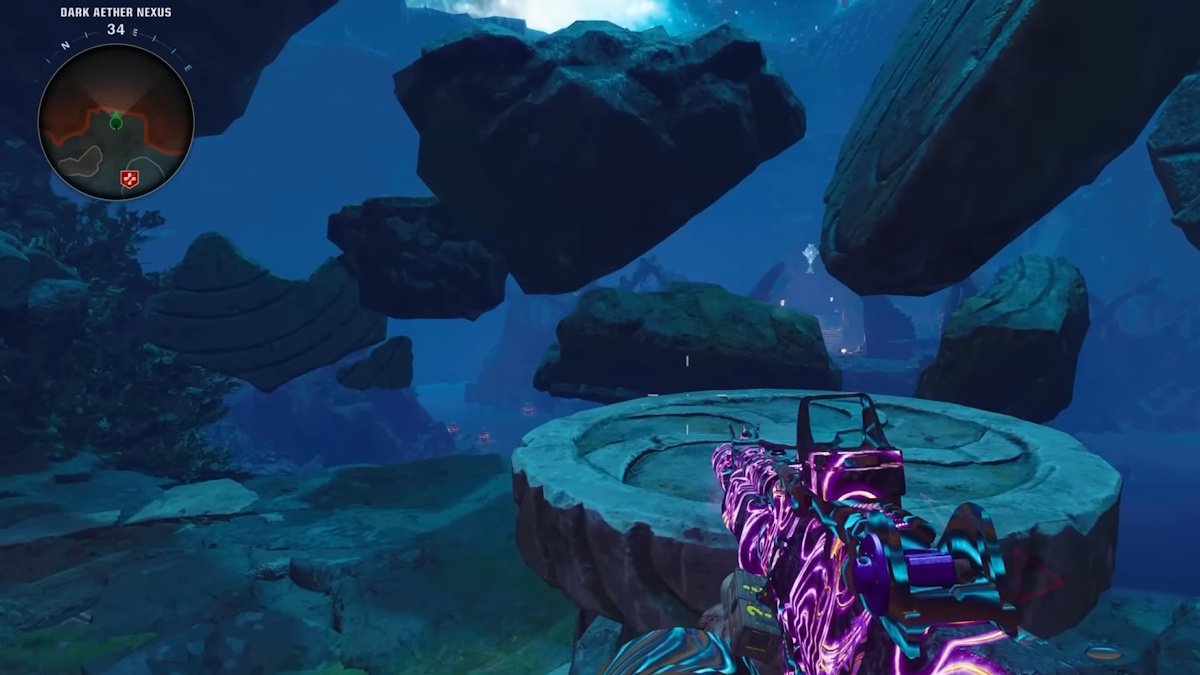
Once the portal is open, proceed through it to enter the Dark Nexus, where you will find the staple of Bo6 Zombies maps, the Pack-A-Punch machine. The first part of The Tomb Easter Egg cannot begin until Round 8, so use this time to gather points and upgrade your weapons as needed.
How to craft the Ice Staff The Tomb Black Ops 6
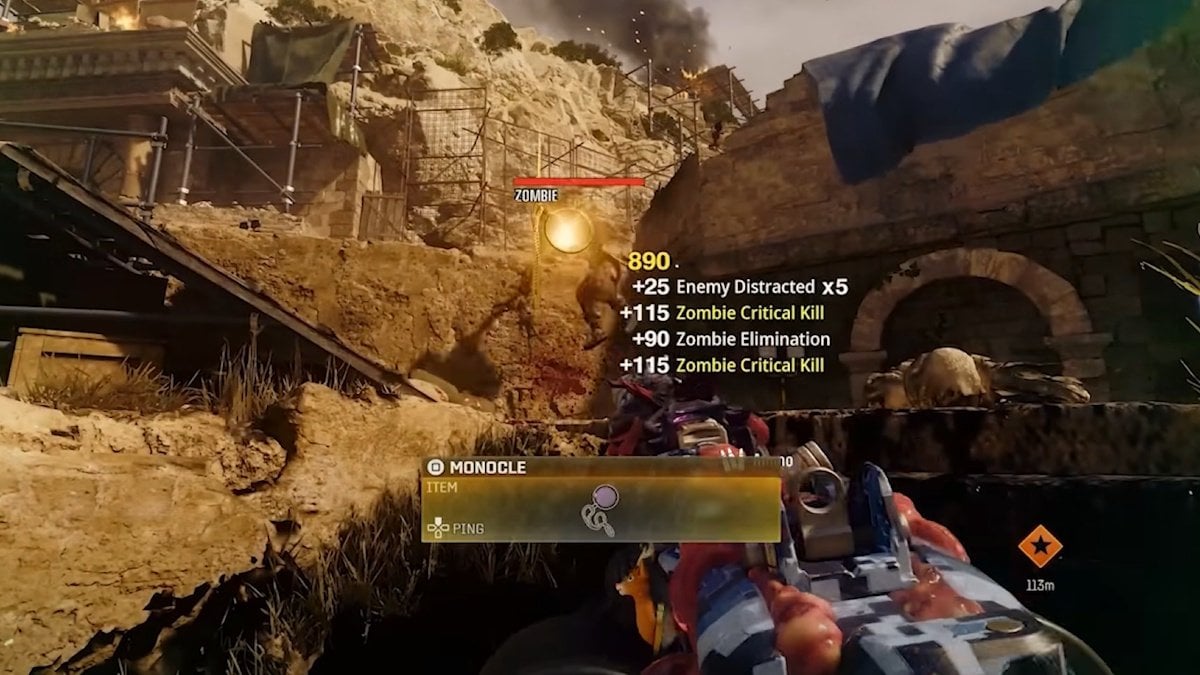
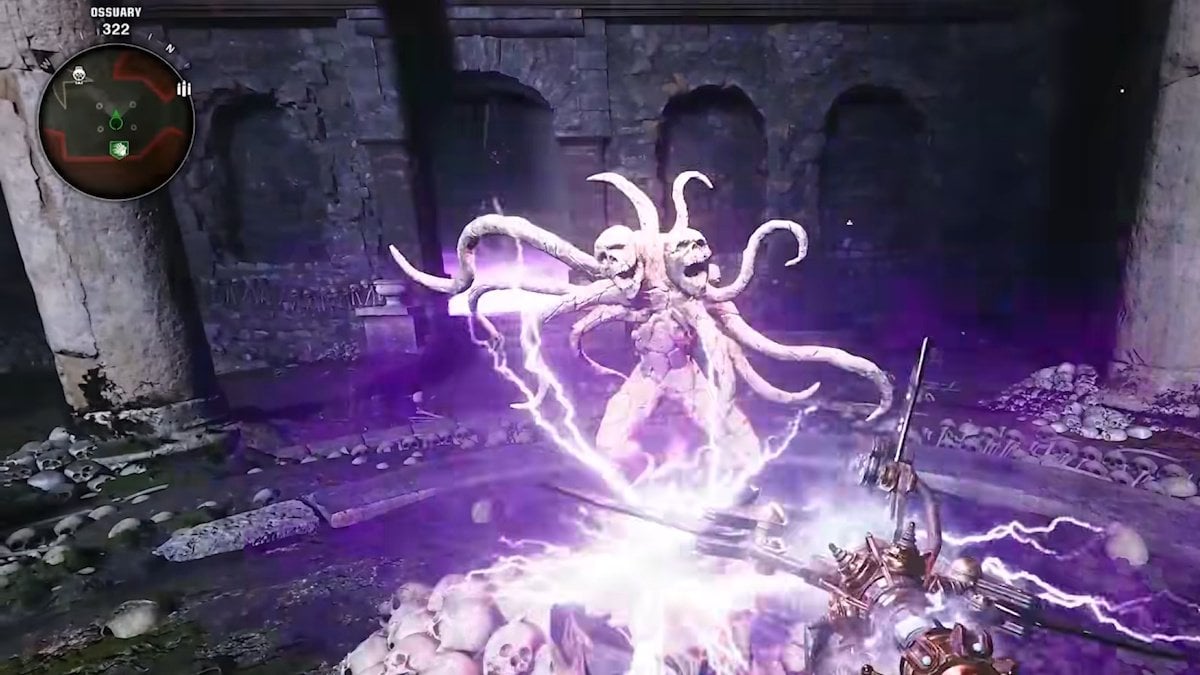
On Round 8, a Shock Mimic will spawn.
(Source: MrDalekJD)
Kill it, and it will drop a Monocle, which is the first of three parts needed to build the Ice Staff.
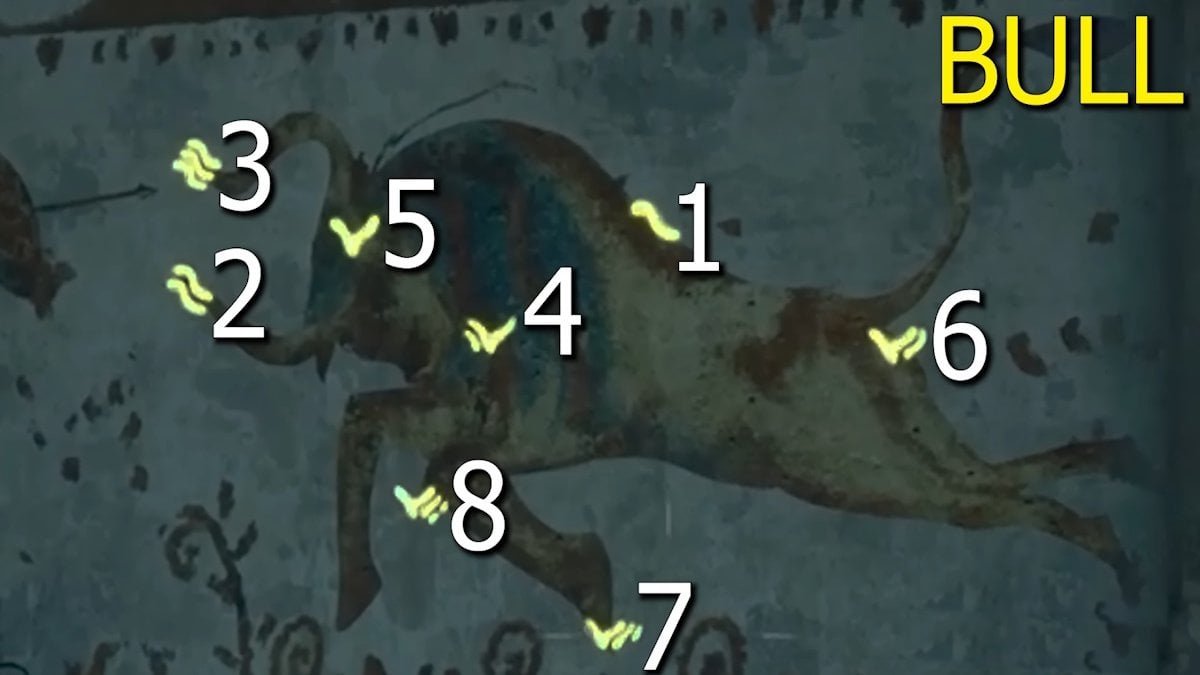
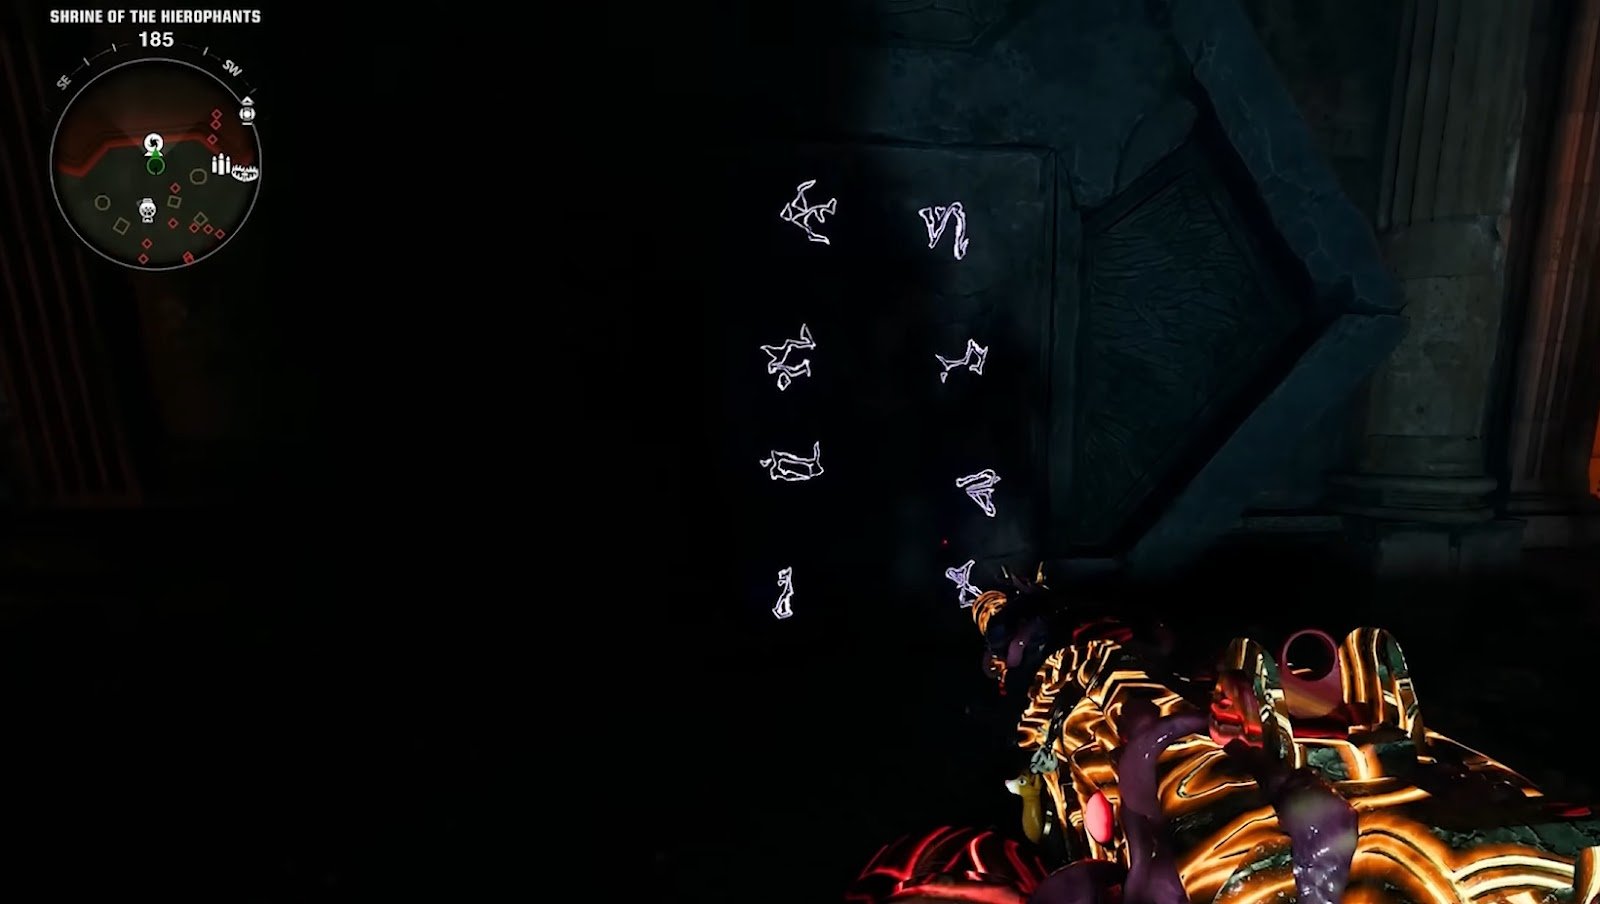
The Tomb constellations
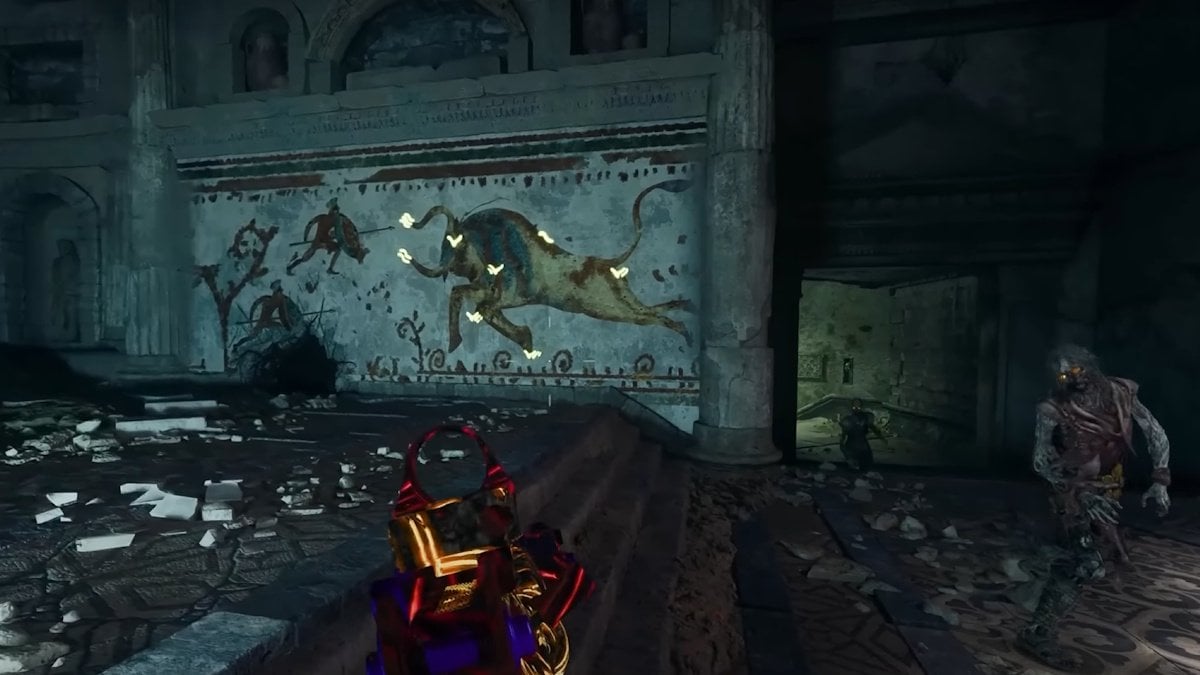
The second and third parts come from puzzles involving purple crystals. There are around 15 total crystal spawn locations across the map, but the two key locations you need to focus on are the Hunter and Bull paintings. Each of these paintings has four possible crystal spawn points nearby. Your goal is to get the crystal to spawn closest to the painting by destroying it in the wrong locations and waiting 45 seconds for it to respawn.
- Hunter Painting: Check the four crystal locations near the Hunter. If the crystal is not already in the spot shown in the picture, destroy it in the other three locations until it respawns in the correct position.
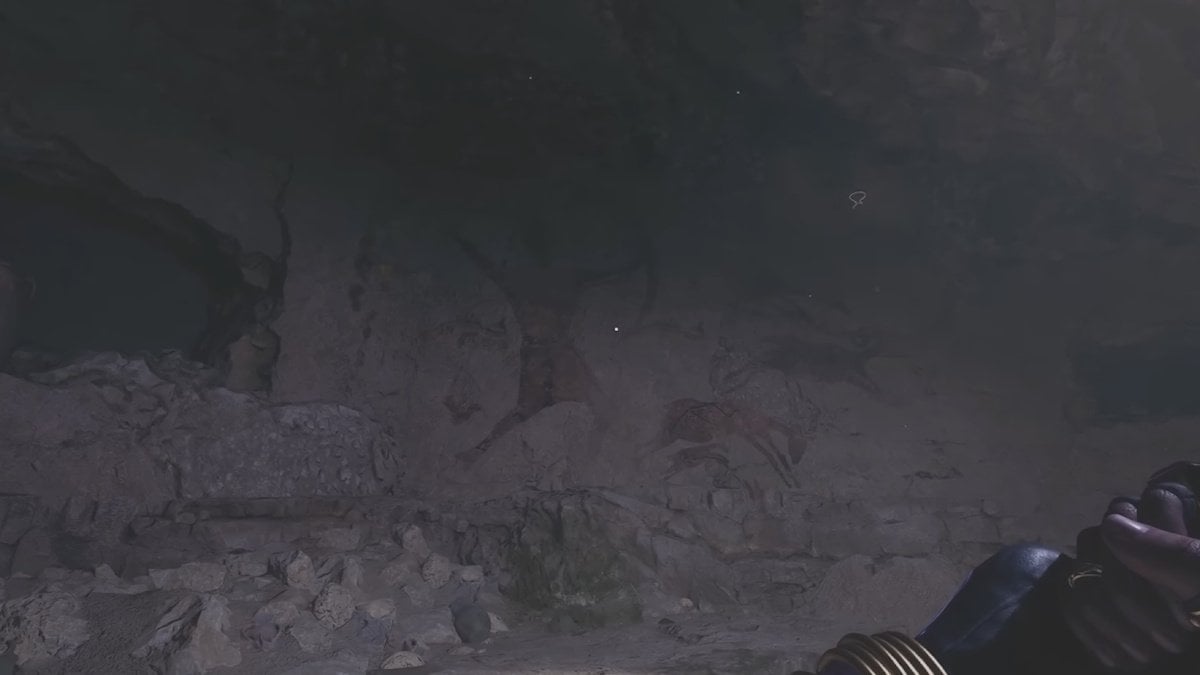

- Bull Painting: Do the same thing for the Bull painting, ensuring the crystal spawns in front of it.
If you’re struggling to get the crystal to spawn in the correct spot, try destroying some of the crystals further away from the area, as this can help reset the spawn cycle.
The Tomb Constellations puzzle
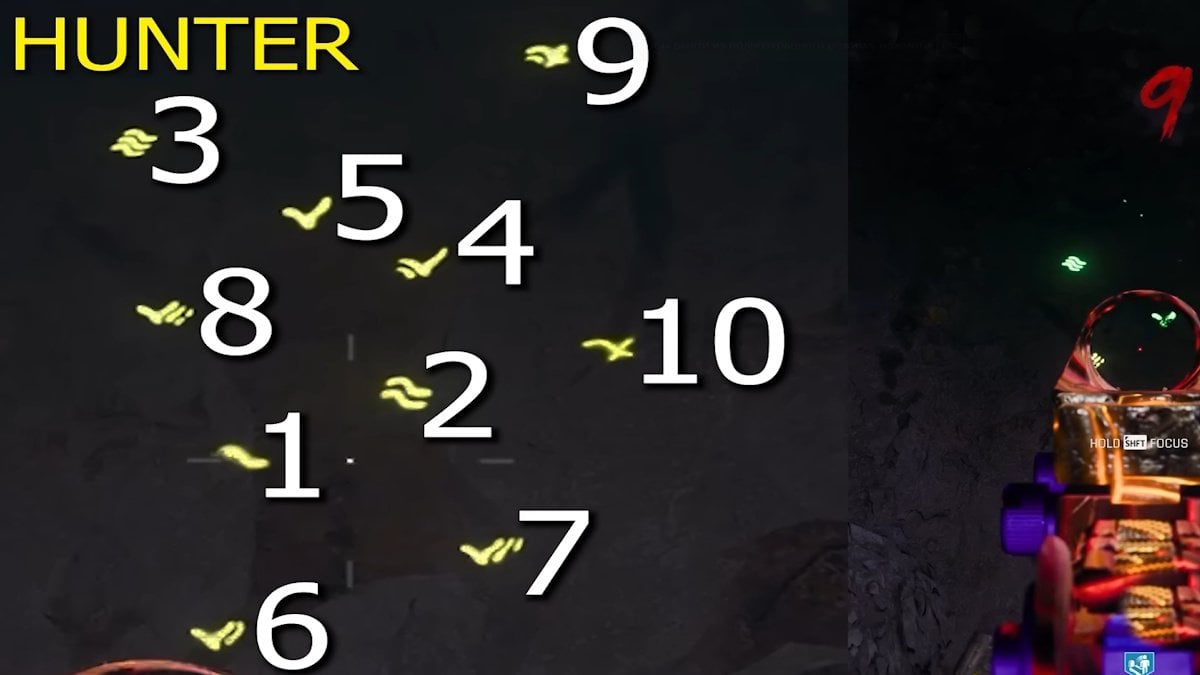
Once both crystals are positioned correctly, symbols will appear on the Hunter and Bull paintings. These symbols represent an alternate form of Roman numerals. You need to shoot the symbols in the correct order:
- The Hunter painting will display ten symbols.
- The Bull painting will display eight symbols.
Shoot the symbols in the correct order to start a lockdown phase. You will have to fight off four waves of zombies and special enemies while purple energy orbs move between the crystal spawns. Survive the lockdown, and you will be rewarded with an Ice Staff part.
Repeat this process for both the Hunter and Bull paintings to obtain the final two parts of the Ice Staff.
Building the Ice Staff
Once you have all the parts, return to the Dark Nexus. Place the components into the crafting machine at the center. Defend the staff as zombies attempt to destroy it. Focus on the purple-smoke zombies, as they pose the biggest threat. If the staff takes too much damage, you’ll have to restart the defense sequence in the next round.
Once successfully defended, the Ice Staff will be complete and ready to use.
Black Ops 6 The Tomb Ice Staff upgrade
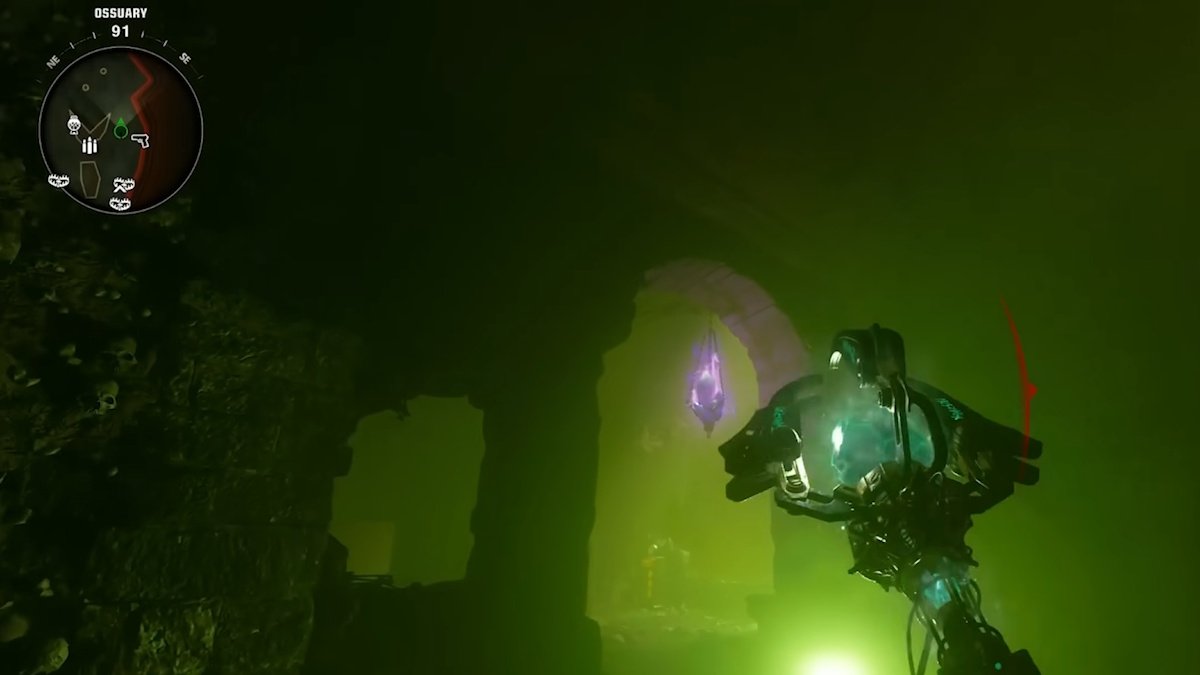
In true Call of Duty Bo6 fashion you will now upgrade the new wonder weapon. To upgrade the Ice Staff, you need to return to the underground area of the map and shoot three crystals in quick succession. Unlike using a bullet weapon, which causes them to explode, shooting the crystals with the Ice Staff will freeze them. The key challenge here is that you must freeze three different crystals within about 10 seconds, requiring speed and precision.
To make this process easier, coordinate your crystal spawns so they are positioned close together. You can either find ones within quick running distance or ensure that at least one is visible from another’s location to minimize movement time. If necessary, reposition crystals by shooting them with a bullet weapon — this will cause them to respawn in a different location 45 seconds later, allowing you to set up an optimal layout.
Below is an optimal route that you can use to make sure you get it:
Once you successfully freeze all three crystals within the time limit, you will hear a quote from Archibald indicating progress. If you are struggling, here are some pro tips:
- Use “Tribologist” on PhD or the “Hot Foot” Stamin-Up augment to boost speed and reach crystals faster.
- In Co-op mode, you can have two players with Ice Staffs if you craft one, and the other player gets it from the box, allowing each to focus on one or two crystals to complete the sequence more efficiently.
With the quote successfully triggered, you can move on to the next step in the upgrade process.
Black Ops 6 The Tomb floating rocks
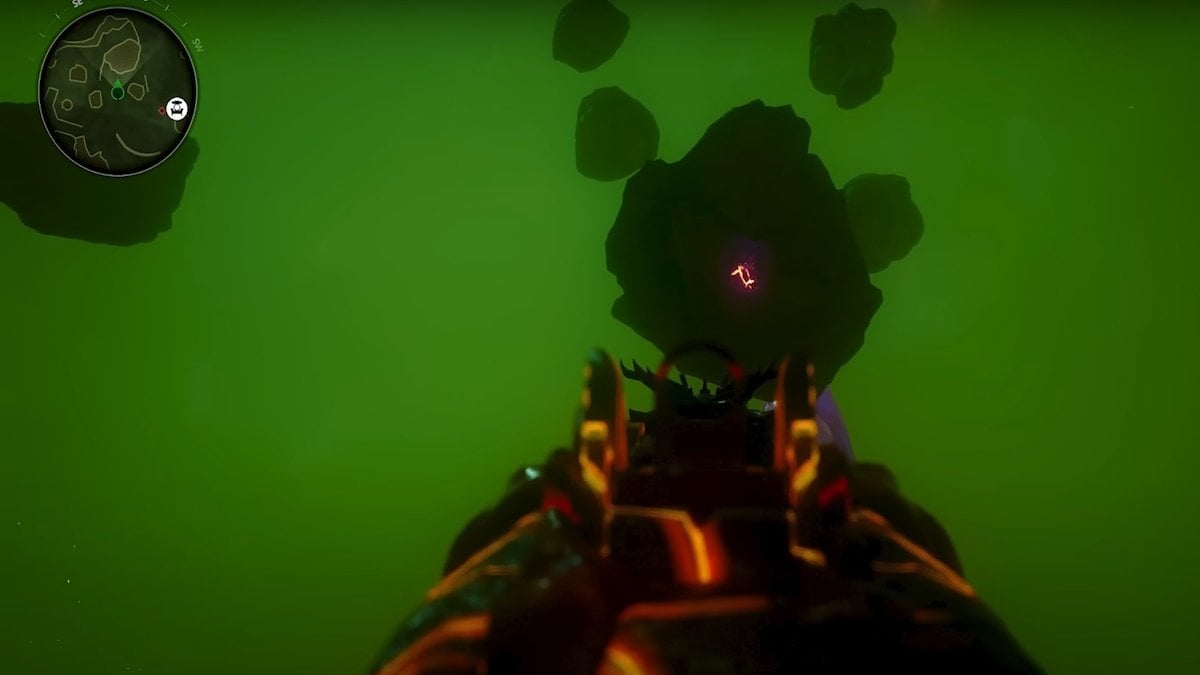
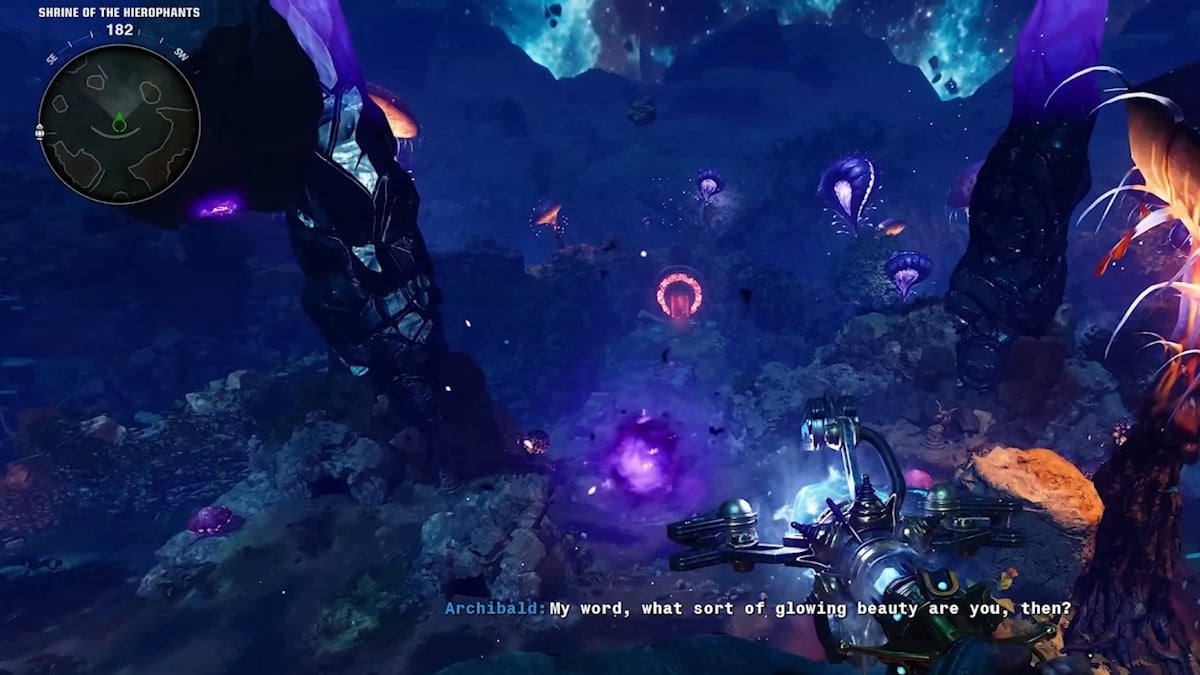
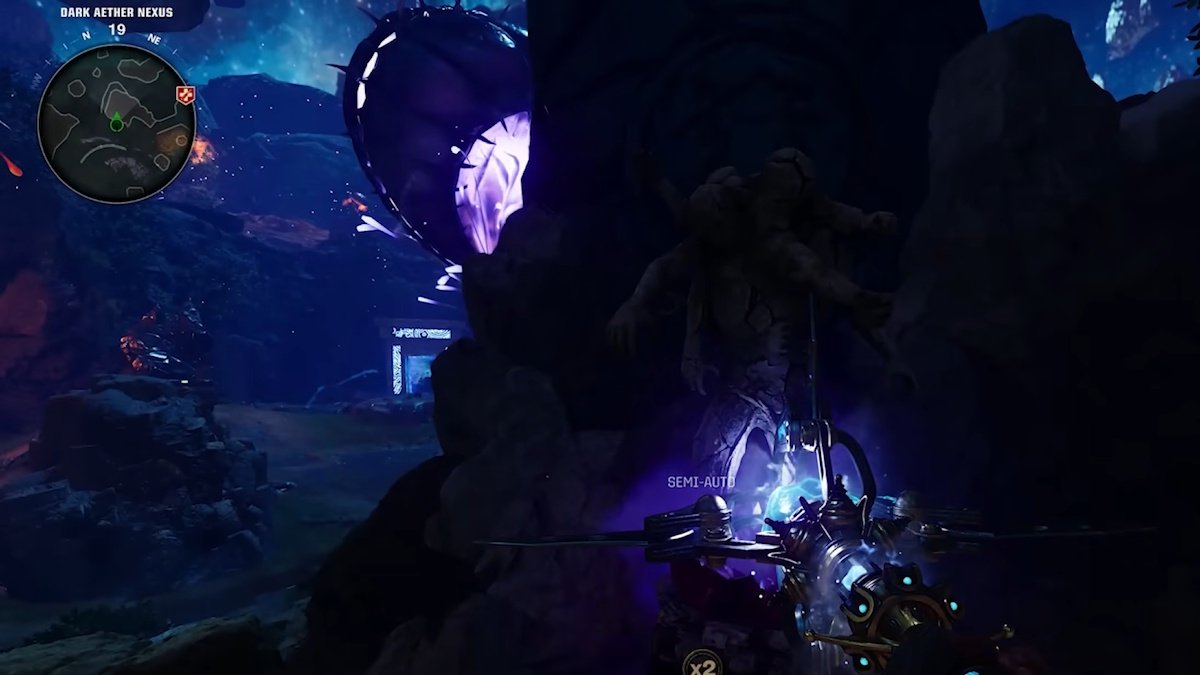
Now, head back into the Dark Nexus, where you’ll need to shoot three symbols on floating rocks in the sky. These can be shot in any order, and their spawns may vary slightly. However, they will always appear on rocks that are relatively close to you rather than those further away in the skybox. Be sure to check all sides of each rock to locate the glowing purple symbols.
Once you shoot each symbol with the Ice Staff, its rock will lower toward you. After shooting all three symbols, you will hear a quote, and one of the four portals inside the Dark Ether will close. On the other side of the closed portal, a set of runes will appear, which you need to inspect.
Exit via one of the remaining open portals and memorize the symbols from the rocks. Once back in the underground area of the real world, go to the door corresponding to the closed portal:
- Blue portal closure: Spawn area
- Red portal closure: Near Quick Revive
- Yellow portal closure: Near Stamin-Up
- Green portal closure: Near Speed Cola
At the door, you will see eight possible symbols. Shoot the three that match the ones from the floating rocks using your Ice Staff. If done correctly, the door will reopen, allowing you to enter and transport to an elevated platform.
(Source: MrDalekJD)
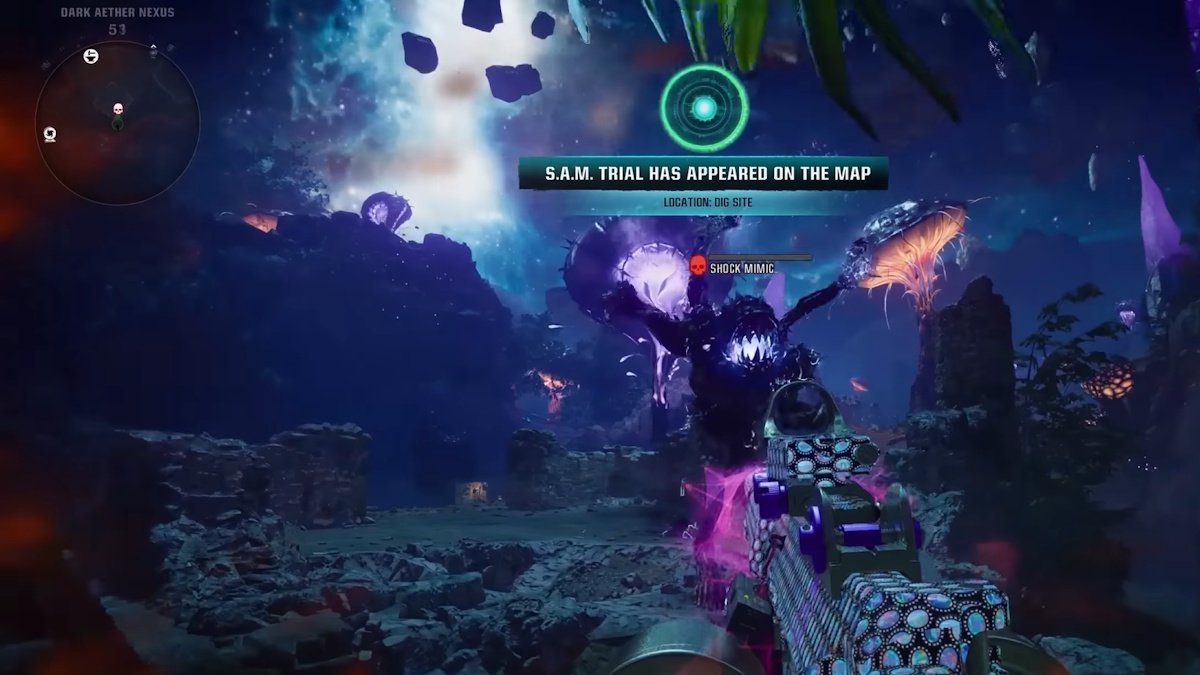
Black Ops 6 The Tomb orb trial
Once you arrive on the platform, a purple orb will appear. Interact with it to begin the next step. The orb acts as a soulbox, meaning you’ll need to kill zombies near it to fill it up. However, if you stray too far from the orb, you’ll fail the step and have to start over. Stay close to the orb, and continue to kill zombies around it.
(Source: MrDalekJD)
As the orb fills up, it will travel through the Dark Nexus, and different types of enemies, including Doppelgasts and Mimics, will spawn. When the orb reaches the Pack-A-Punch location, an Amalgam will appear. The best advice here is to ignore the Amalgam and keep running toward the orb. If you get enough zombie souls into the orb, you won’t even need to fight the Amalgam. Just keep focused on the orb, and once it reaches its final location, you’ll be able to place the Ice Staff into the machine for the upgrade.
Black Ops 6 The Tomb trials of the damned
Now that you’ve upgraded the Ice Staff, you can start the final steps of the The Tomb Easter egg. When you press left on your controller (or the equivalent key for alt-fire on your keyboard), the Ice Staff will rotate 180° to reveal the green tip, which is its alt-fire ability.
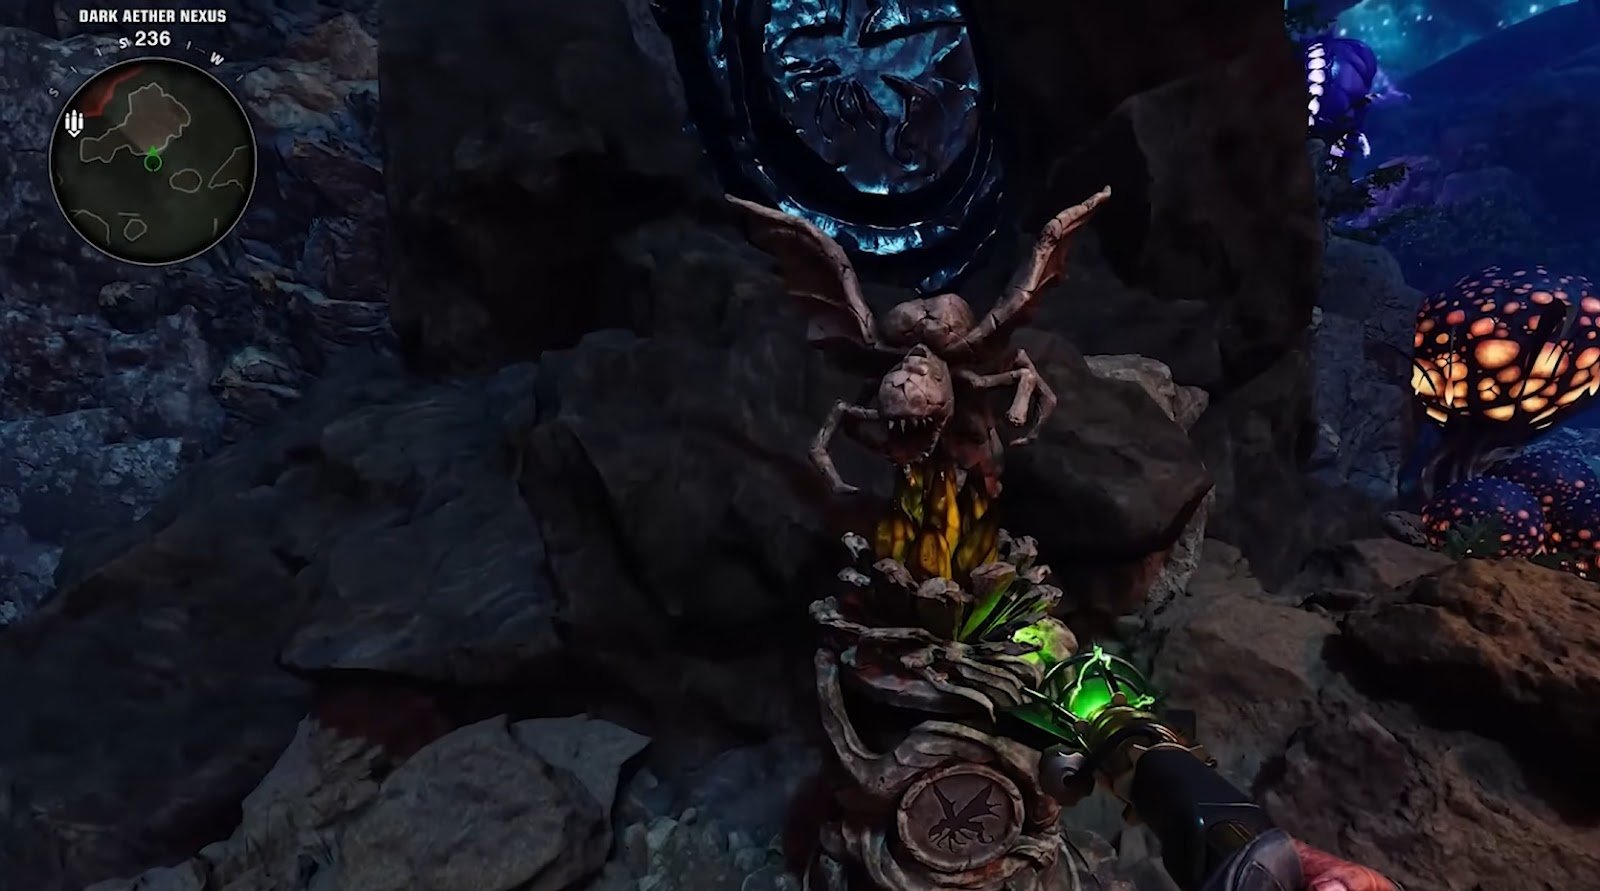
The Vermin Trial
Use this alt-fire on the blue crystal inside the Vermin statue. When you do, the crystal will start glowing, and you can now pick up the dark energy.

(Source: MrDalekJD)
Take this dark energy to the Vermin statue located in the spawn room.
(Source: MrDalekJD)
Placing the energy into the statue will start a lockdown phase where you’ll face a swarm of Vermin. This phase can feel overwhelming, even solo, but the best way to deal with these enemies is to use the Ice Staff’s charged shot. A fully charged shot will freeze all the Vermin, and you’ll be able to take them down quickly. After you’ve wiped out the enemies in time, you can pick up the dark energy again.
Now, you need to carefully escort the dark energy back to the Dark Aether Nexus. However, only one of the teleporters will be active, and you’ll need to keep the energy safe. If you take too much damage while holding the dark energy, it will get destroyed, forcing you to restart the trial. Bring the energy back to the correct podium, and you will have completed the first of four trials.
The Parasite Trial
For the second trial, shoot the Parasite statue with the Ice Staff’s alt-fire to obtain another dark energy.
(Source: MrDalekJD)
Head over to the Shrine of the Hierophants, where you’ll find a statue with a glowing purple light in the middle of the room. Place the dark energy in the statue to start another lockdown phase.
(Source: MrDalekJD)
This time, some of the Parasites that spawn will be glowing purple. As you take them down, they will drop purple orbs. You’ll need to pick up these orbs and return them to the statue, similar to another cod bo6 map Liberty Falls. Repeat this process, taking out the Parasites and collecting the orbs within the given time limit. If done correctly, you will be able to pick up the dark energy again.
Now, just like before, you’ll need to escort the dark energy back to the Dark Nexus. Again, only one teleporter will be active, and you’ll need to make sure the energy doesn’t take too much damage. Once you place it on the correct podium in the Nexus, you will have completed the second trial.
The Doppelgast Trial
For the third trial, shoot the Doppelgast statue with the Ice Staff’s alt-fire to get another dark energy.

(Source: MrDalekJD)
Then, head over to the Doppelgast statue near the upgrade machine and interact with it to begin the lockdown.
(Source: MrDalekJD)
During this lockdown, a ton of Doppelgasts will spawn, and the best way to handle them is by charging up your Ice Staff. A charged shot will take them out quickly, making this trial easier to manage.
Once you’ve cleared the enemies, grab the dark energy again. Like the other trials, you’ll need to escort it back to the Dark Aether Nexus, where you’ll place it on the corresponding podium. If you did everything correctly, you’ve completed the third trial.
The Amalgam Trial
The fourth and final trial is related to the Amalgam statue, located behind the Ice Staff upgrade machine.
(Source: MrDalekJD)
Shoot it with the alt-fire ability of the Ice Staff to obtain the dark energy. Then, make your way to the Subterranean Temple, specifically to the Deep Excavation area. The statue for this trial will be in that location.
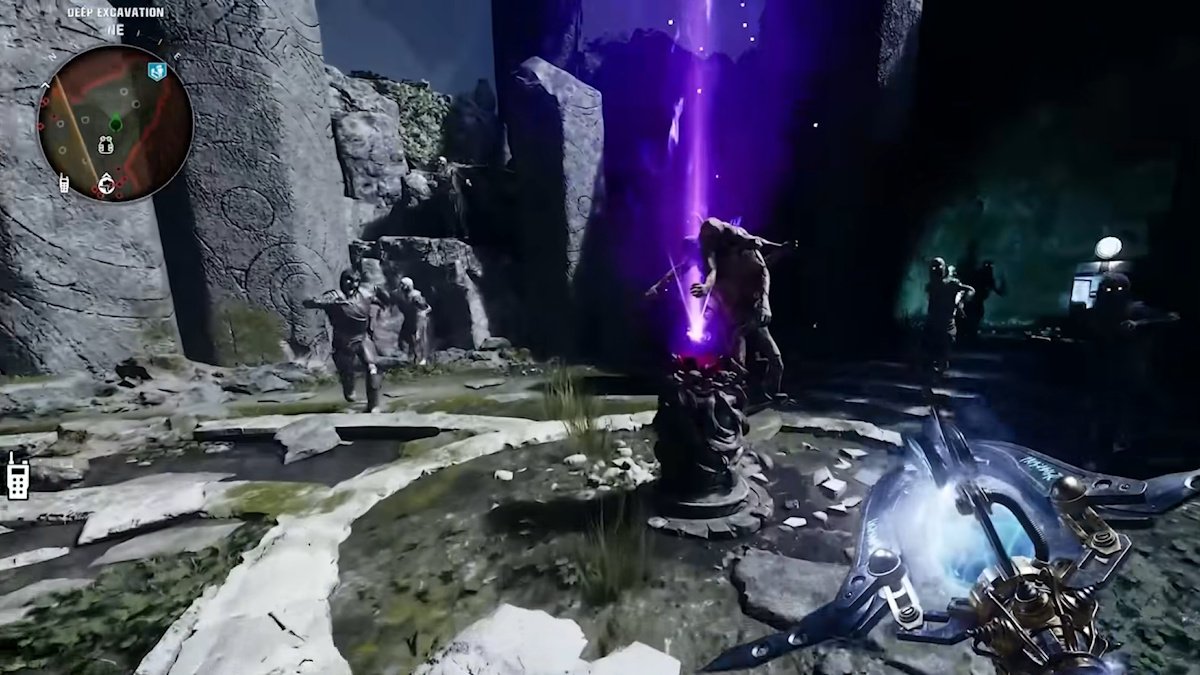
(Source: MrDalekJD)
This trial involves facing an elite Amalgam that will be invulnerable at certain points. During these moments, the Amalgam will have a bubble shield, which will only disappear after you take down a nearby zombie that it is tethered to. Once the bubble shield is down, you can deal damage to the Amalgam. After it’s defeated, pick up the dark energy and take it back to the Nexus, placing it in the appropriate podium.
Once all four trials are completed, you’ll see four purple beams firing from the Nexus, signaling that you’re ready to face the final boss.
Black Ops 6 The Tomb boss fight setup
Before starting the boss fight, make sure you’re fully prepared. It’s highly recommended to have all your perks, a fully upgraded weapon (triple pack-a-punched), and a level three armor vest. While not essential, a support streak, like the Mutant Injection, can be a lifesaver in certain situations.
Once you’re ready, head to the back of the Dark Nexus and interact with the pedestal. This will reveal a bridge leading to the boss fight arena. Once you interact with the Sentinel Artifact, you’re at the point of no return and will enter the boss fight. Be sure you’re fully prepared before you proceed.
Black Ops 6 The Tomb Boss fight
This boss fight is different from other bosses we encountered in other Call of Duty Black Ops 6 Zombies maps, as you’re not facing a large physical boss. Instead, the main target is the Sentinel Artifact, which will be spinning around the arena, shooting a laser up from the ground to the top floor and back down multiple times.

The first phase involves hiding behind the cover (either upstairs or downstairs) to avoid the laser beams and charging up your Ice Staff. While the lasers are active, focus on killing zombies to stay safe. When the laser stops, the Sentinel Artifact will become transparent, and you’ll have a small window of time to deal damage to it. If you do enough damage, the Sentinel Artifact will split into two.
During the second phase, there will be two lasers in play, one upstairs and one downstairs. The more phases you progress through, the more lasers and Sentinel Artifacts will appear, making it harder to avoid damage. Keep focusing on killing zombies and recharging your Ether Shroud so you can escape if needed. Once the Sentinel Artifacts become transparent, focus all your fire on one of them. After enough damage, the artifact will turn red, and you’ll be able to focus on the second one.
The boss fight will progress with more lasers and Sentinel Artifacts. Eventually, the artifacts will drop to the ground and spawn elite zombies, including Doppelgasts and Amalgams, all while still maintaining their powerful laser attacks. To survive, keep your distance from these elite zombies. To progress further you will need to kill the enemies carrying Sentinel Artifacts. Use your Ice Staff to slow down the enemies while prioritizing elite zombies and their artifacts.
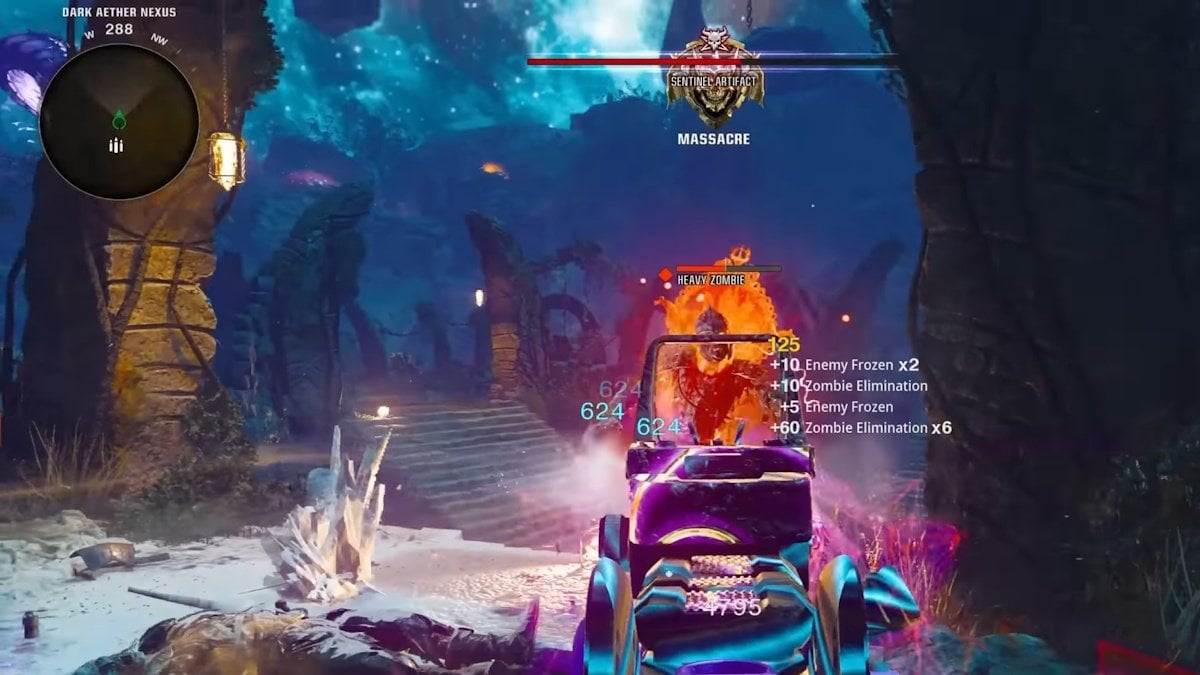
At last, you will be dealing with even tougher enemies, including a Shock Mimic, a Doppelgast, a heavy zombie with a Sentinel Artifact, and a red Amalgam at the same time. The best way to manage this phase is by focusing on taking out the elite zombies first. Once they’re down, you can focus on destroying the heavy zombie with the red Sentinel Artifact. Make sure to keep your ammo stocked, as you’ll need it to deal with the last phase.
After taking down the final red Sentinel Artifact, the artifacts will line up in the middle of the arena. The last Sentinel Artifact will move toward the door, and your goal is to do as much damage to it as possible before time runs out. If you fail to destroy it in time, the artifact will perform a wipe attack, killing everyone and ending your run.
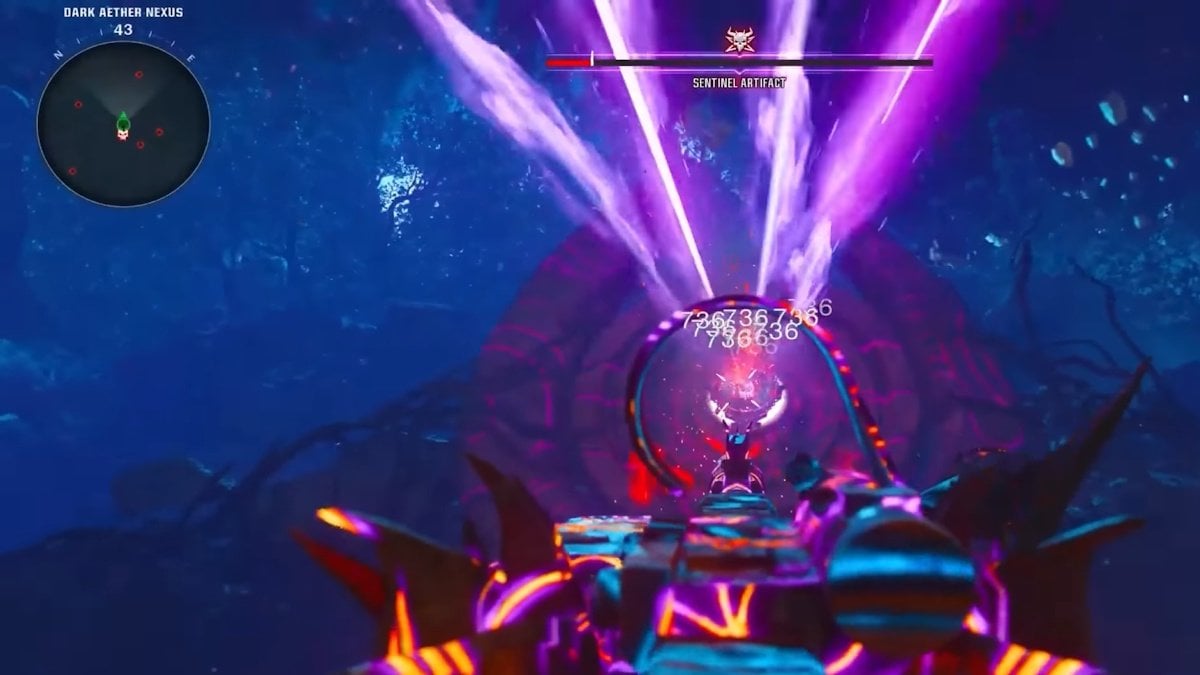
Once you destroy the final artifact, the door will open, and the Easter egg will be completed. Interact with the Sentinel Artifact in the middle of the arena to place your amulet, and enjoy the ending cutscene.
This marks the end of our The Tomb easter egg guide.

Conclusion
This time, the easter egg is less complicated compared to the many steps of the Citadelle des Morts. However, this also makes the map much less interesting. What do you think about the new CoD Zombies map, is it better then the maps in the other call of duty games? Do you want more content, or was this enough for you?


Comments